My very first assignment at West Dean College in 2019 was to make a working padlock and key – only slightly daunting! The fabrication methods were to include a number of techniques including blacksmithing, inspiration was to reflect historical research and the locking mechanism was to work 100 times.
INSPIRATION
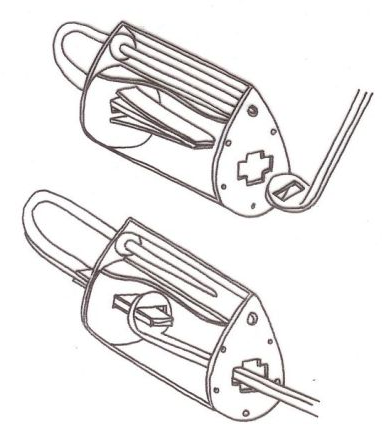
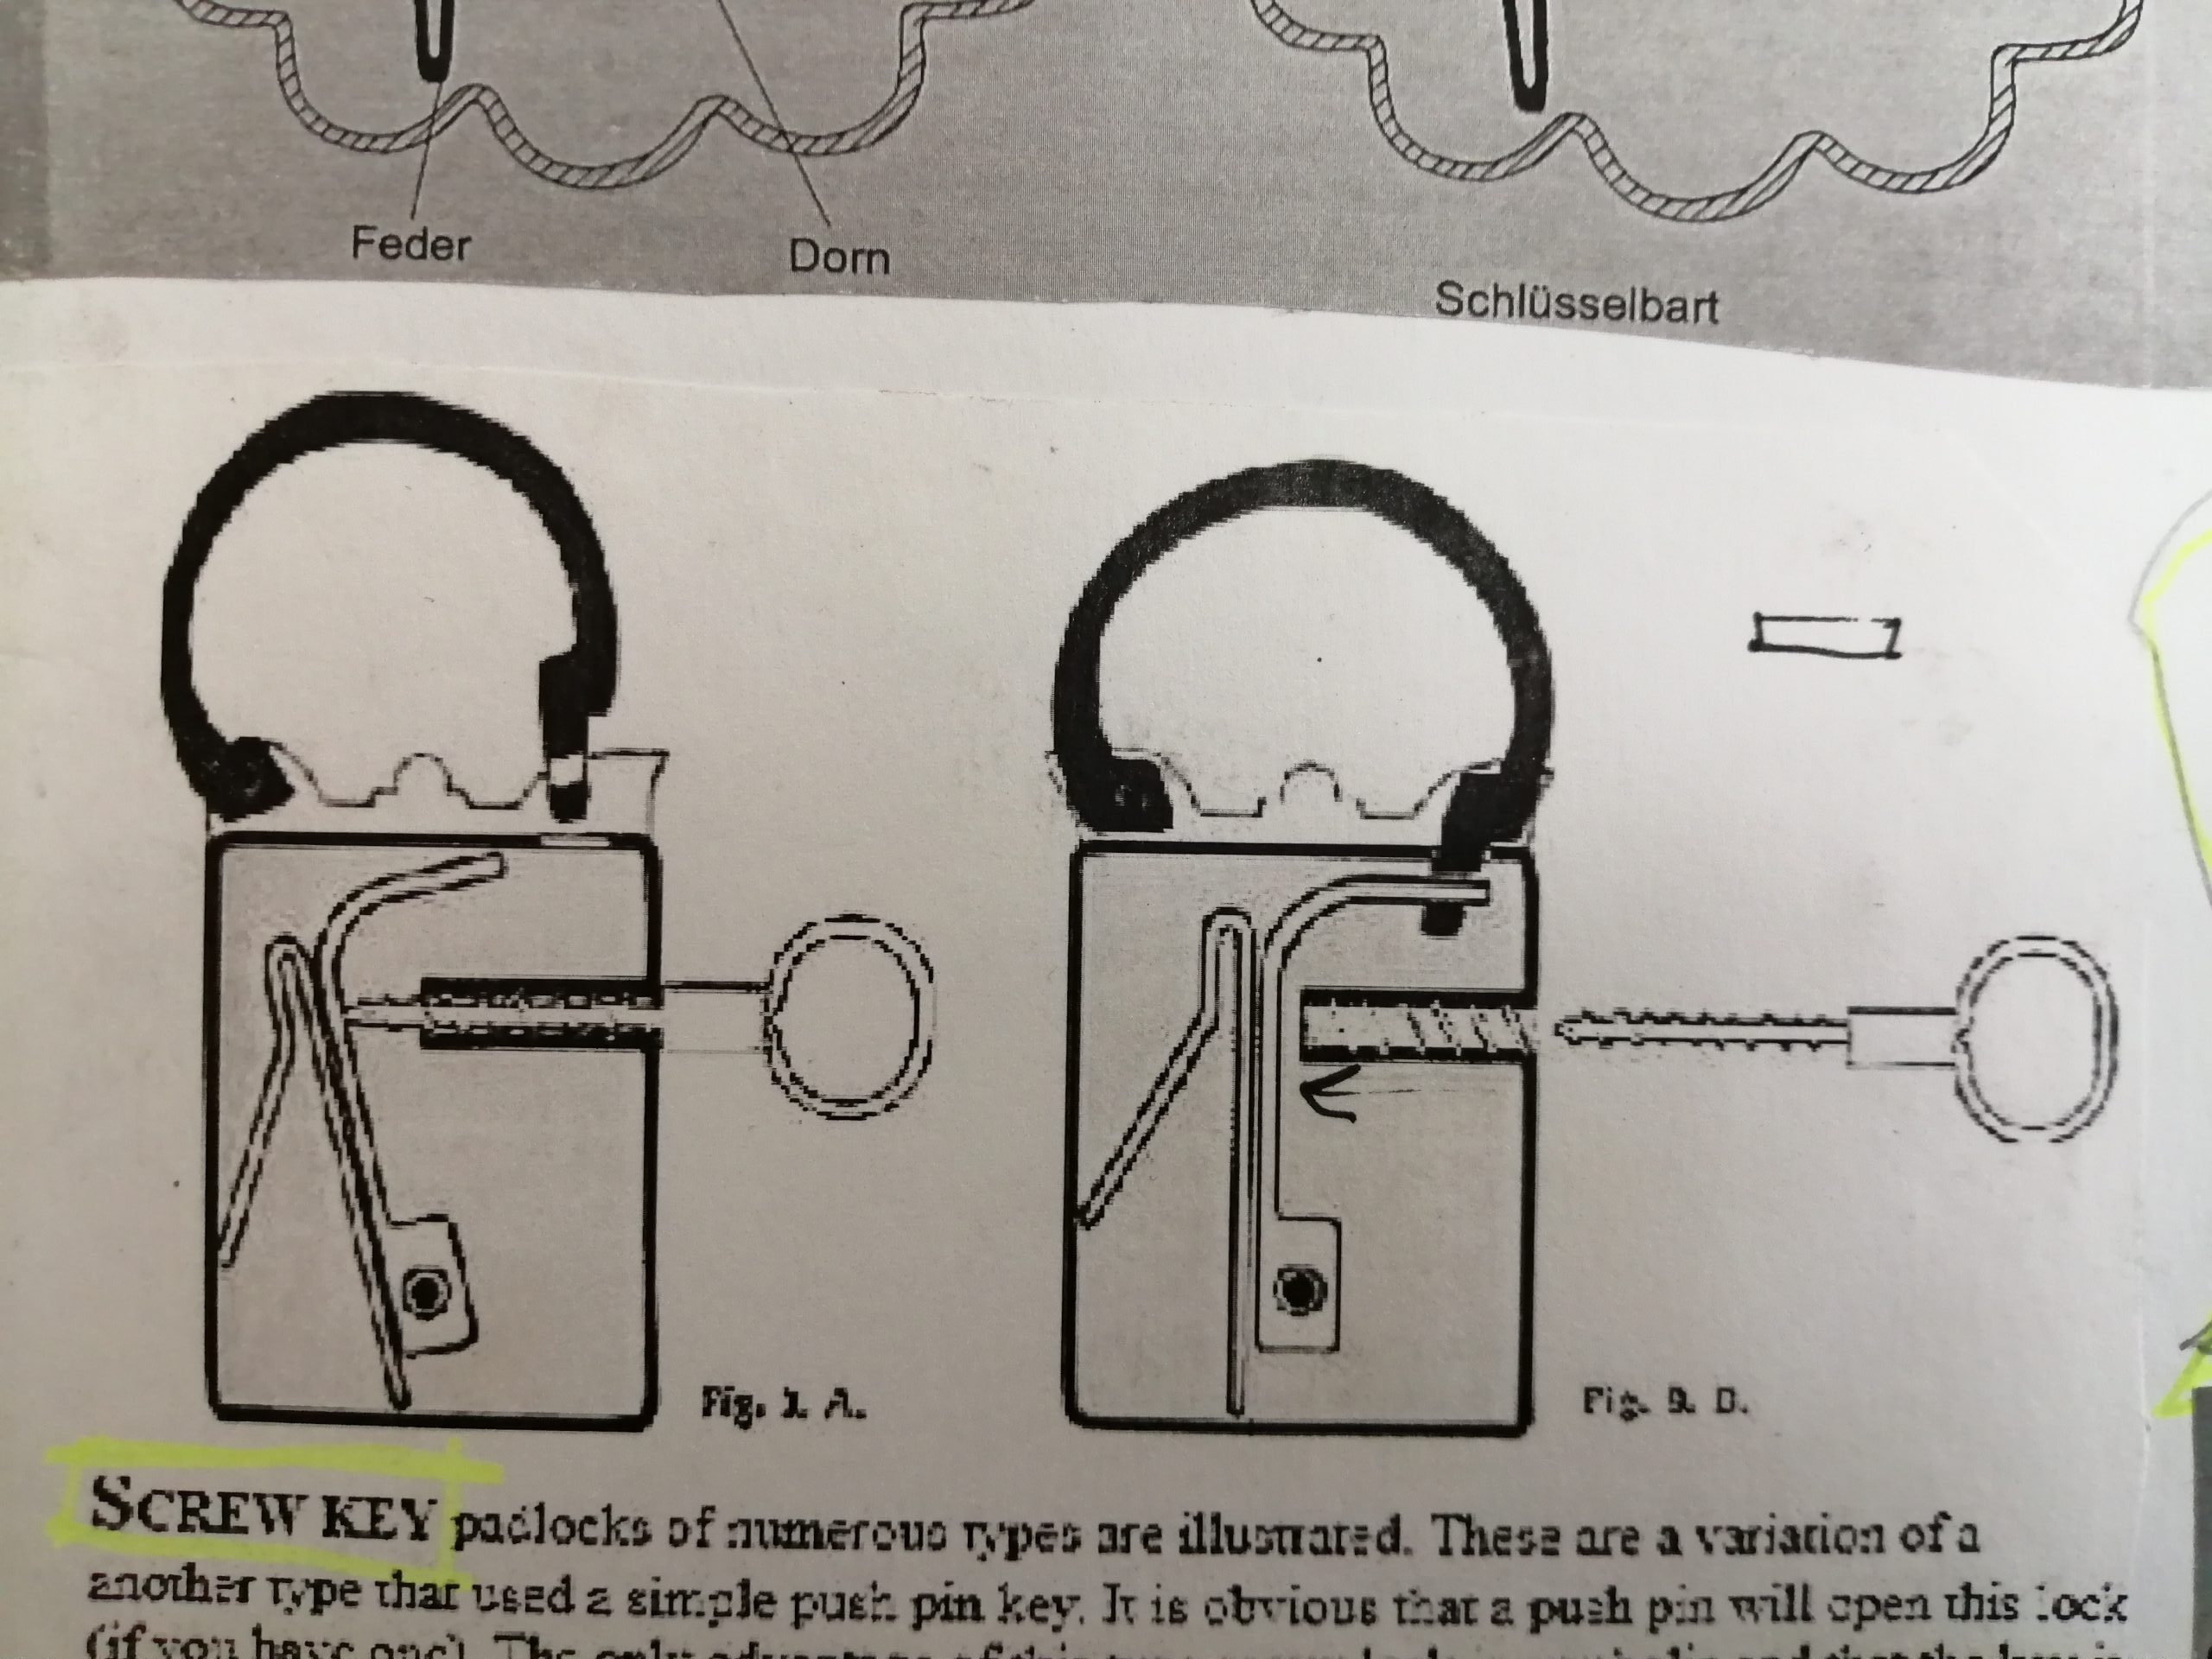
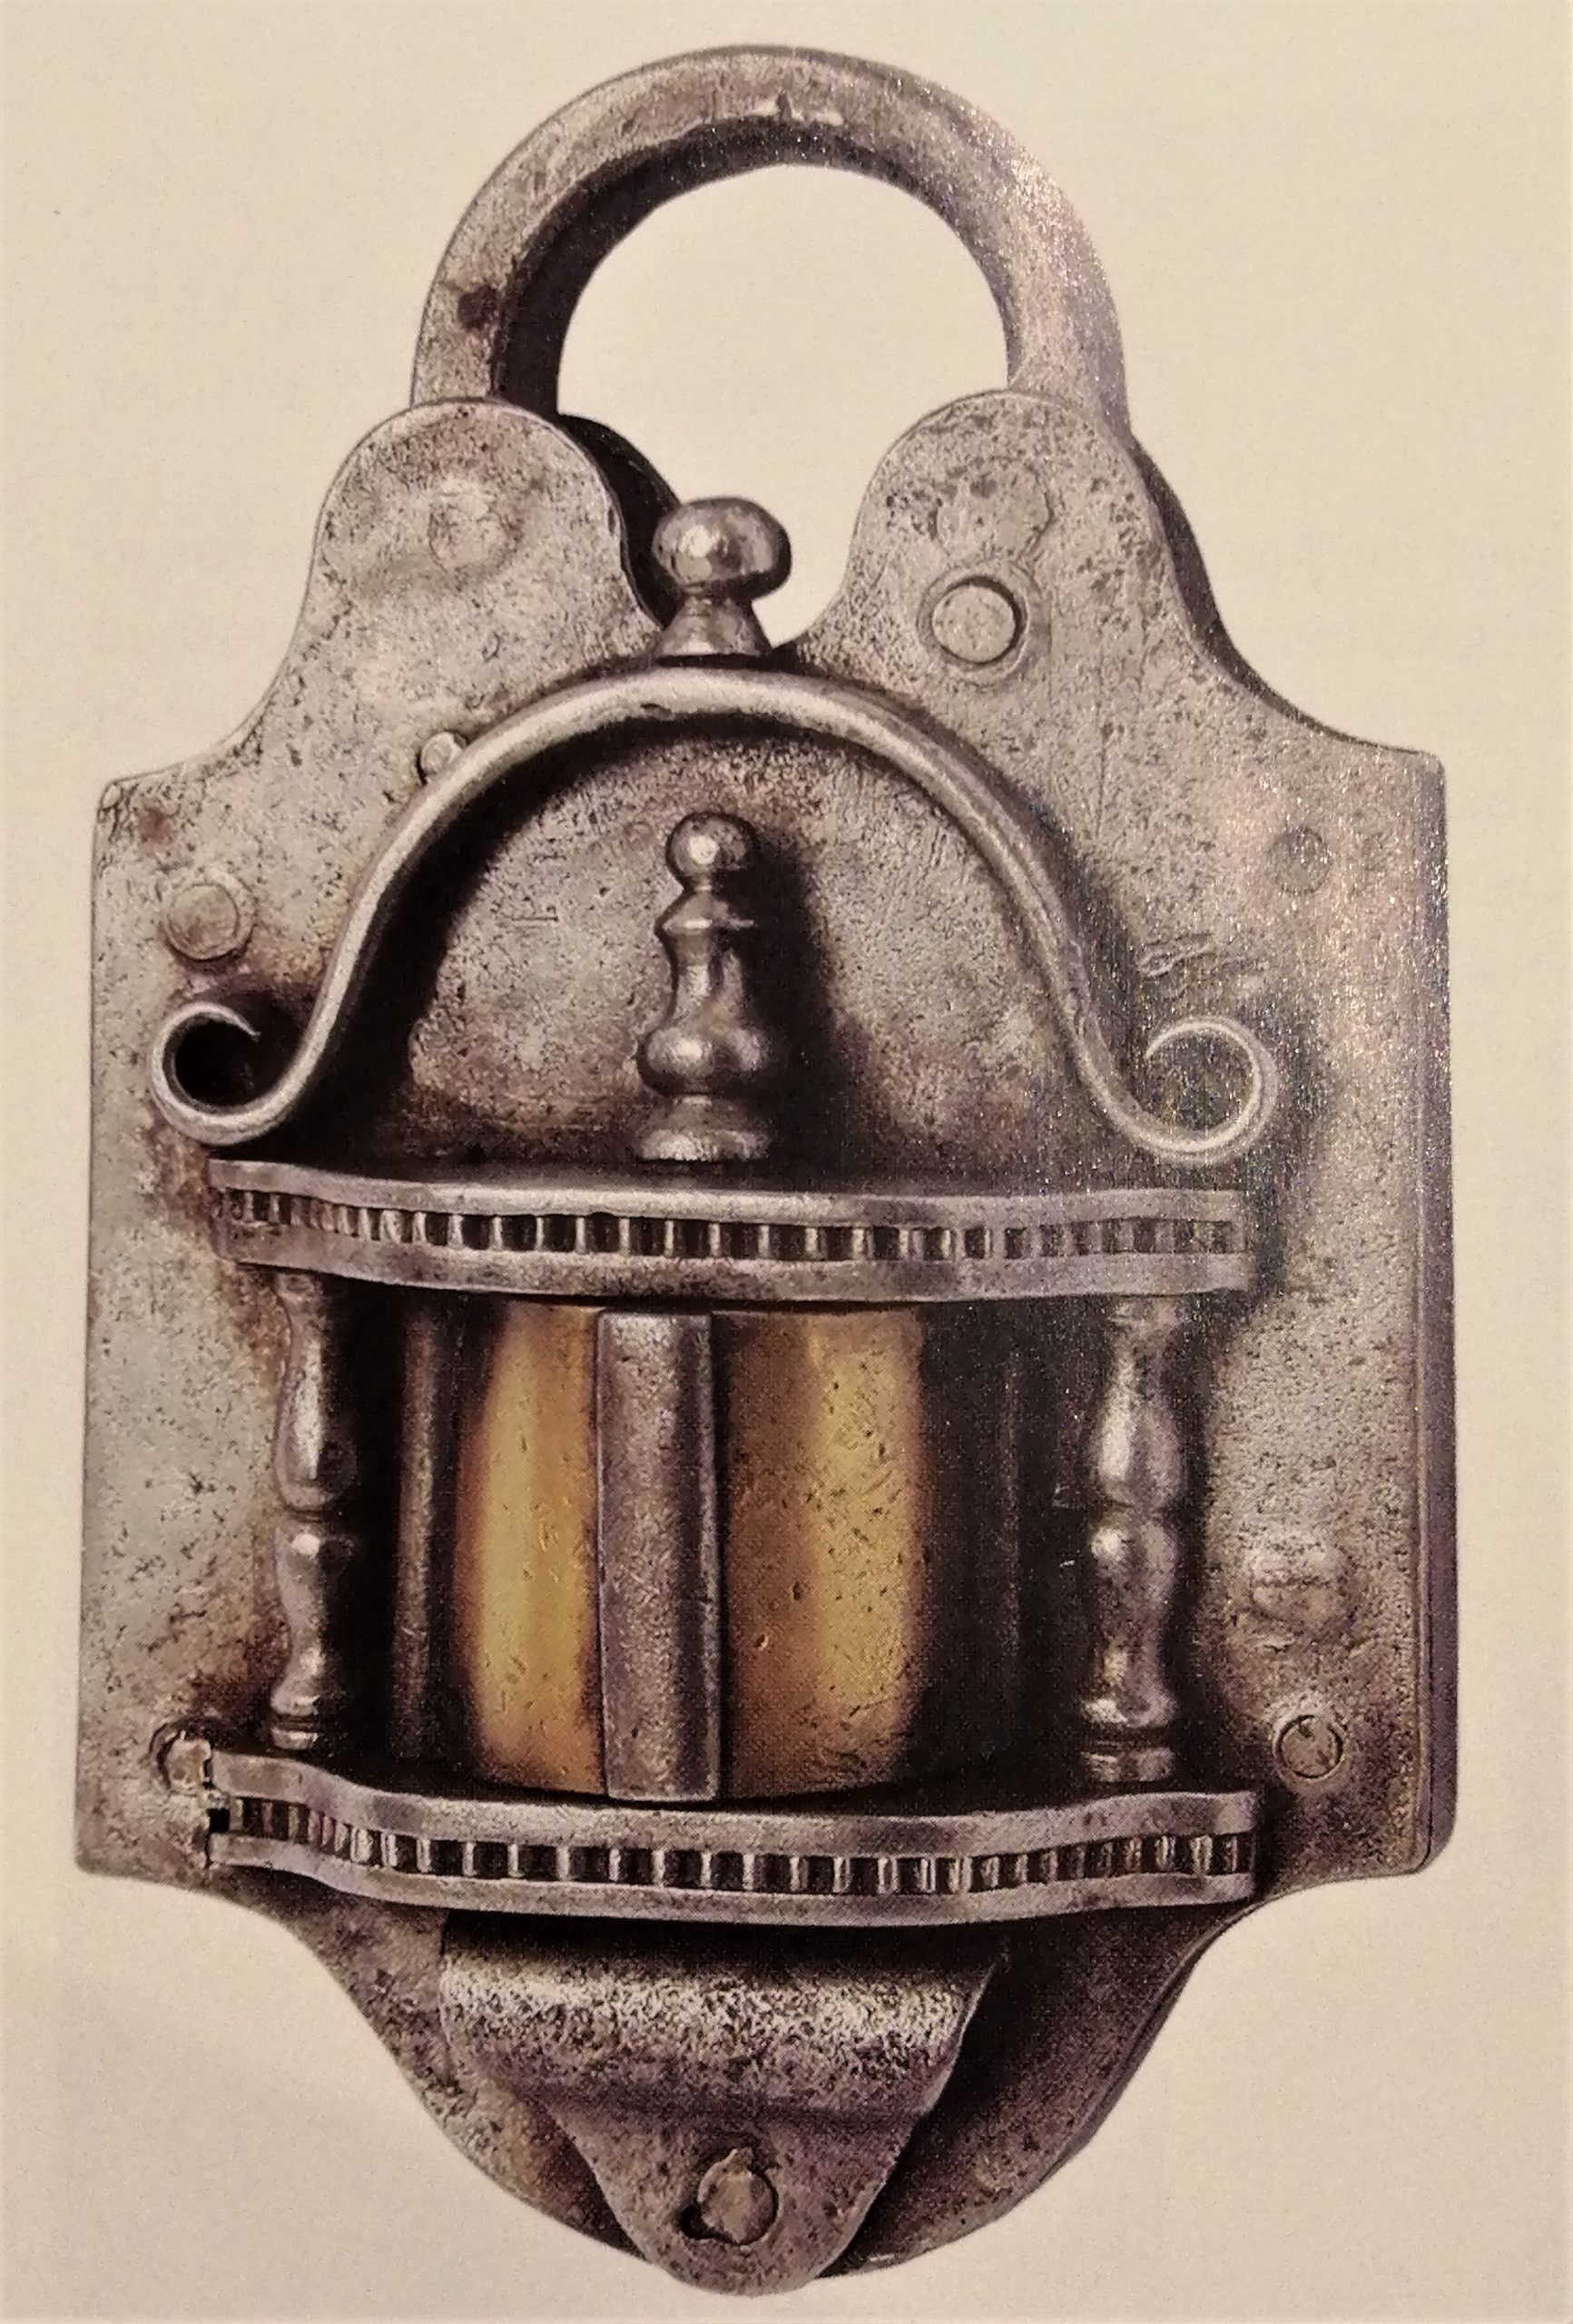
Having never taken on a project such as this, I began researching historical padlocks online, in the college library and at the V&A. The V&A holds some astounding examples of intricate workmanship, but I was searching for some simple designs which I could adapt to suit my skill level. My research for simple internal mechanisms ranged from Romano-Celtic mask locks and Middle East barrel locks to Viking examples. In terms of mechanism, I felt that the many variations on spring mechanisms were attractive in their simplicity so I narrowed down my choices to 3 examples which I could adapt. See Figs 1, 2 and 3
DESIGN
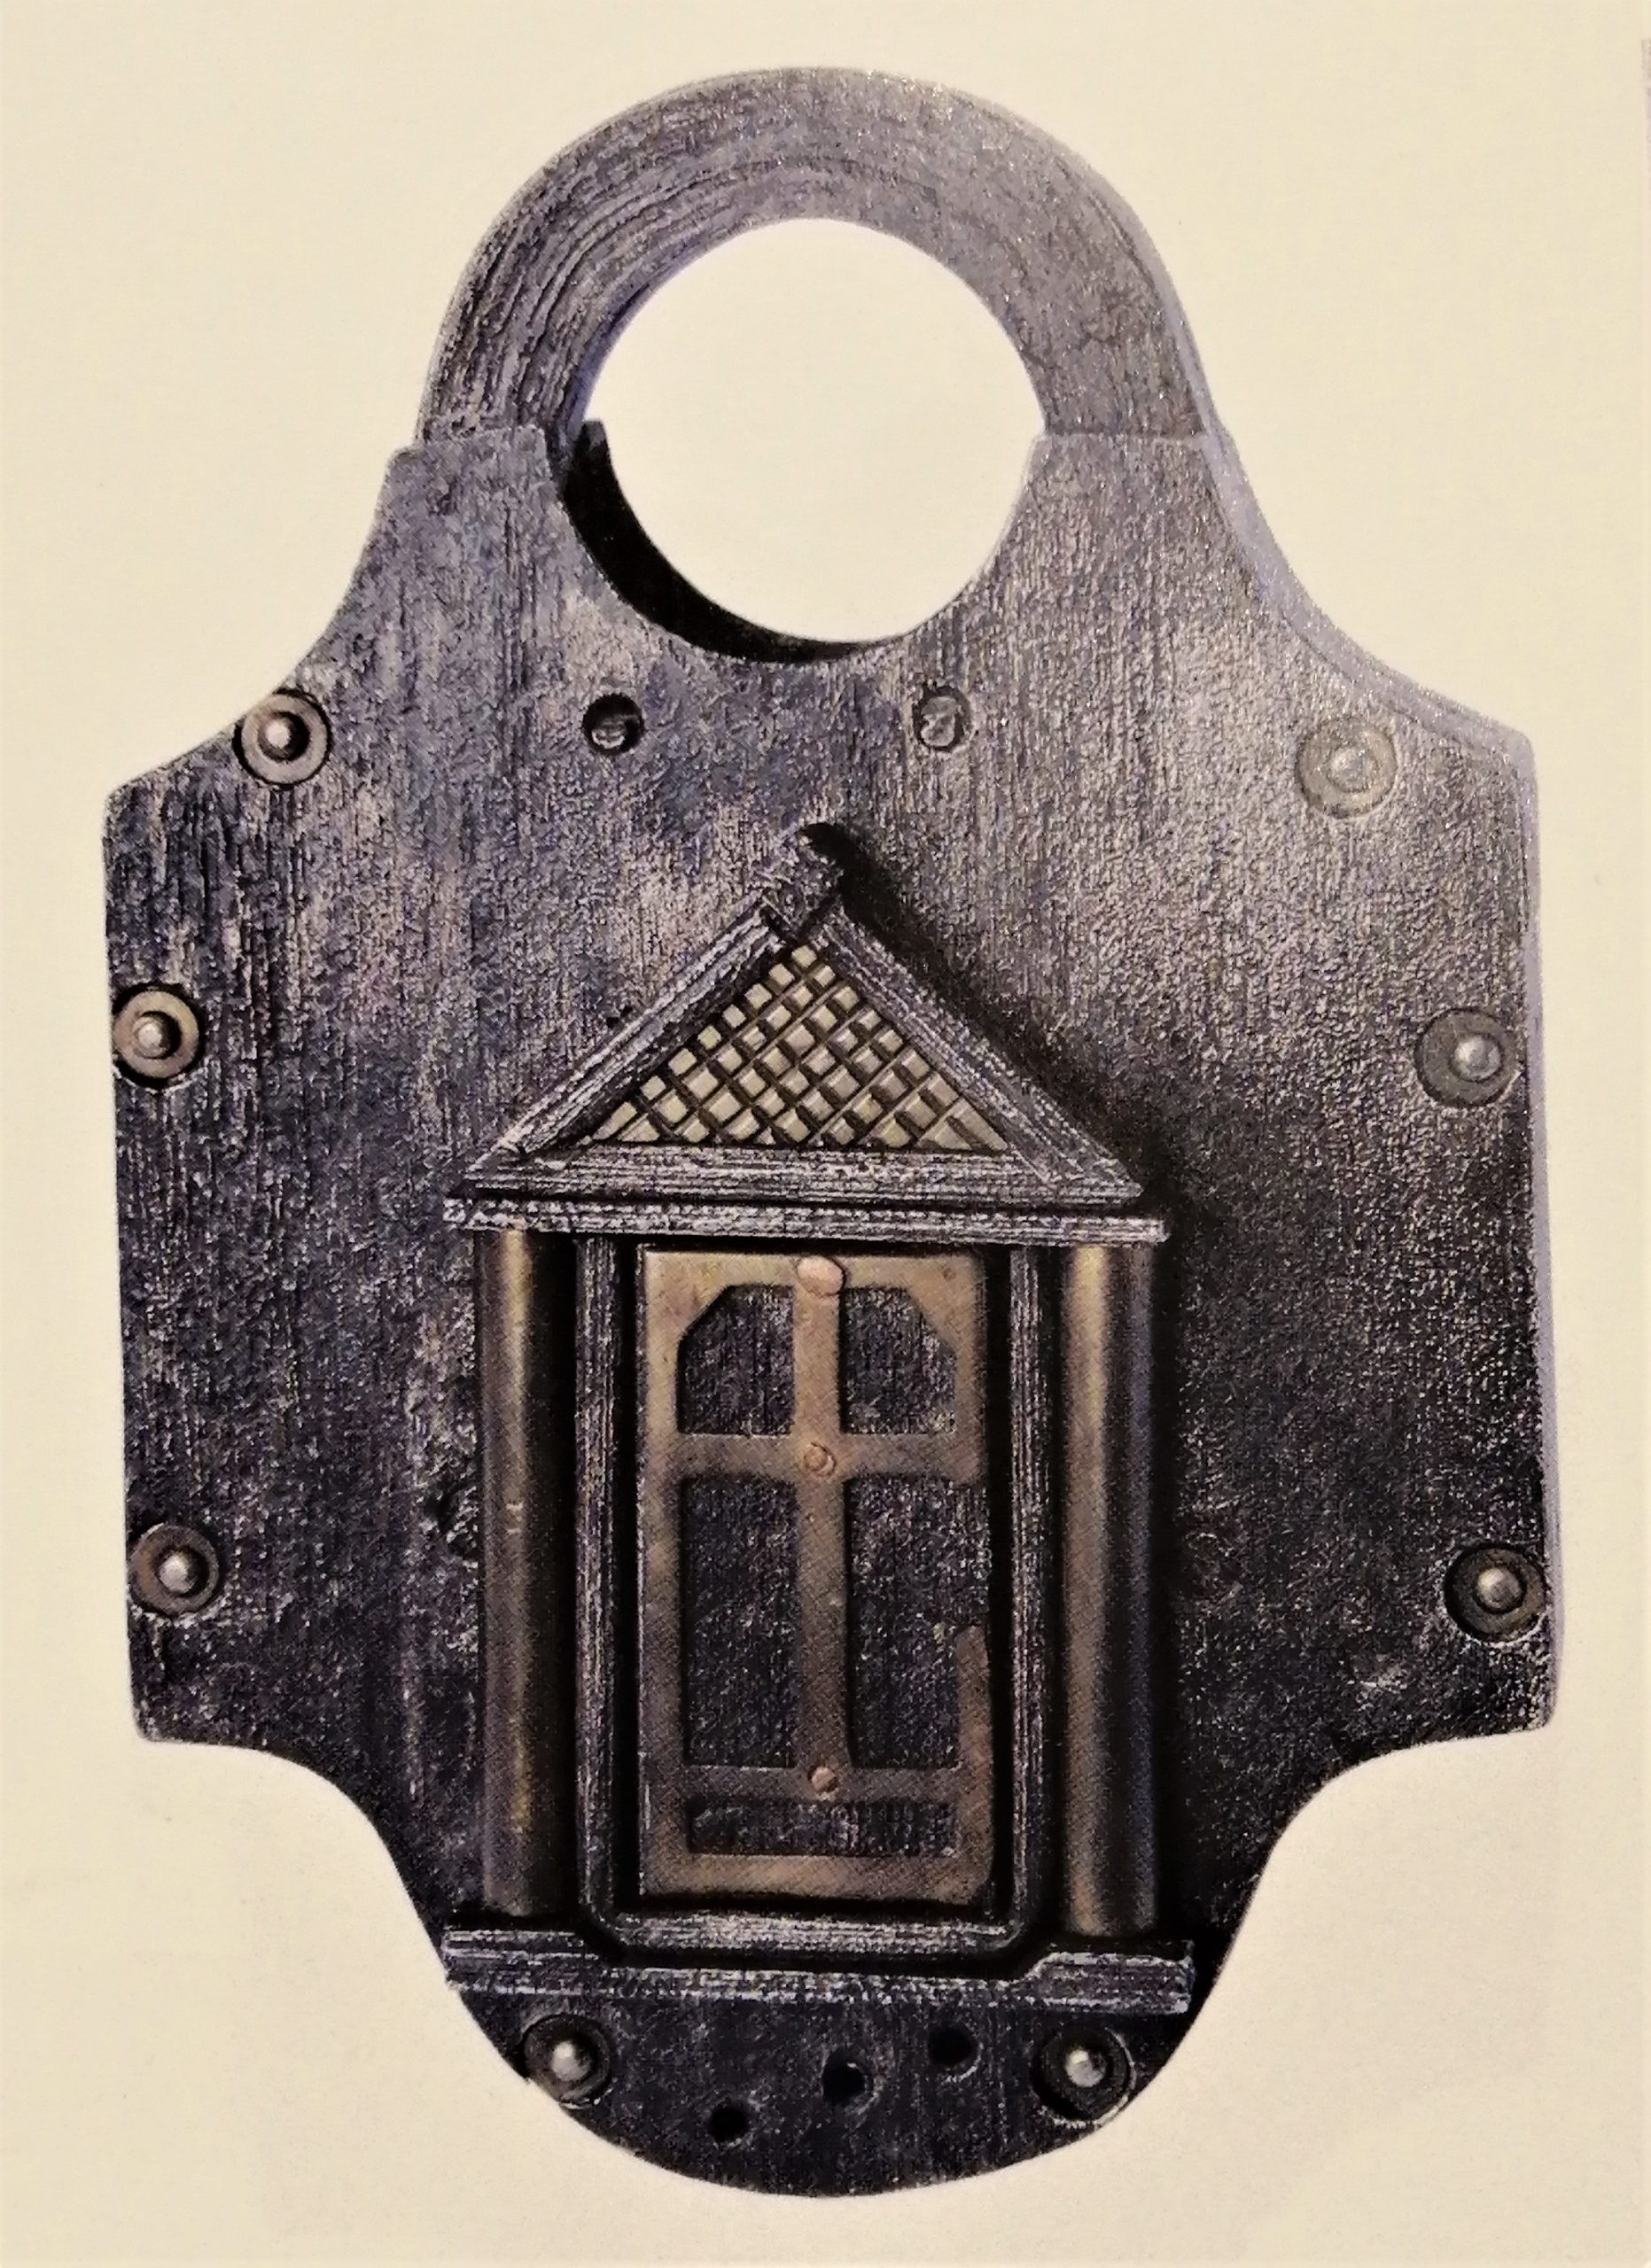
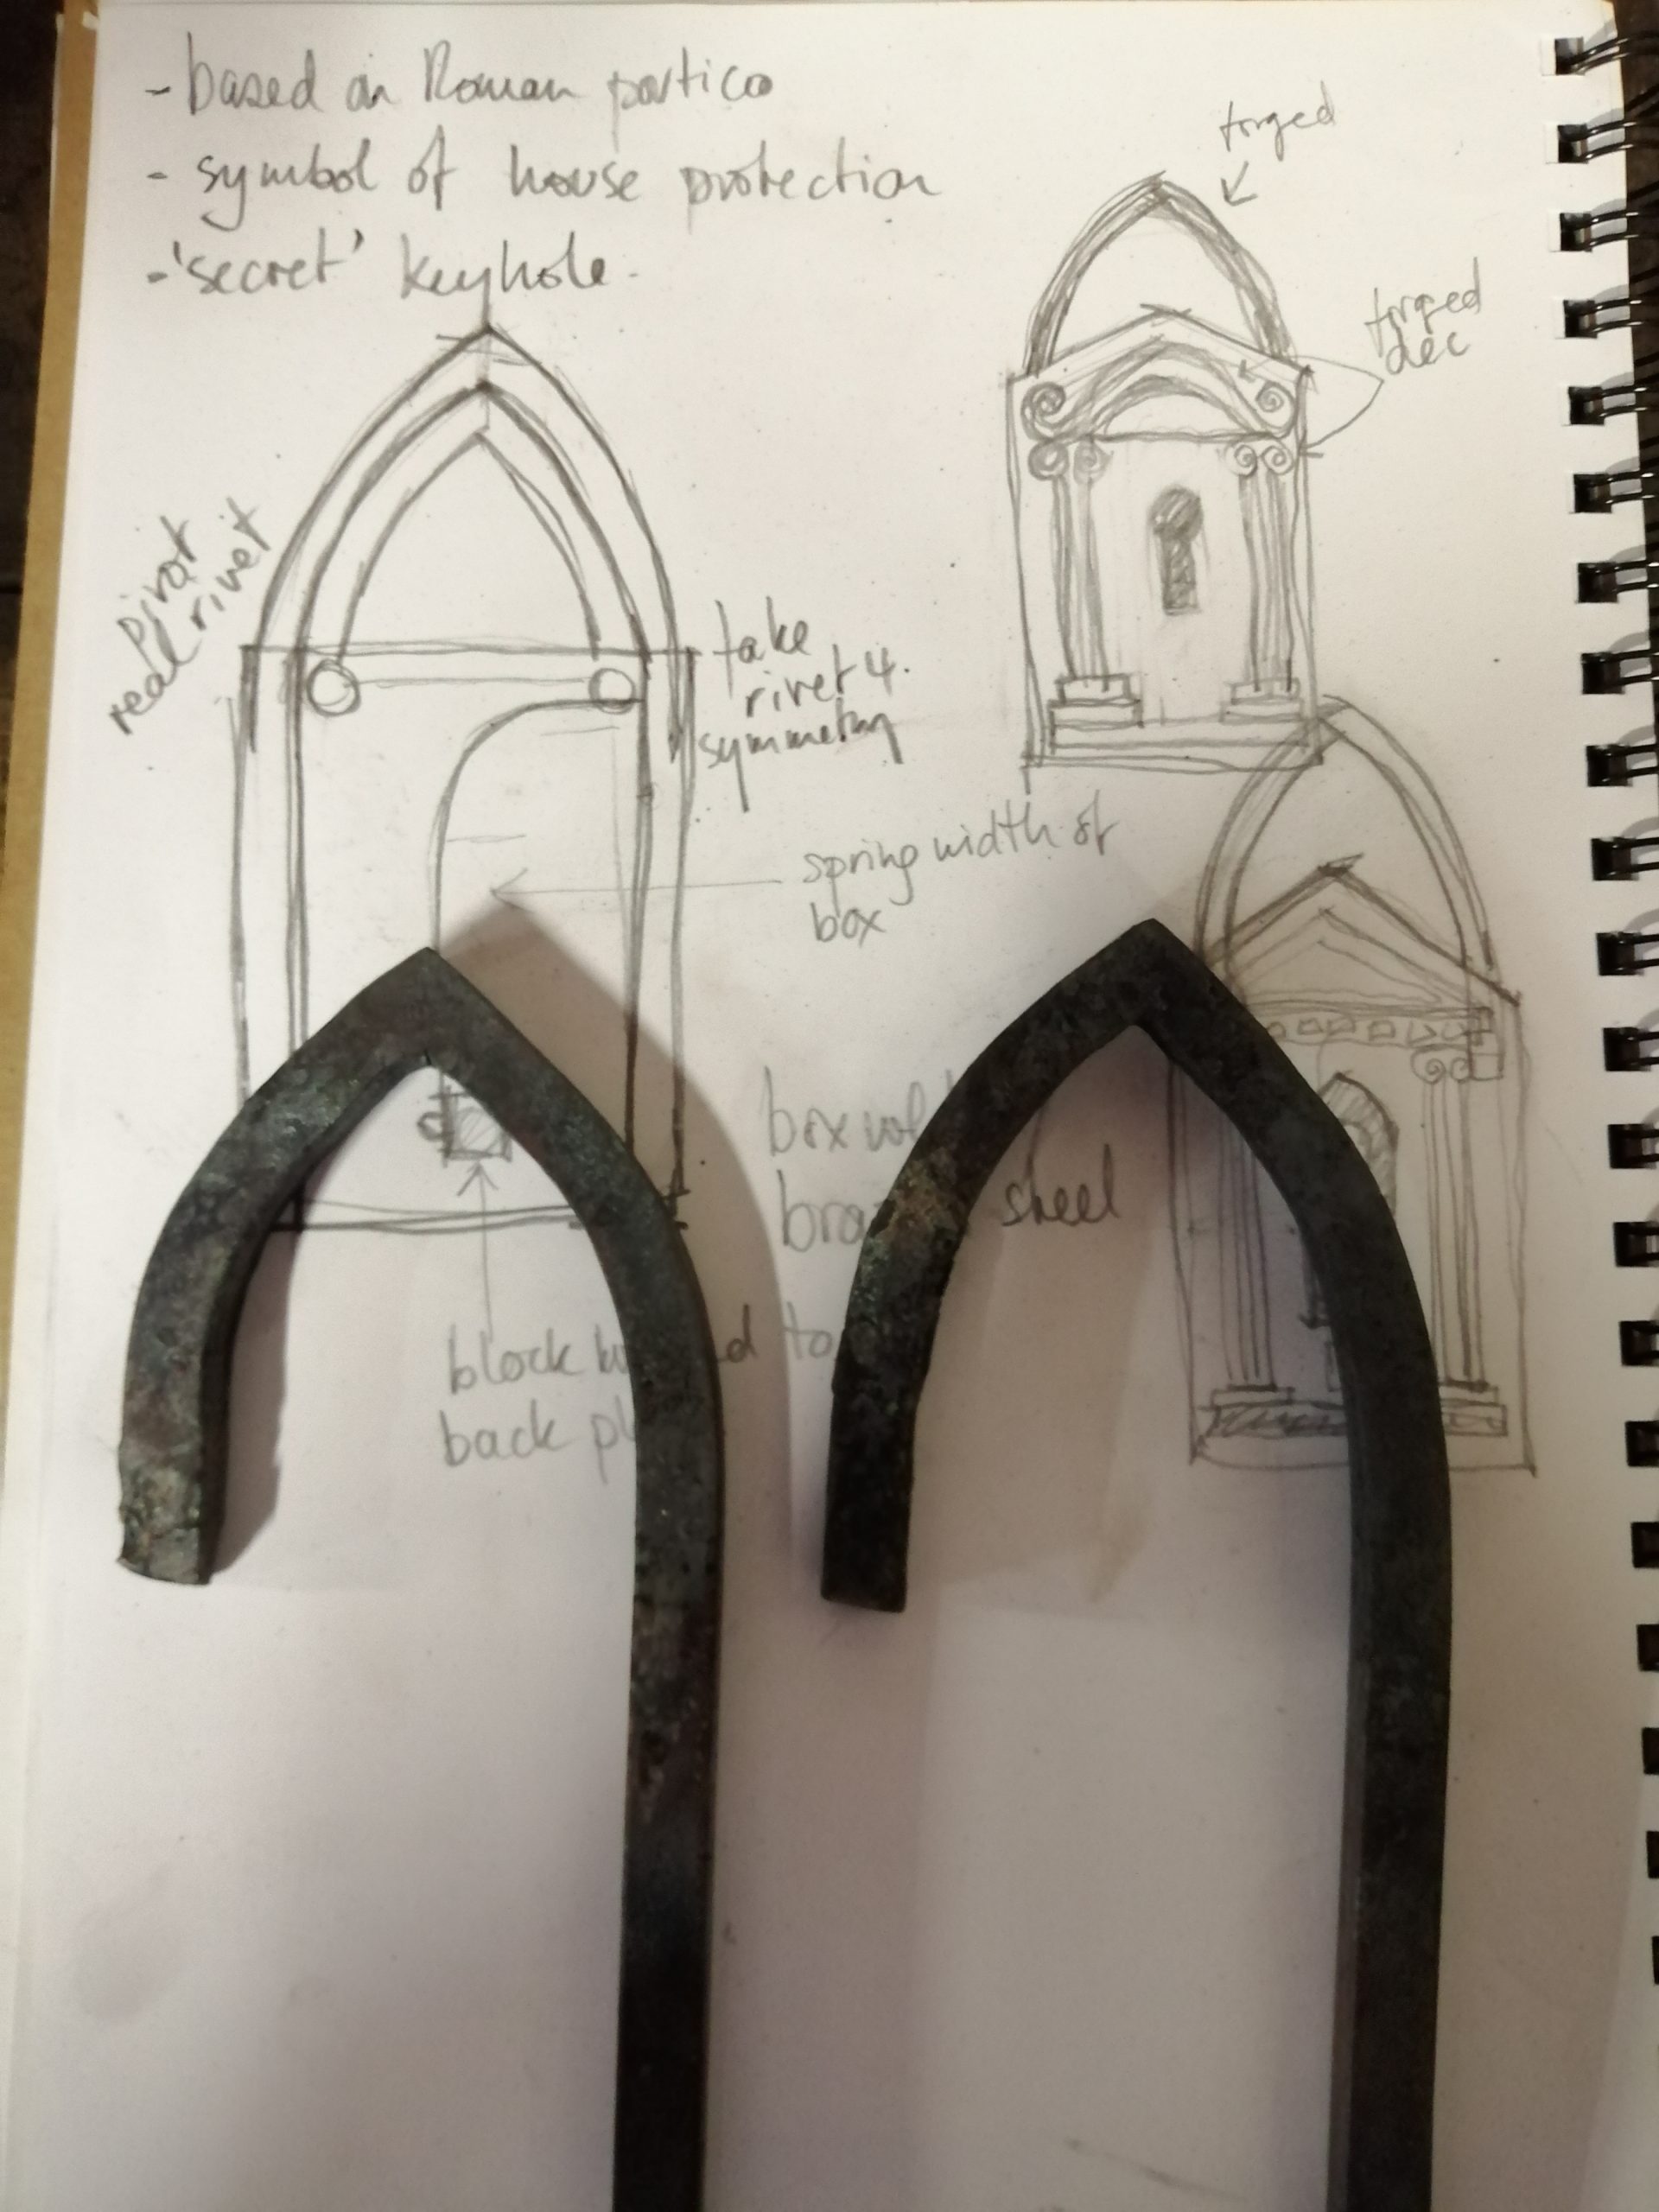
I felt that example 3 could be adapted to my own design, and the body shape would allow me to create a decorative front panel. Traditionally the escutcheon is the decorative part around the keyhole but I wanted to put the decorative element on the front. I began with the idea that my padlock might protect a home, and gaining inspiration from historic symbology, I decided I would recreate an imaginary front door. See Figs 4 and 5 for historical examples.
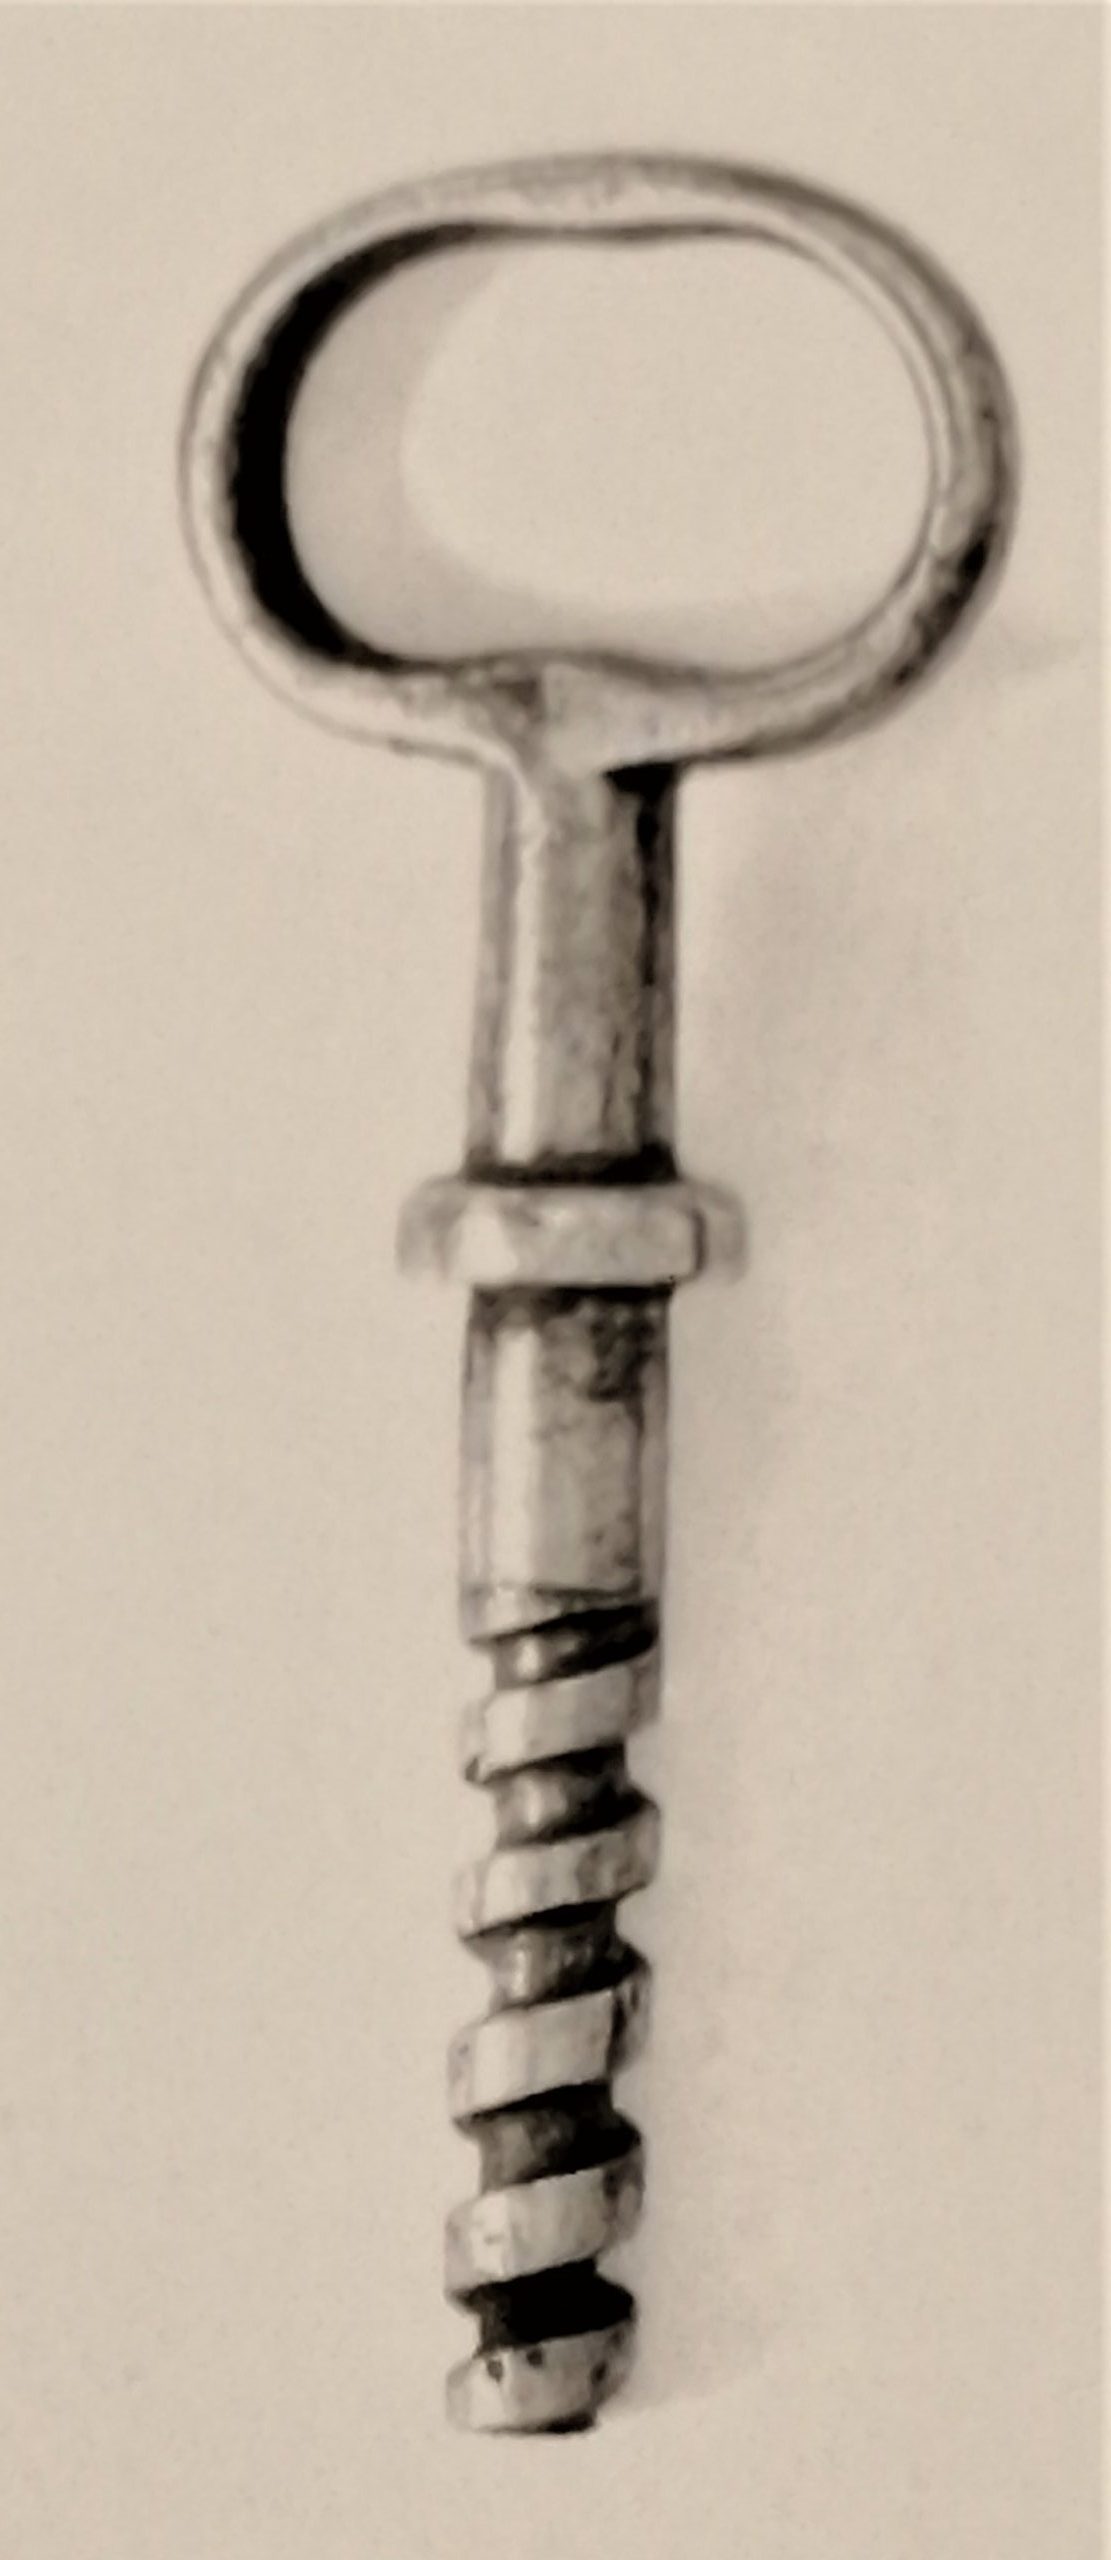
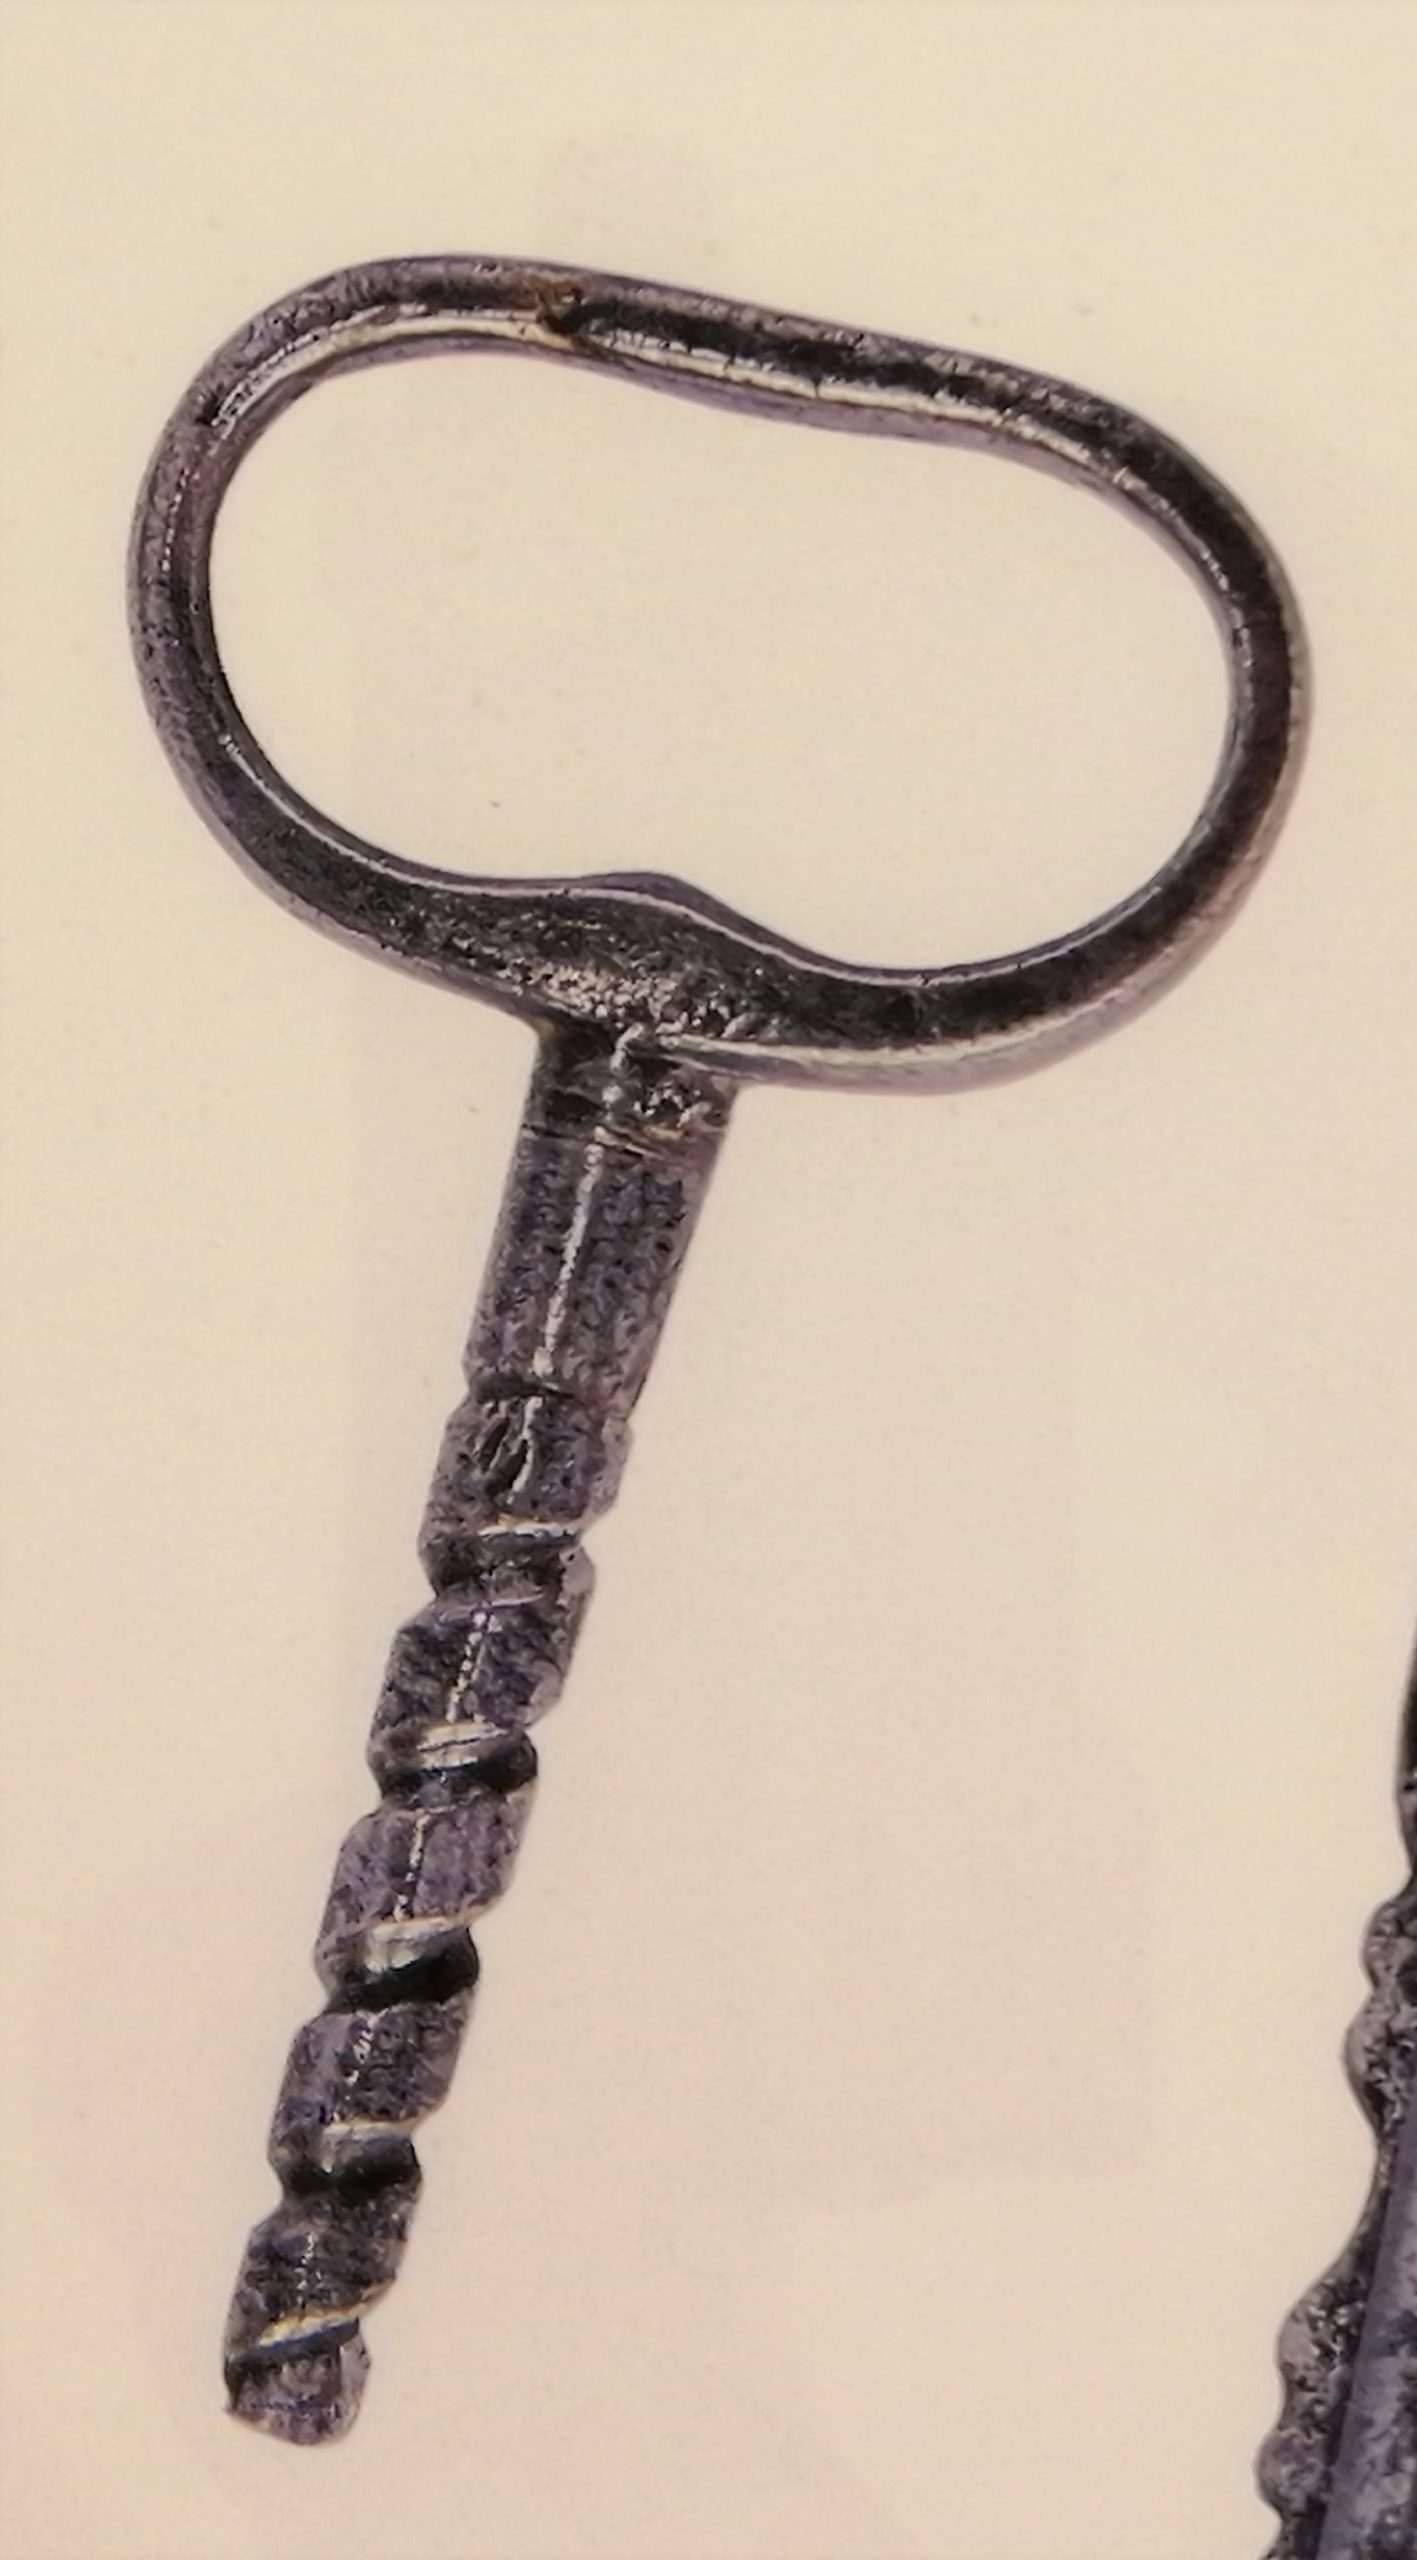
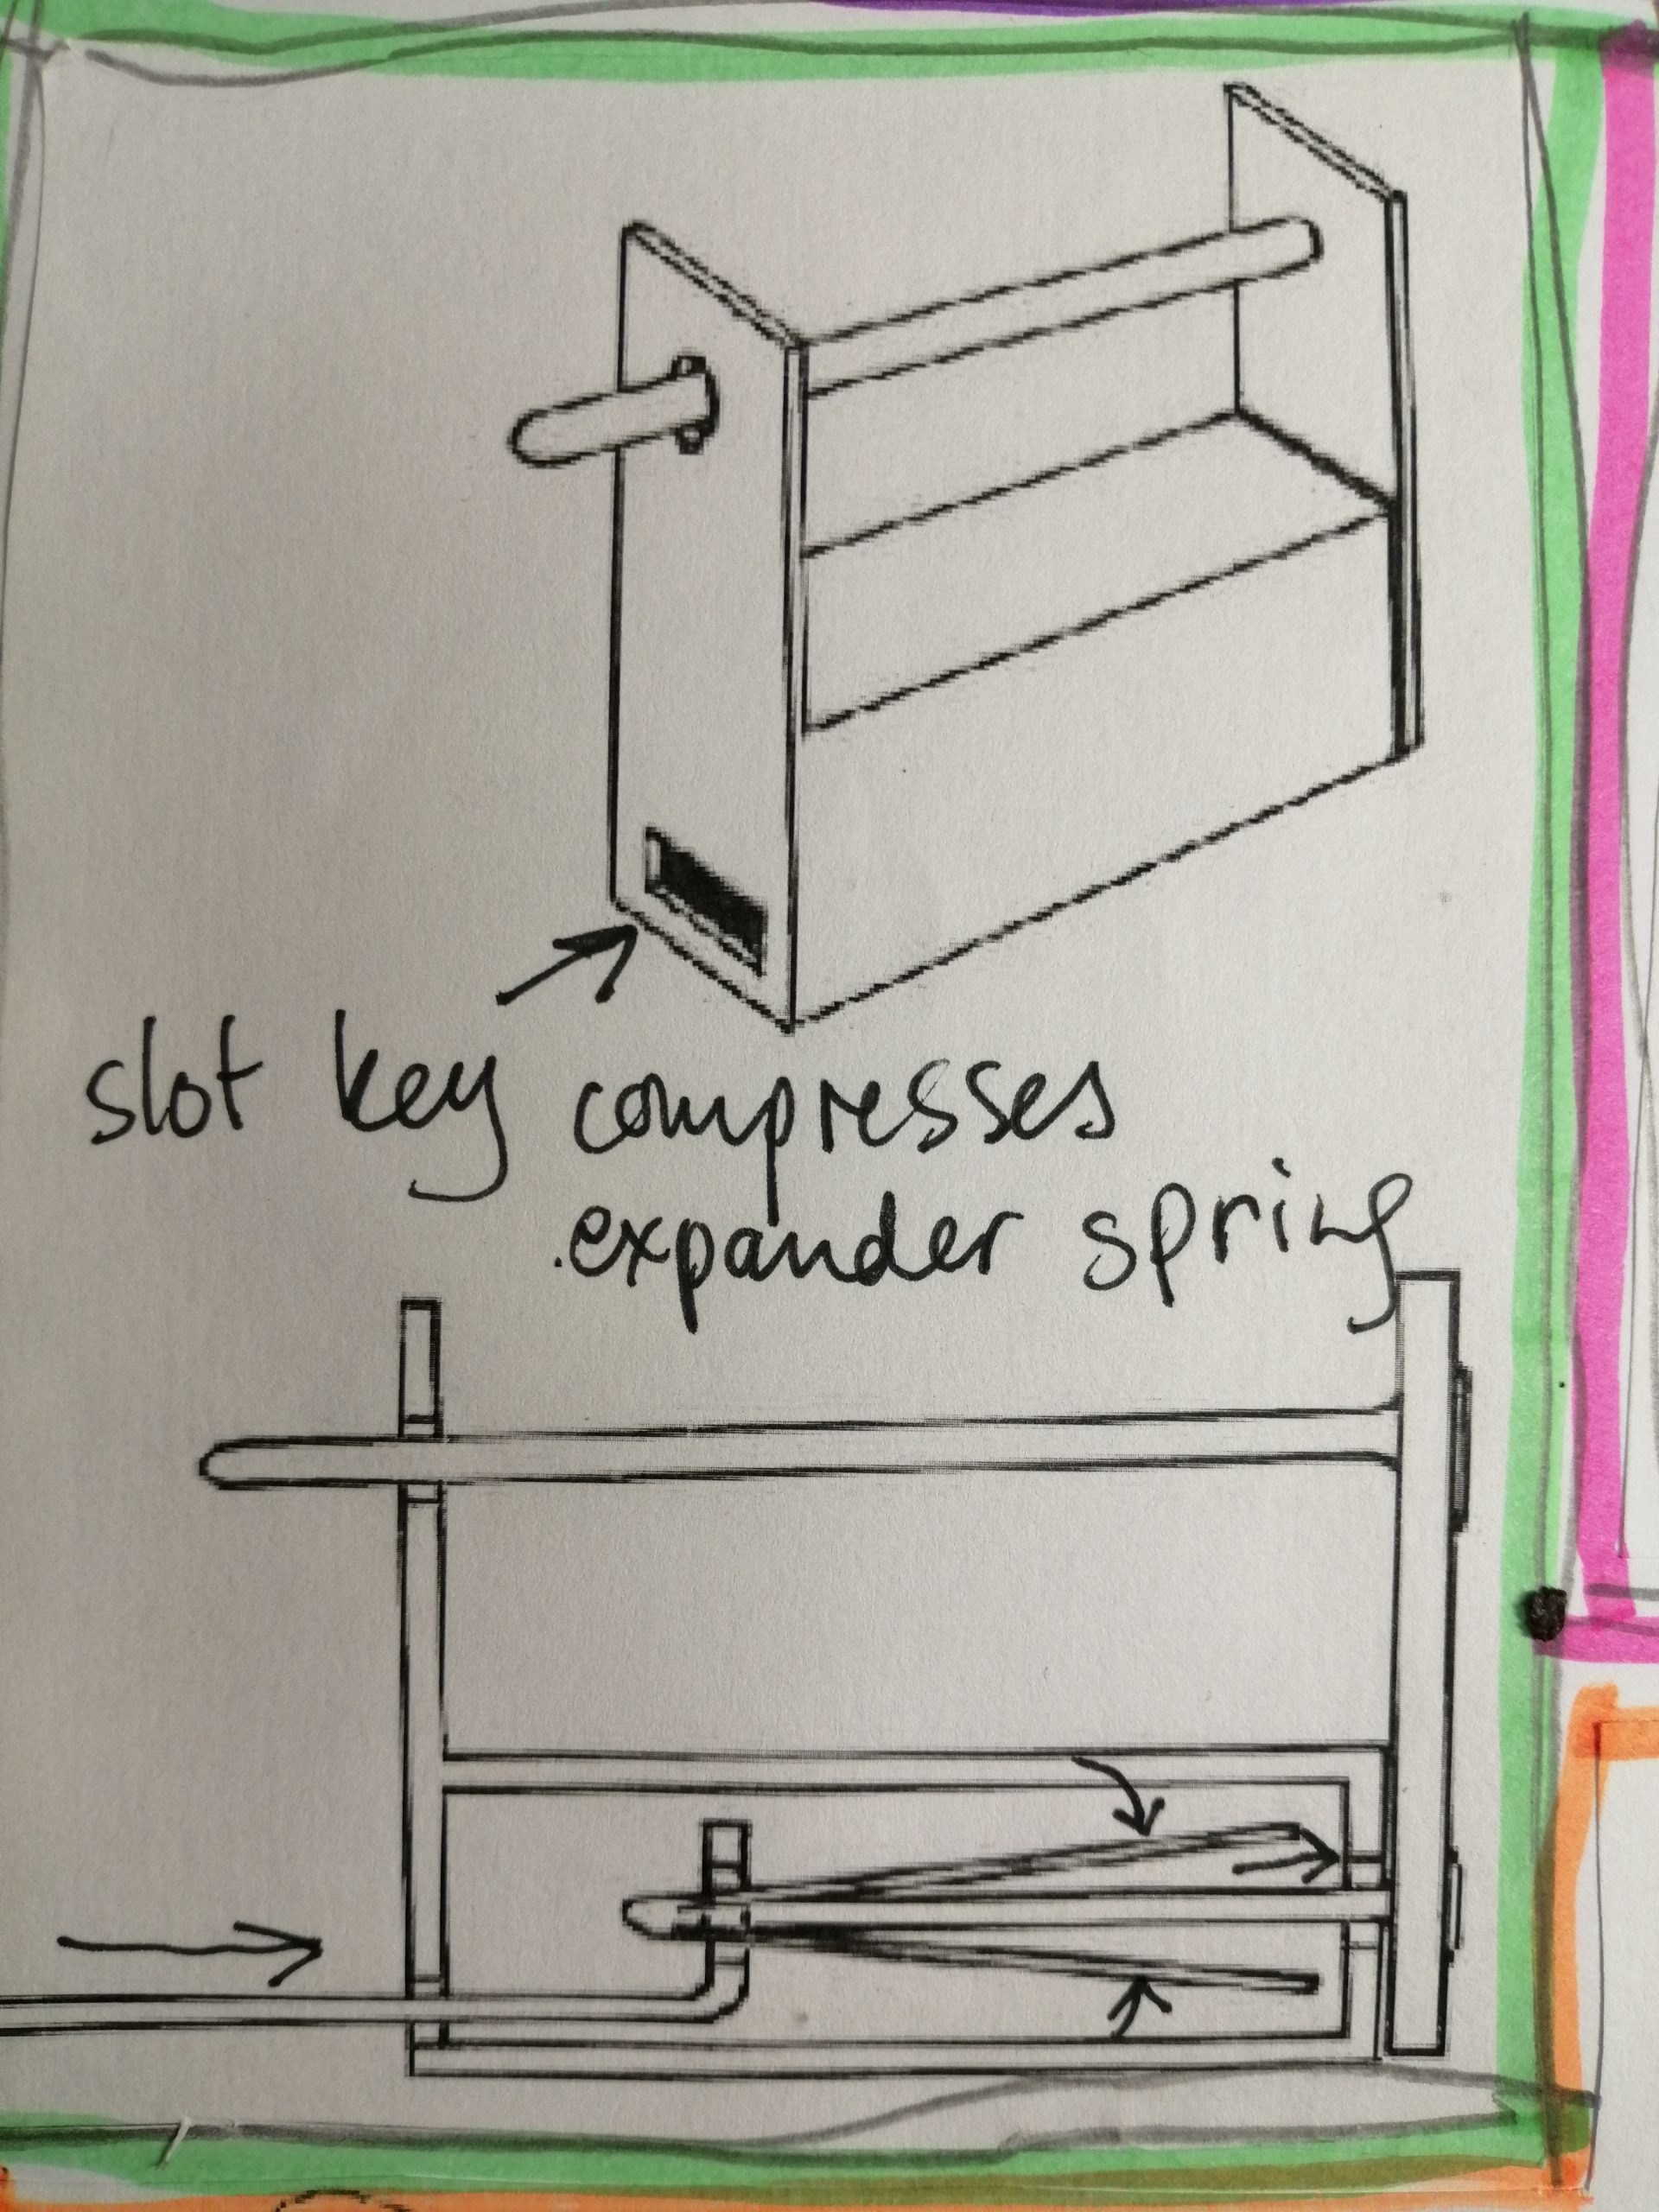
The simple locking mechanism I decided upon was activated by a threaded key which pushed a spring when inserted, in turn releasing the shackle. I thought the threaded key would be an attractive feature, pleasing to operate, and a new challenge to make. Figs 6 and 7. I changed the internal spring design from a ‘V’ to a curled shape, which would look interesting if the padlock were ever to be x-rayed.
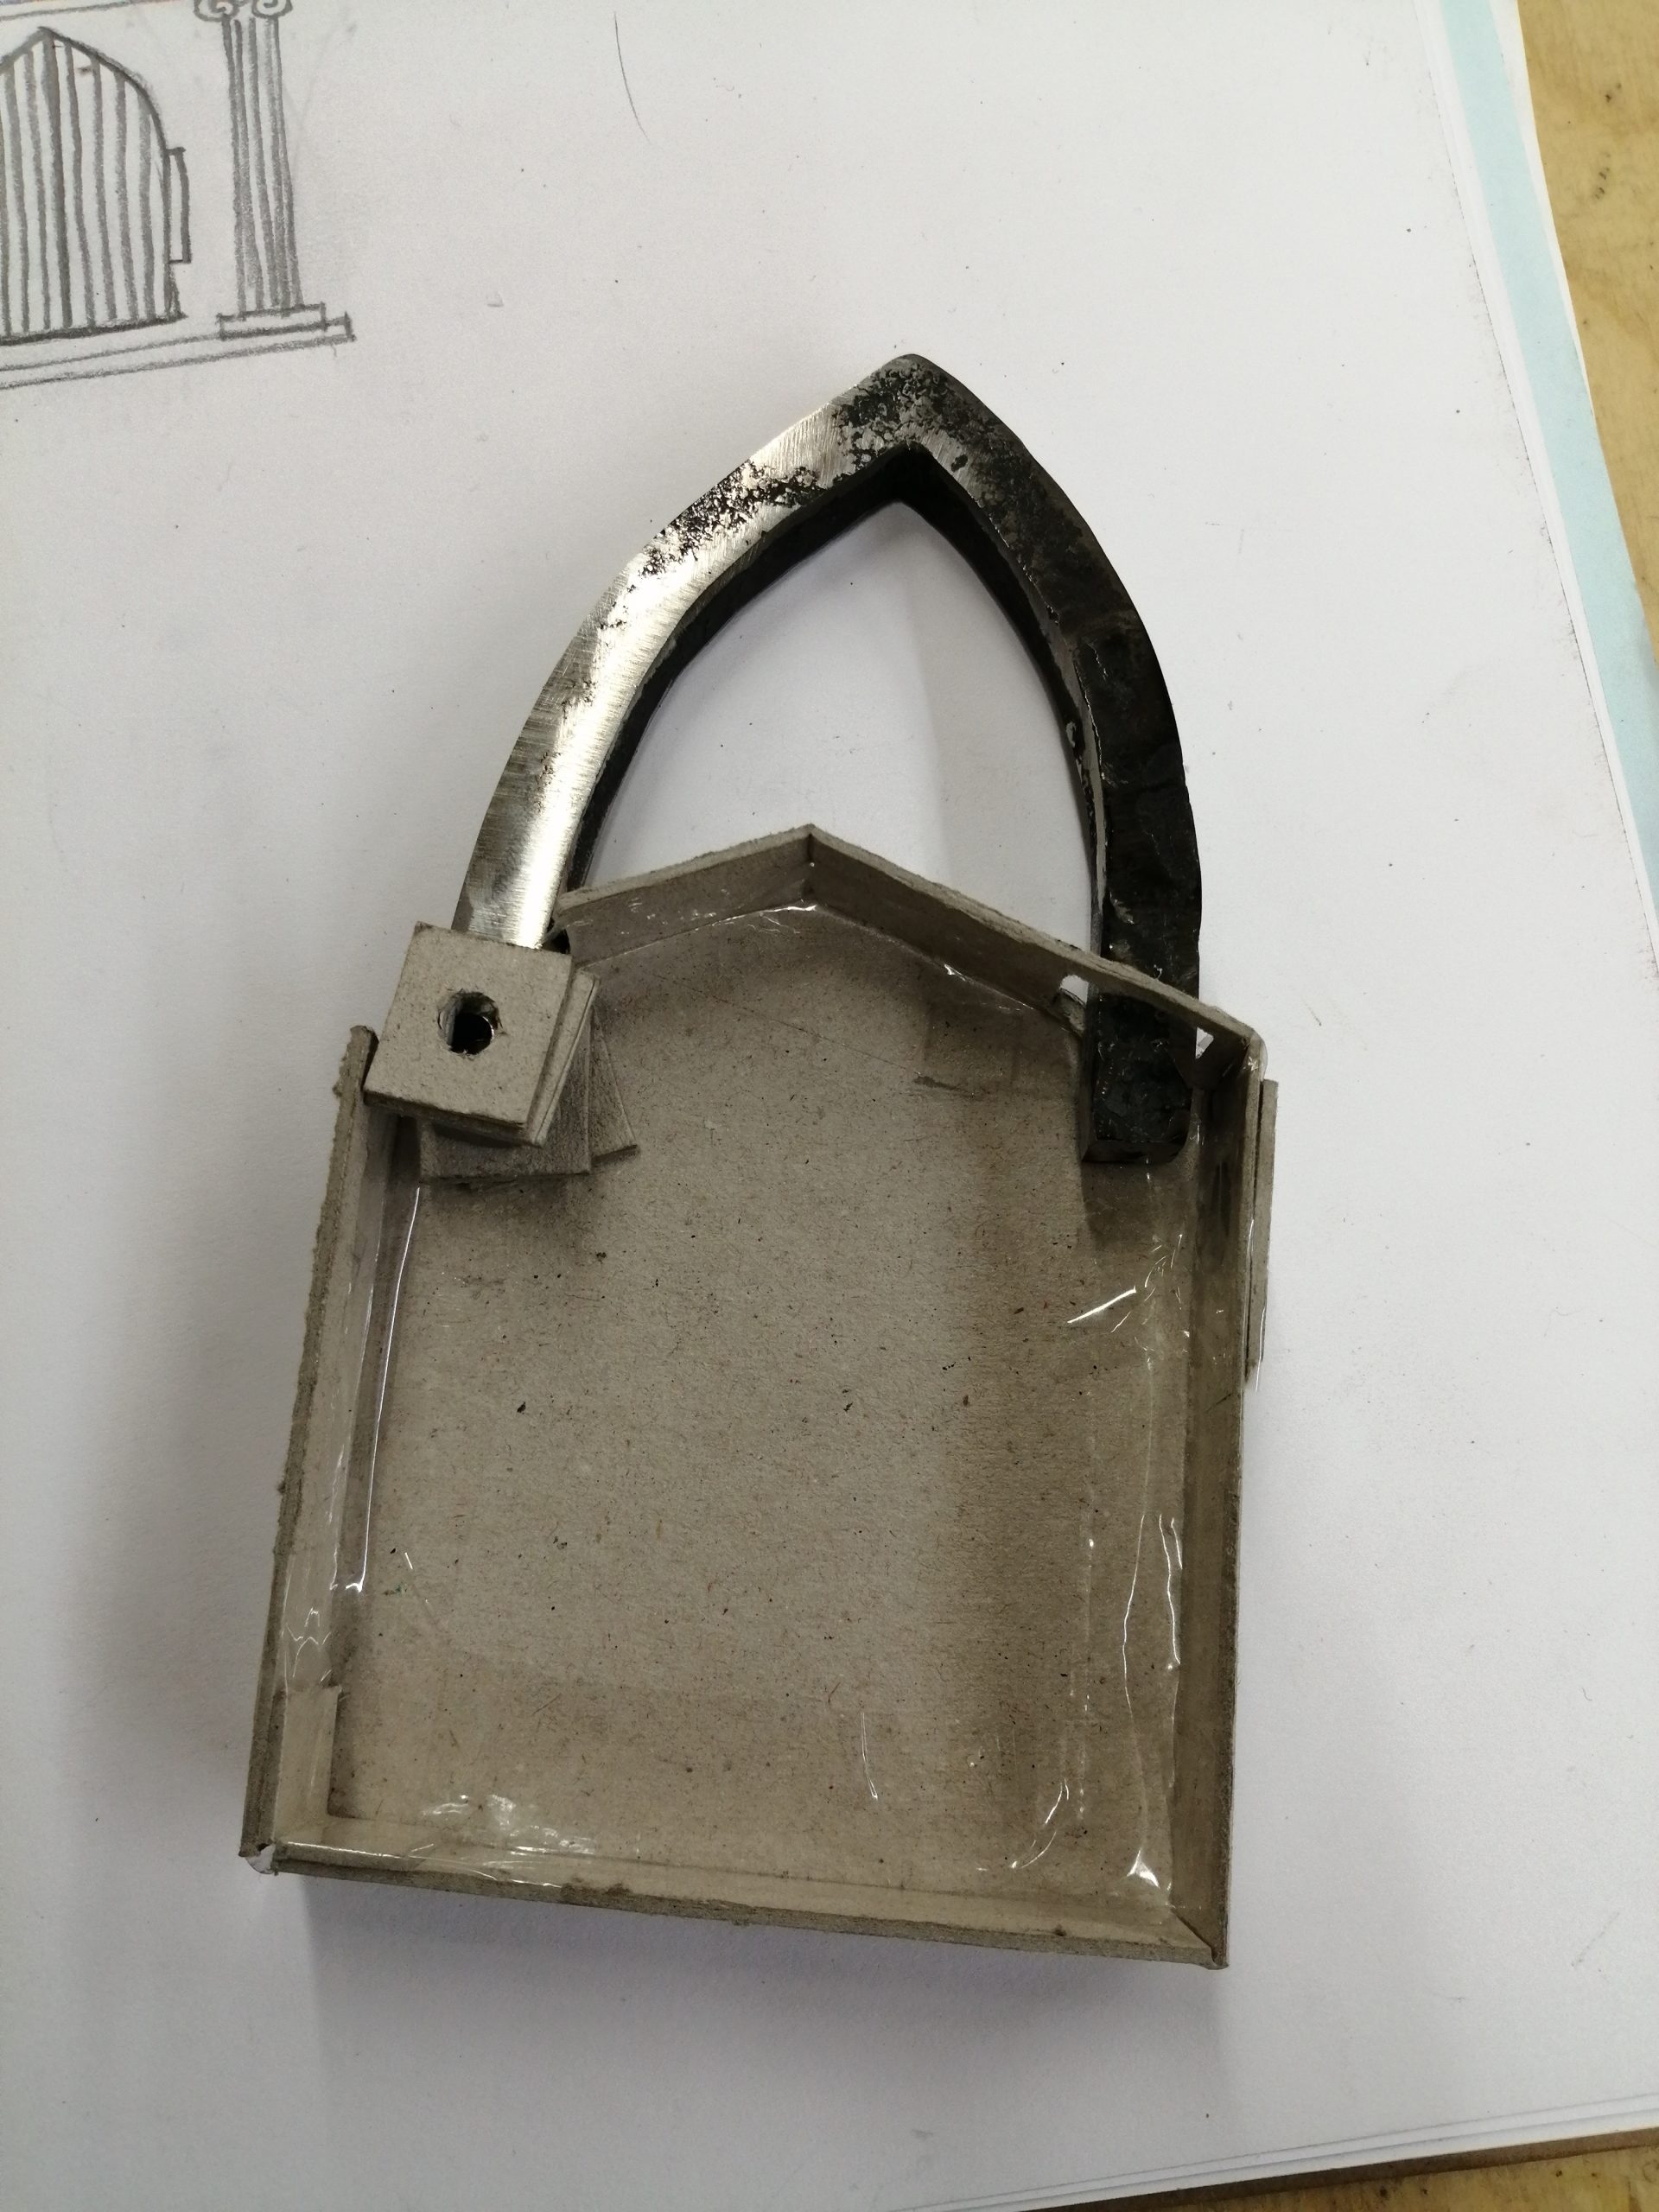
I began the design by making a card model of the padlock – working with the model was a great way to test out ideas and eliminate potential mistakes before building the final piece. Simplicity in the locking mechanism was an important feature, and the sketches and model went through several trials and changes before a successful working design was finalised.
PROCESS STEP BY STEP
THE SHACKLE – BLACKSMITHING
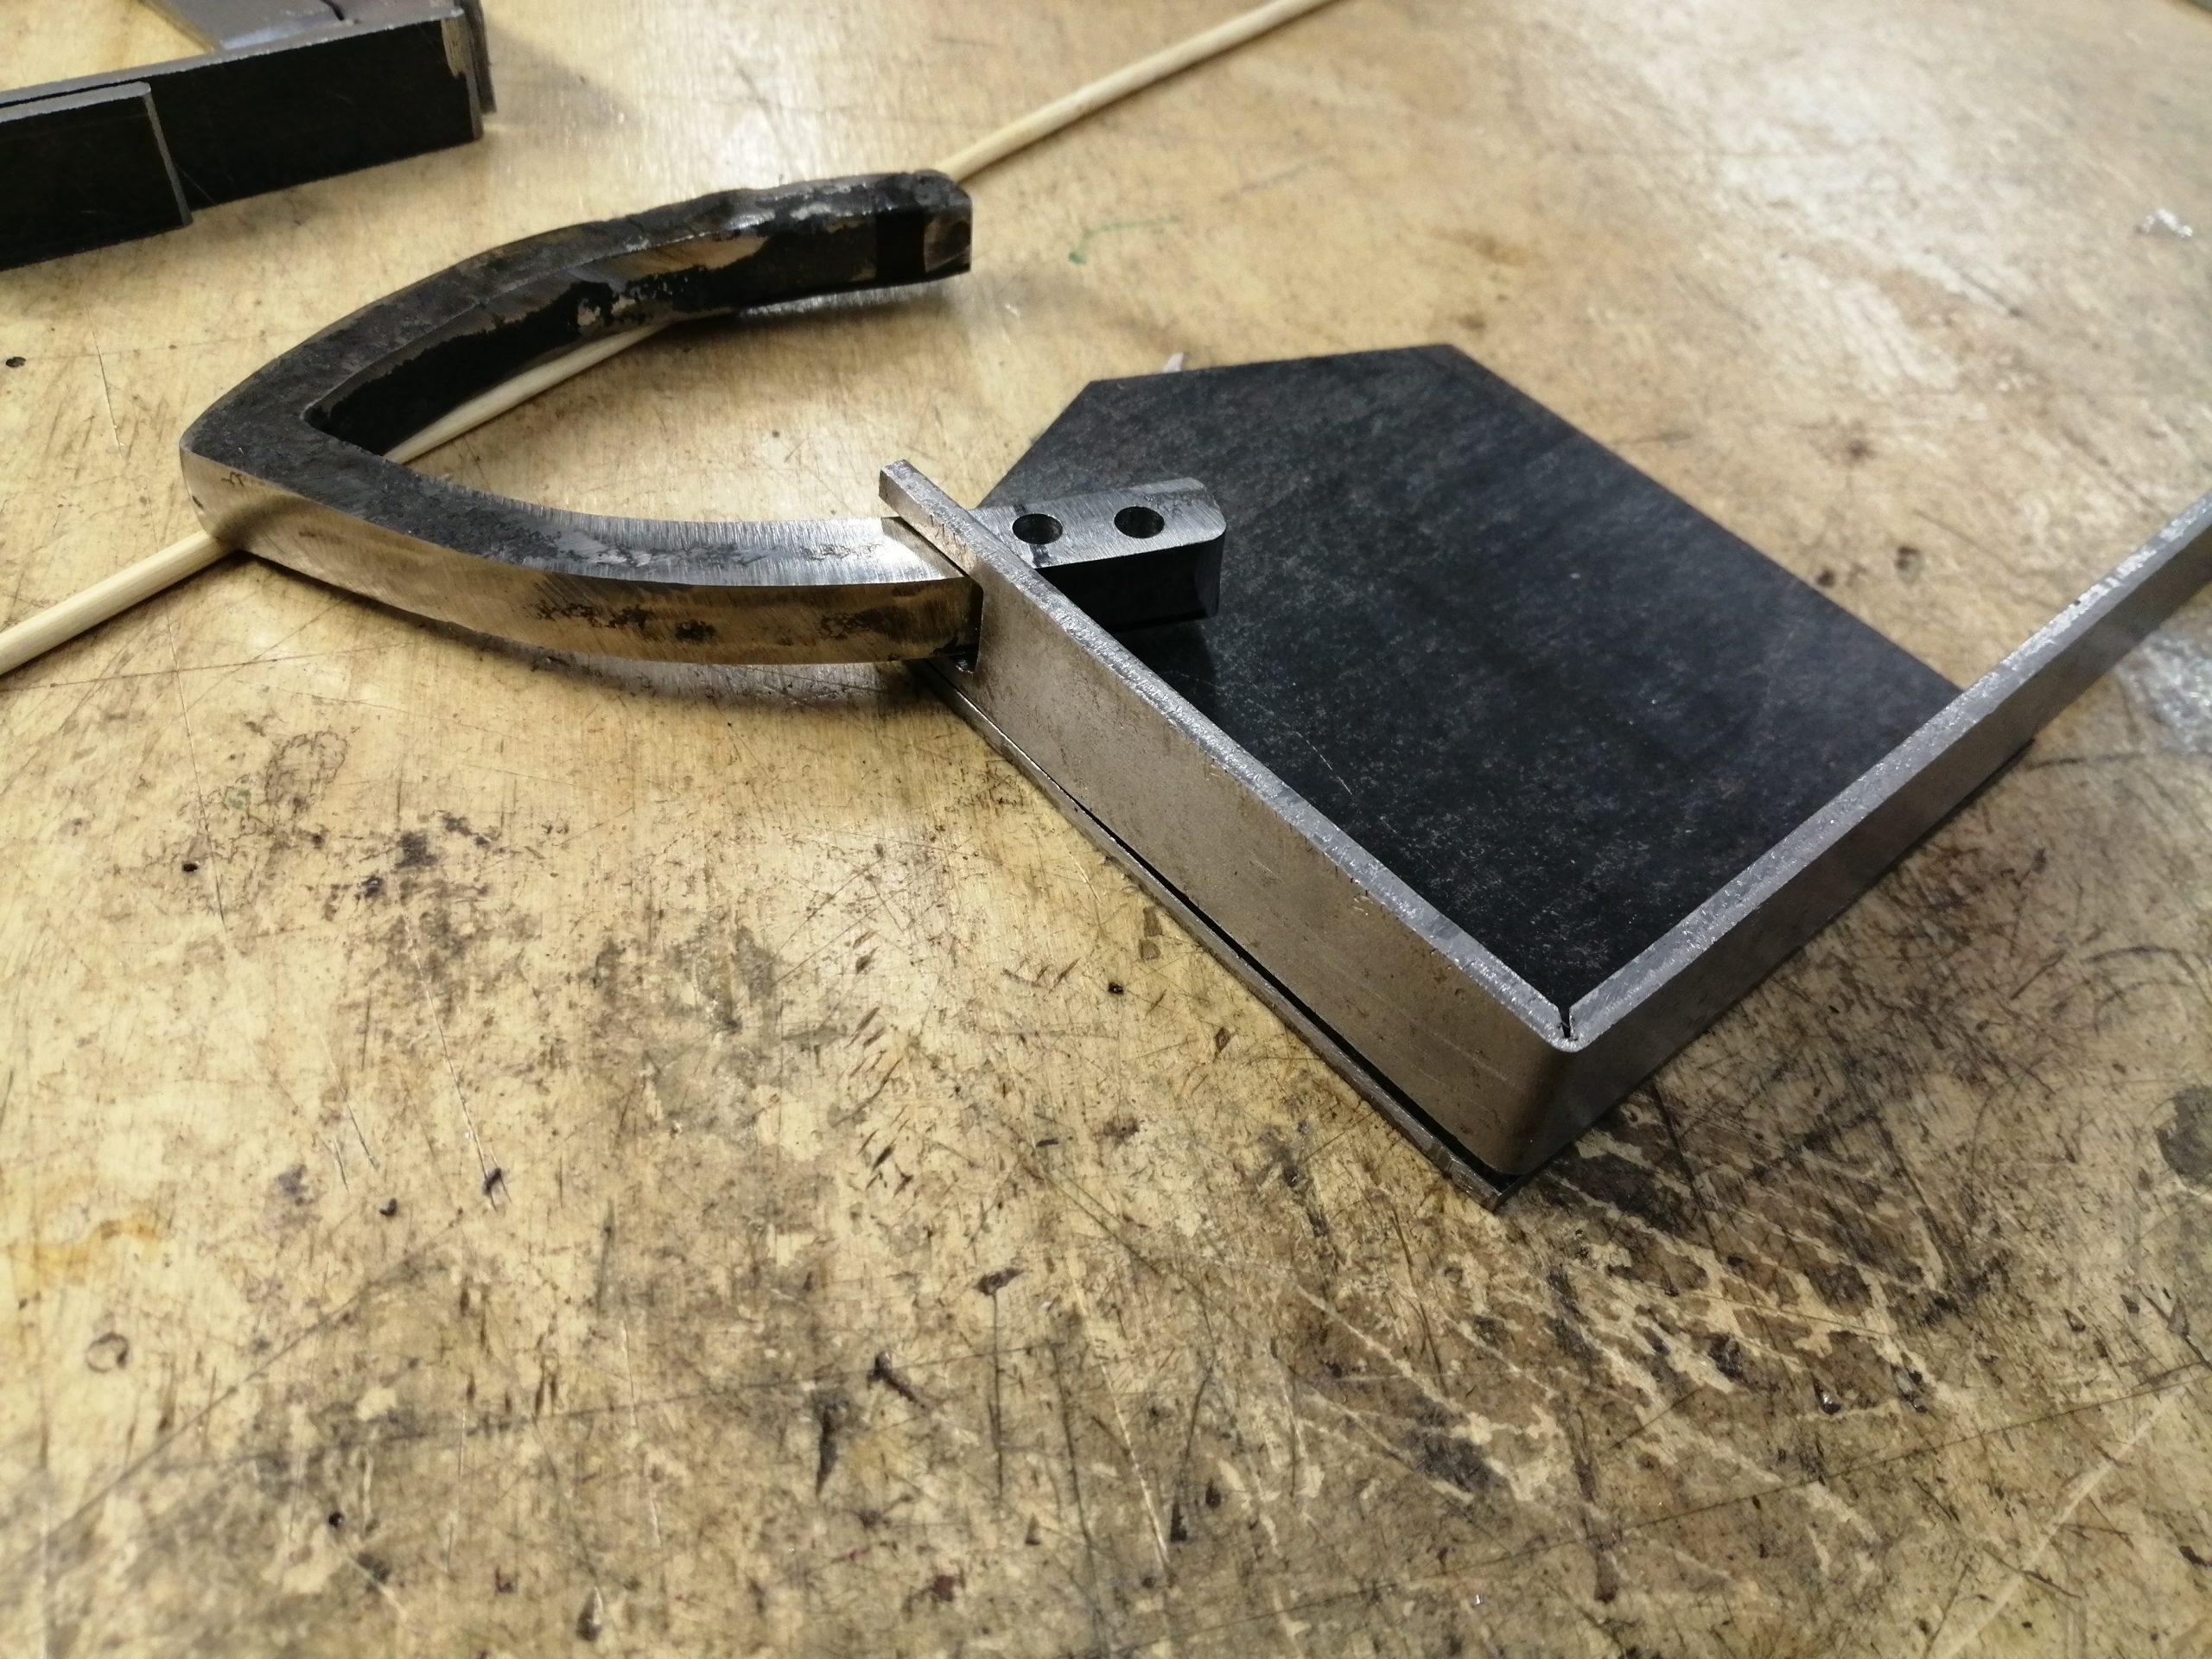
The first element to be made was the shackle, using 10mm square steel bar, and fabricated in the college forge. This was the first time I had experienced blacksmithing, and we had a week to learn the basics, tutored by Alex Coode of Coode Conservation Partnership. Alex is a heritage blacksmith and also an excellent teacher, and it was a fun, dirty, tiring and enjoyable week.The arched angle I designed for the shackle was achieved by a process called ‘upsetting’. I heated the centre of the bar in the forge until orange/white hot, and bent it using a bending tool fitted into the bench vice. Once the bar was bent in the middle, it was repeatedly heated either side of the bend and hammered in the vice and on the anvil, until the acute angle you can see in the picture had been achieved.
SIDES AND BODY – CUTTING AND BRAZING
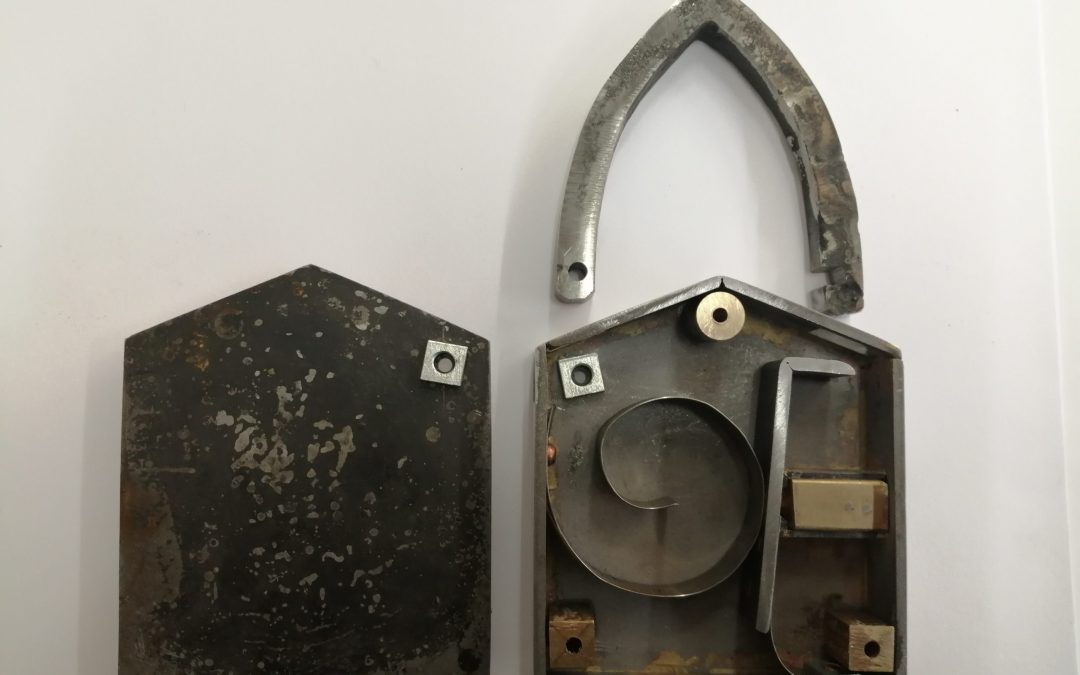
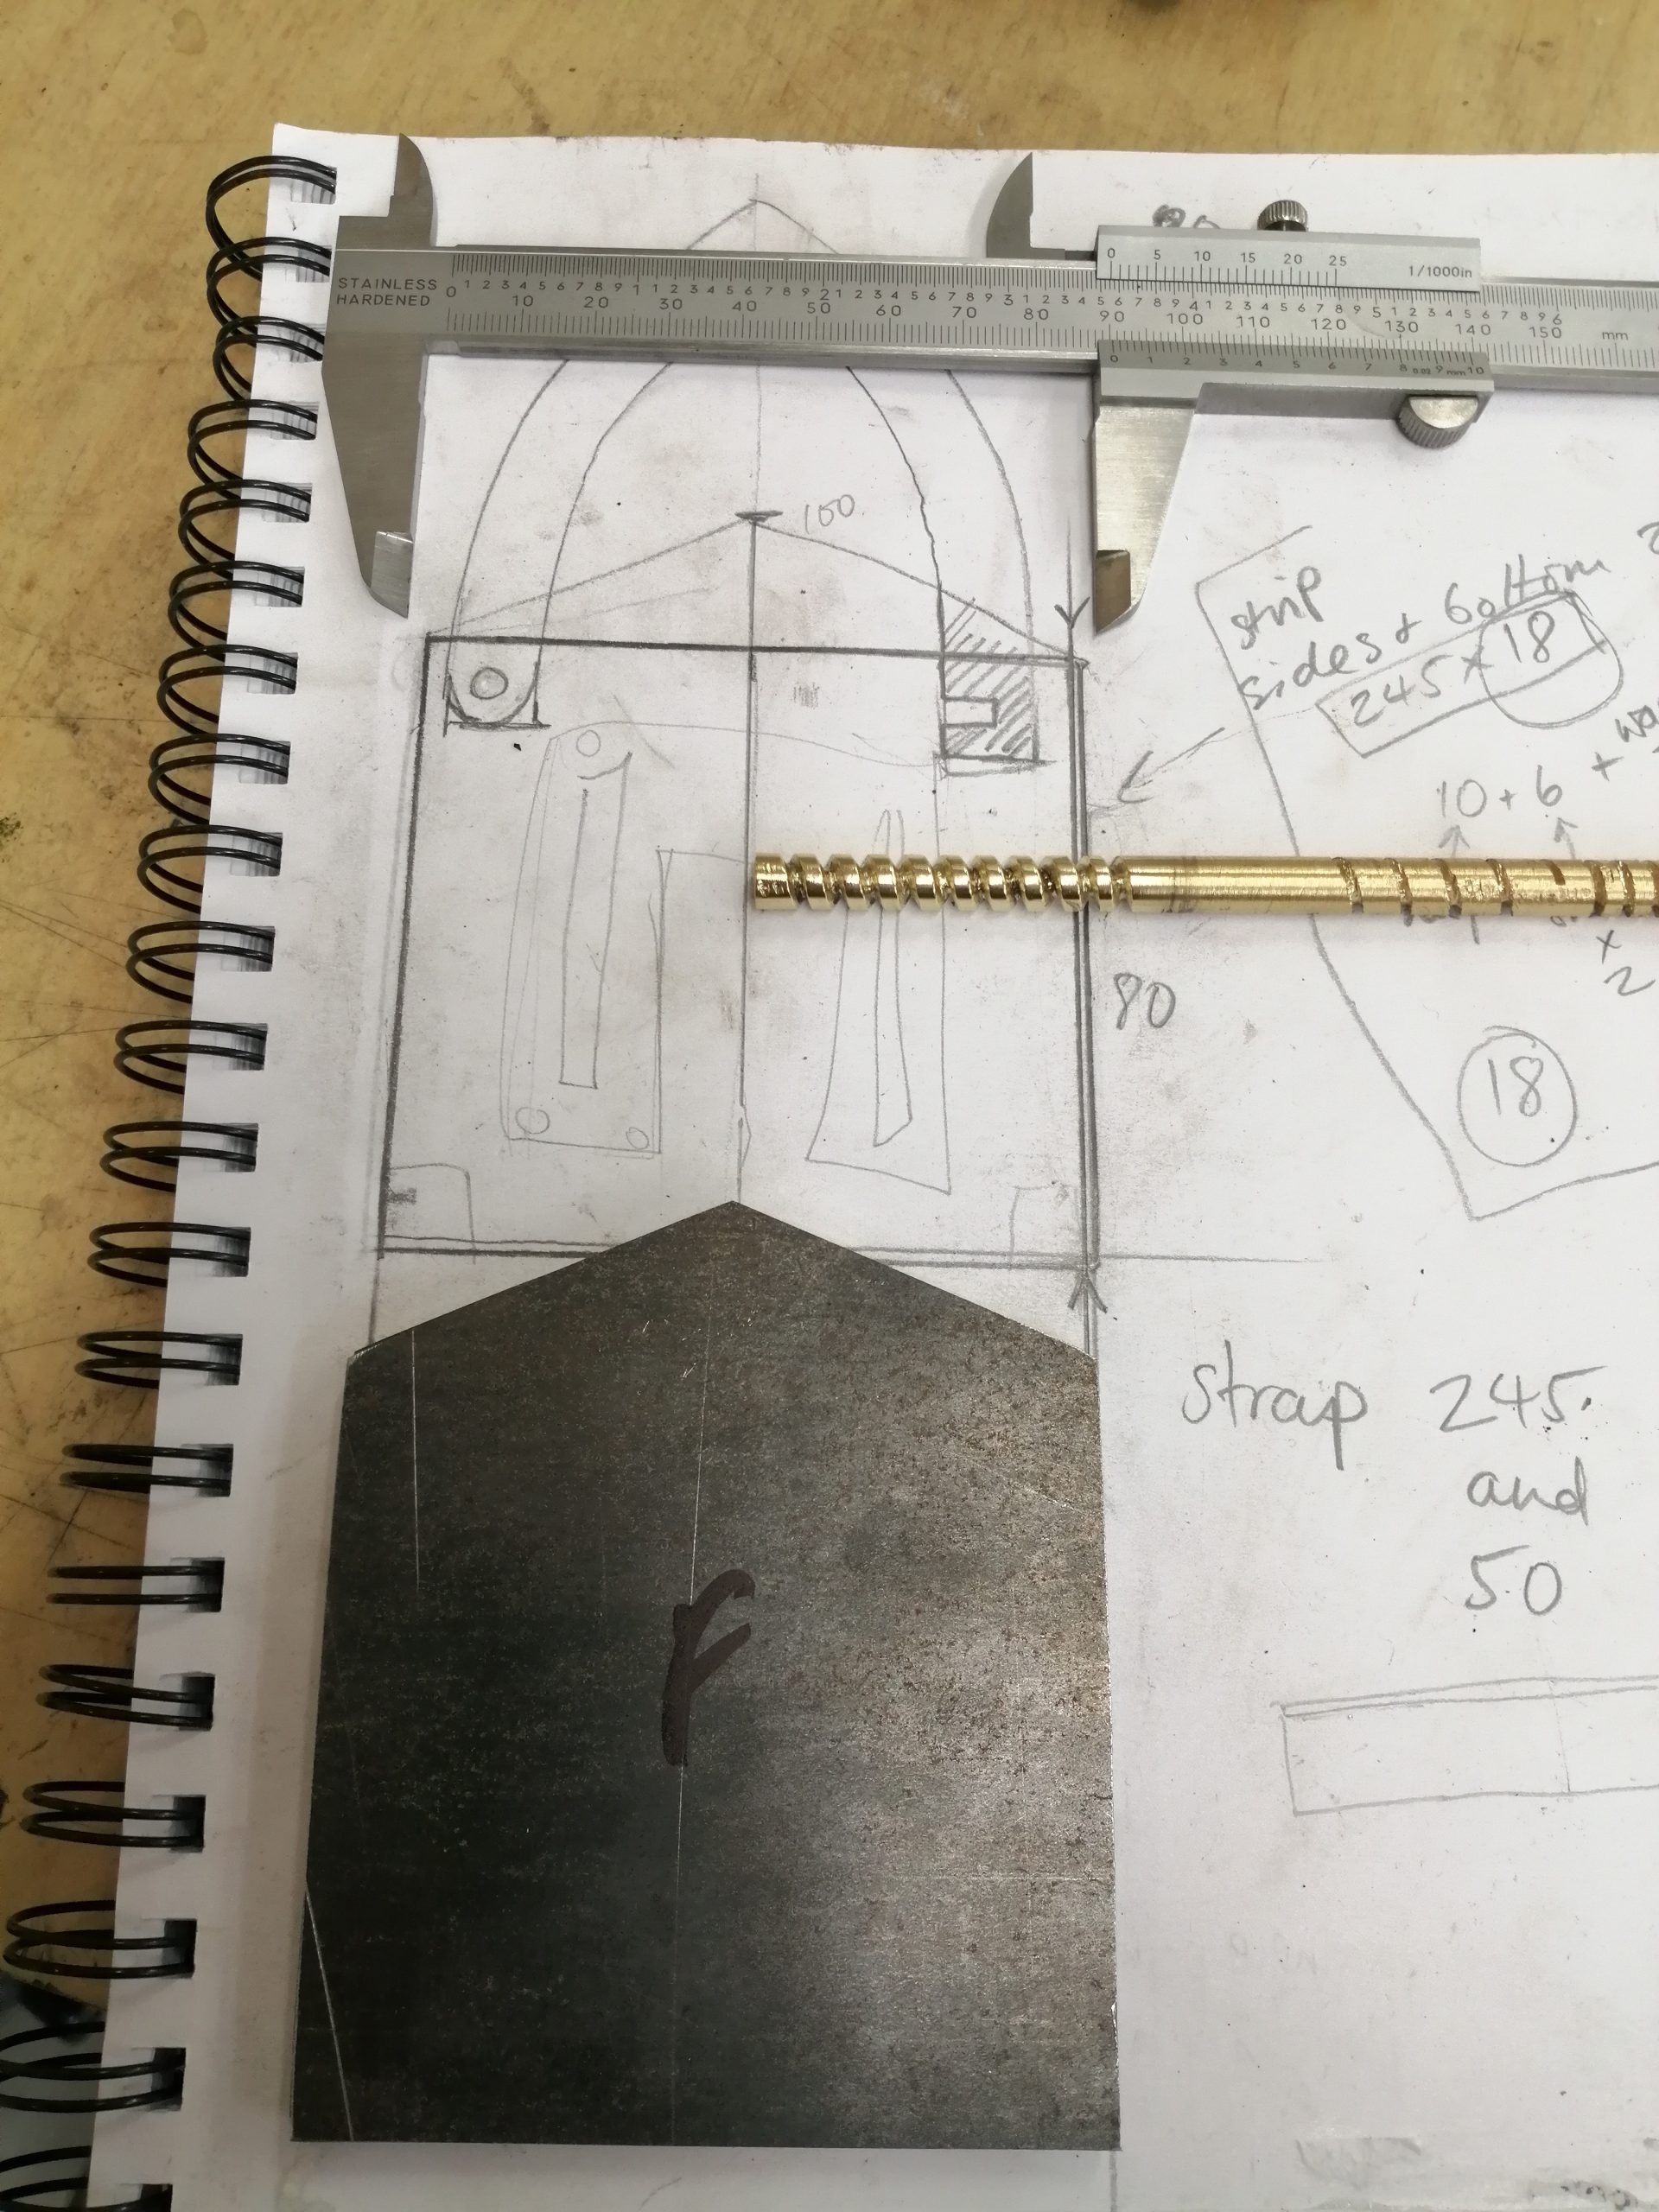
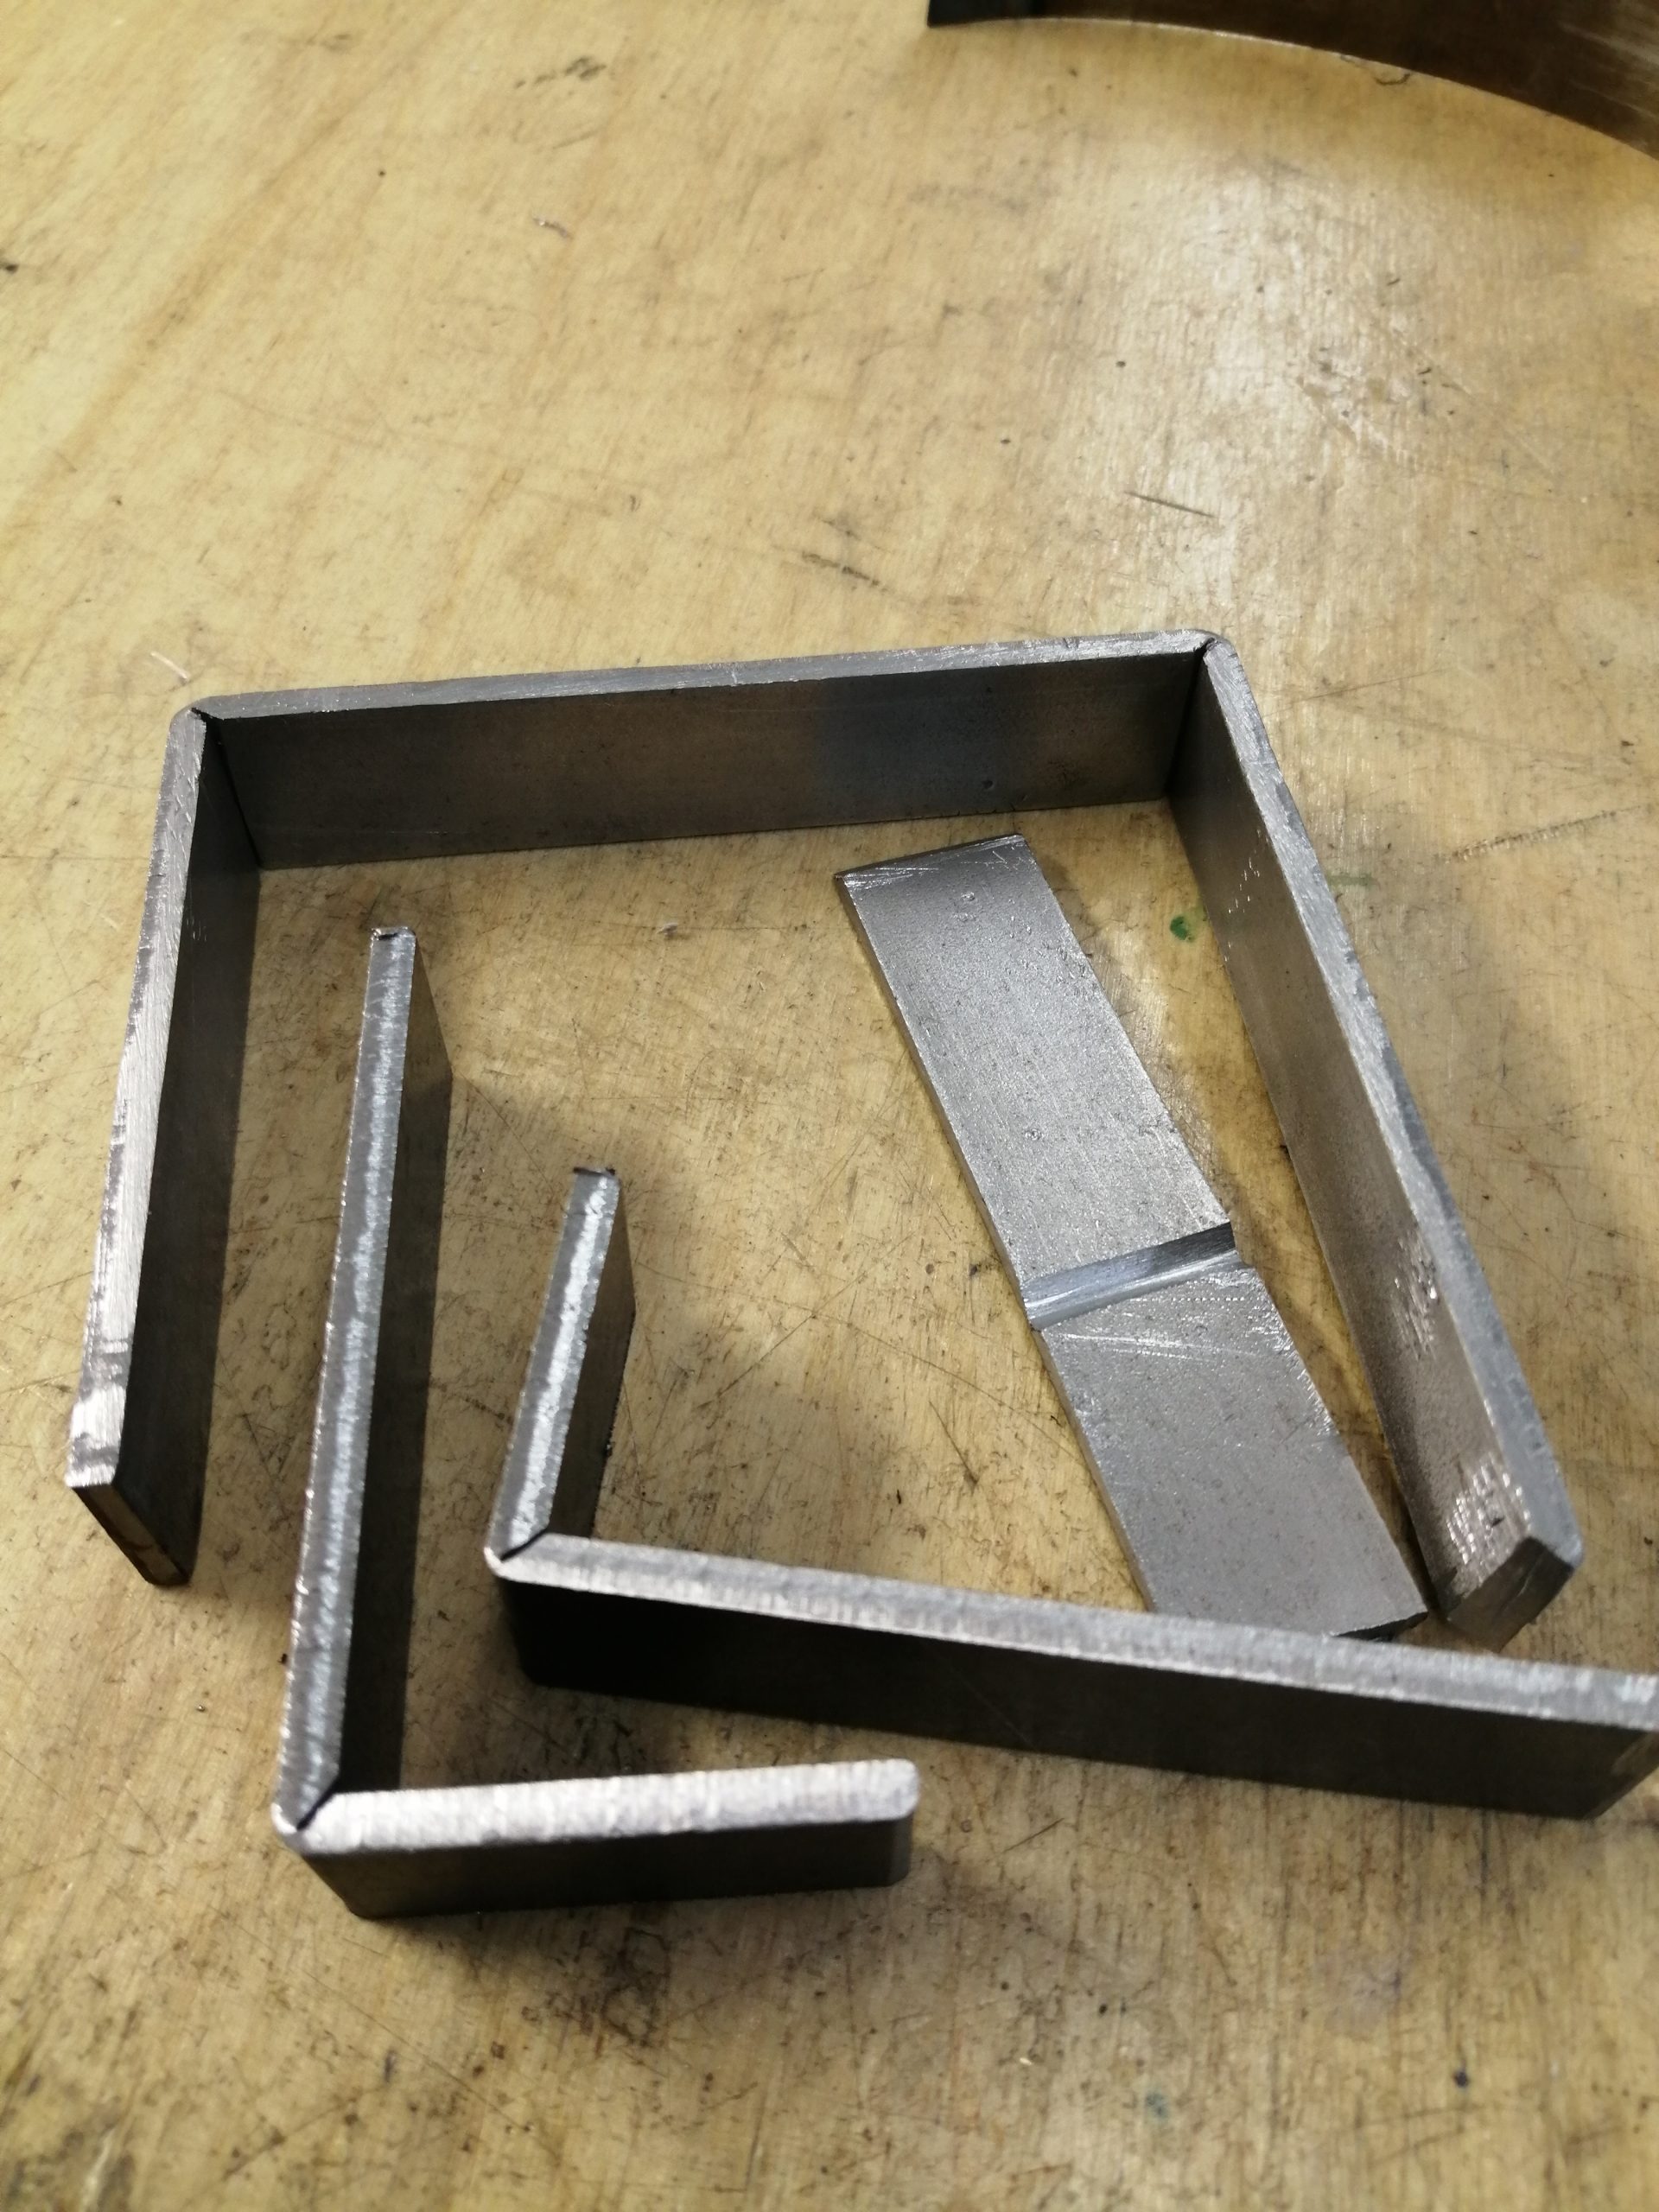
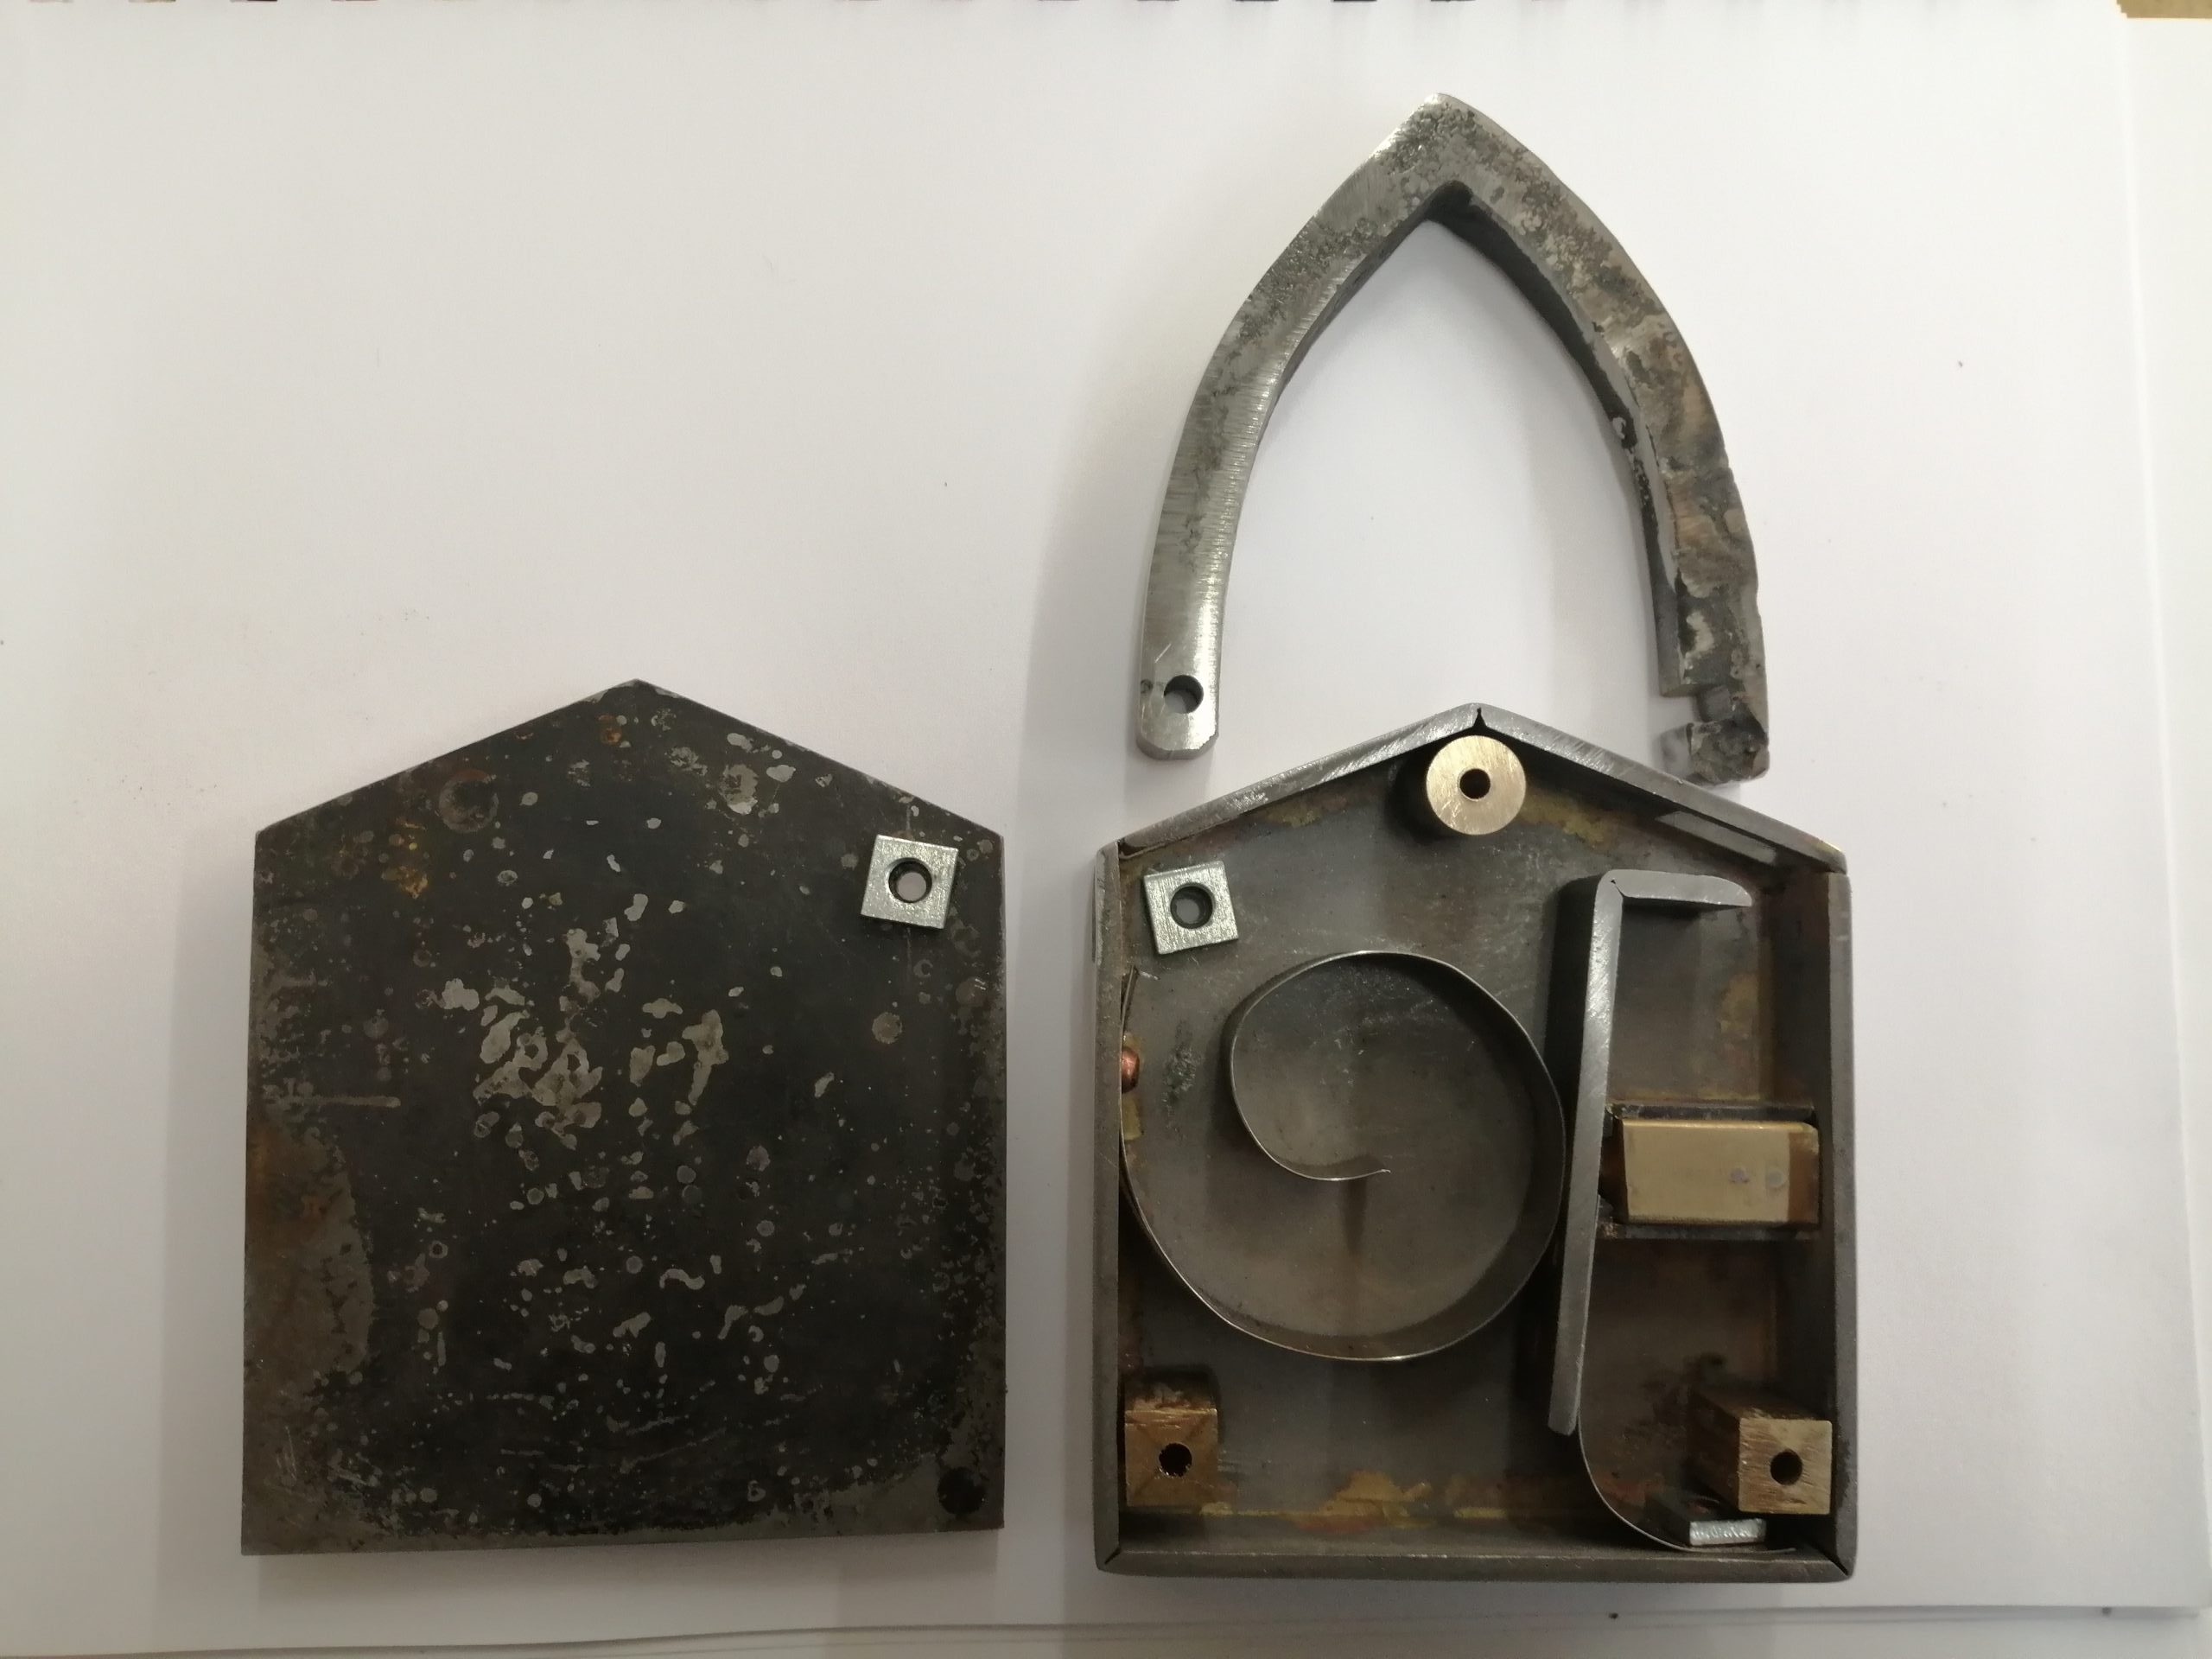
Once the dimentions were finalised using the card model, I cut the body and walls of the padlock from 3mm sheet steel, and created the corners by cutting part-way through the thickness of the steel. I filed a V shape into the cut and bent the steel to a 900 angle. The slot where the shackle fits was cut, and the rivet hole drilled into the shackle, where it would swing open and shut.
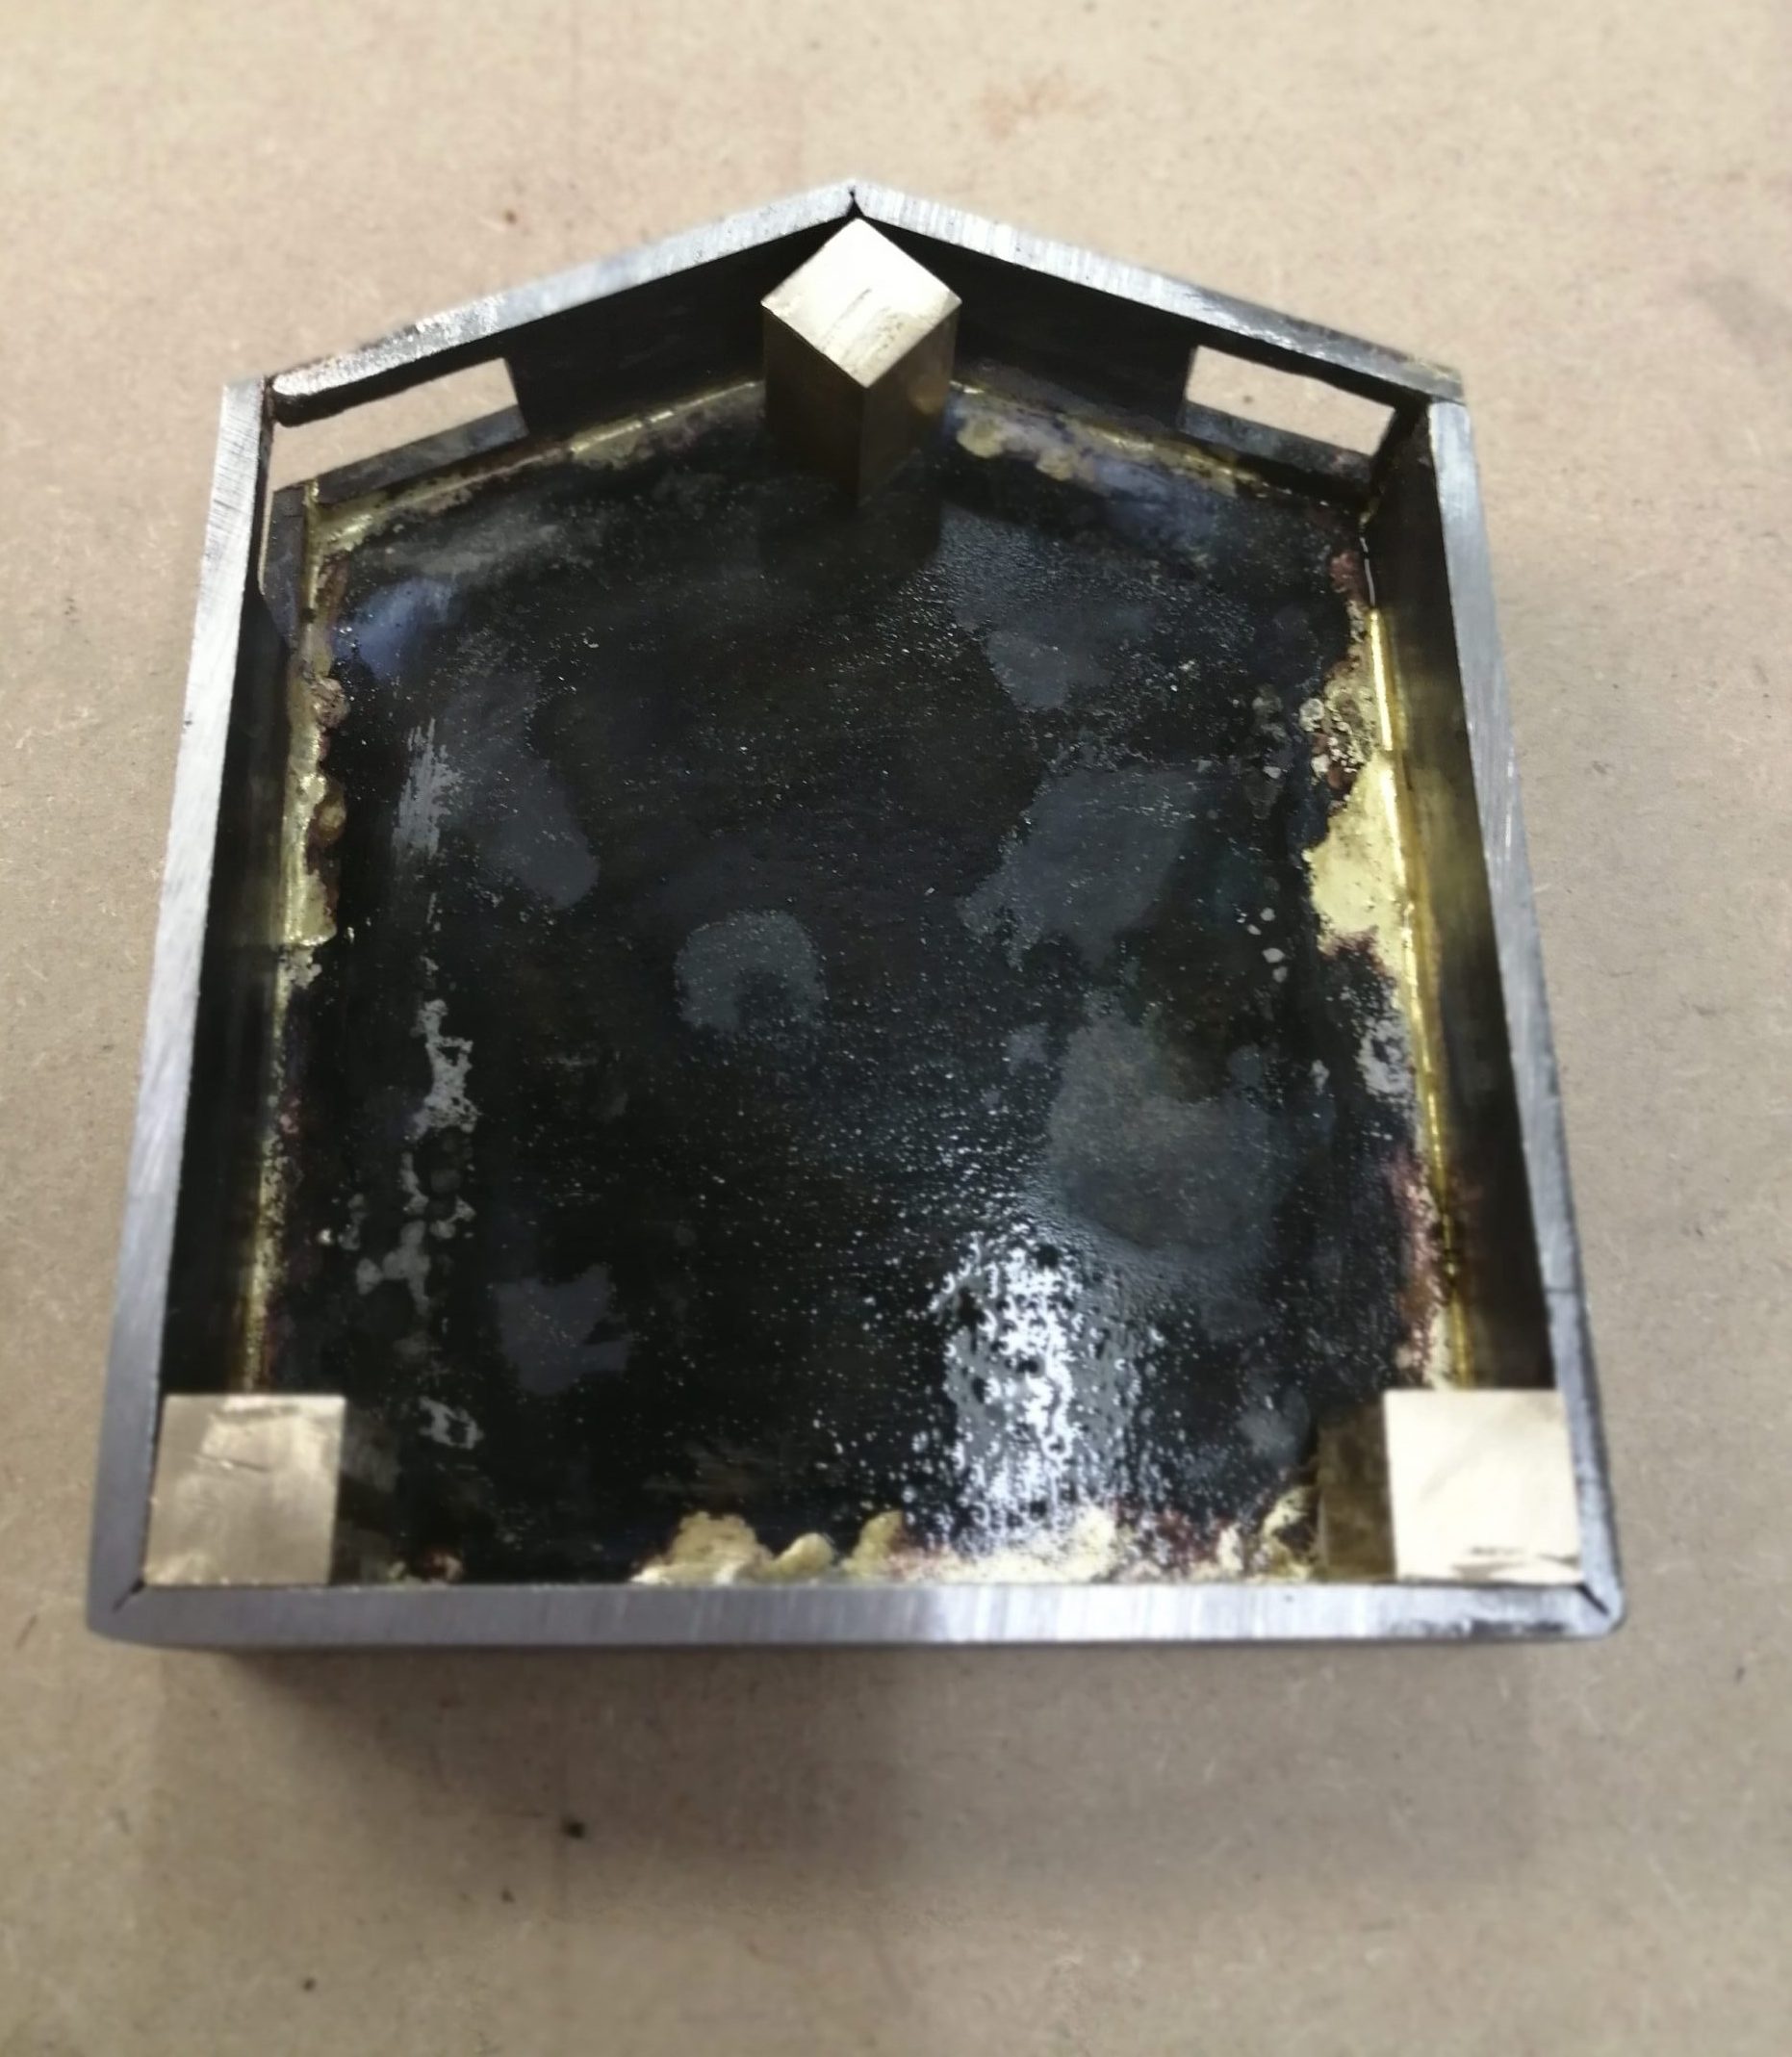
I attached the walls onto the back of the padlock, by placing them in position, clamping a metal bar across the top to keep them in place, and brazing them. Brazing is a metal joining technique which uses brass rod and I used an oxyacetylene torch. I decided to rivet the front of the padlock onto the body, as I had never made rivets before, so I placed tightly fitting 10mm square brass rod sections in each corner to support the rivets, which you can see in Fig 10.
THE KEY – MAKING A THREAD
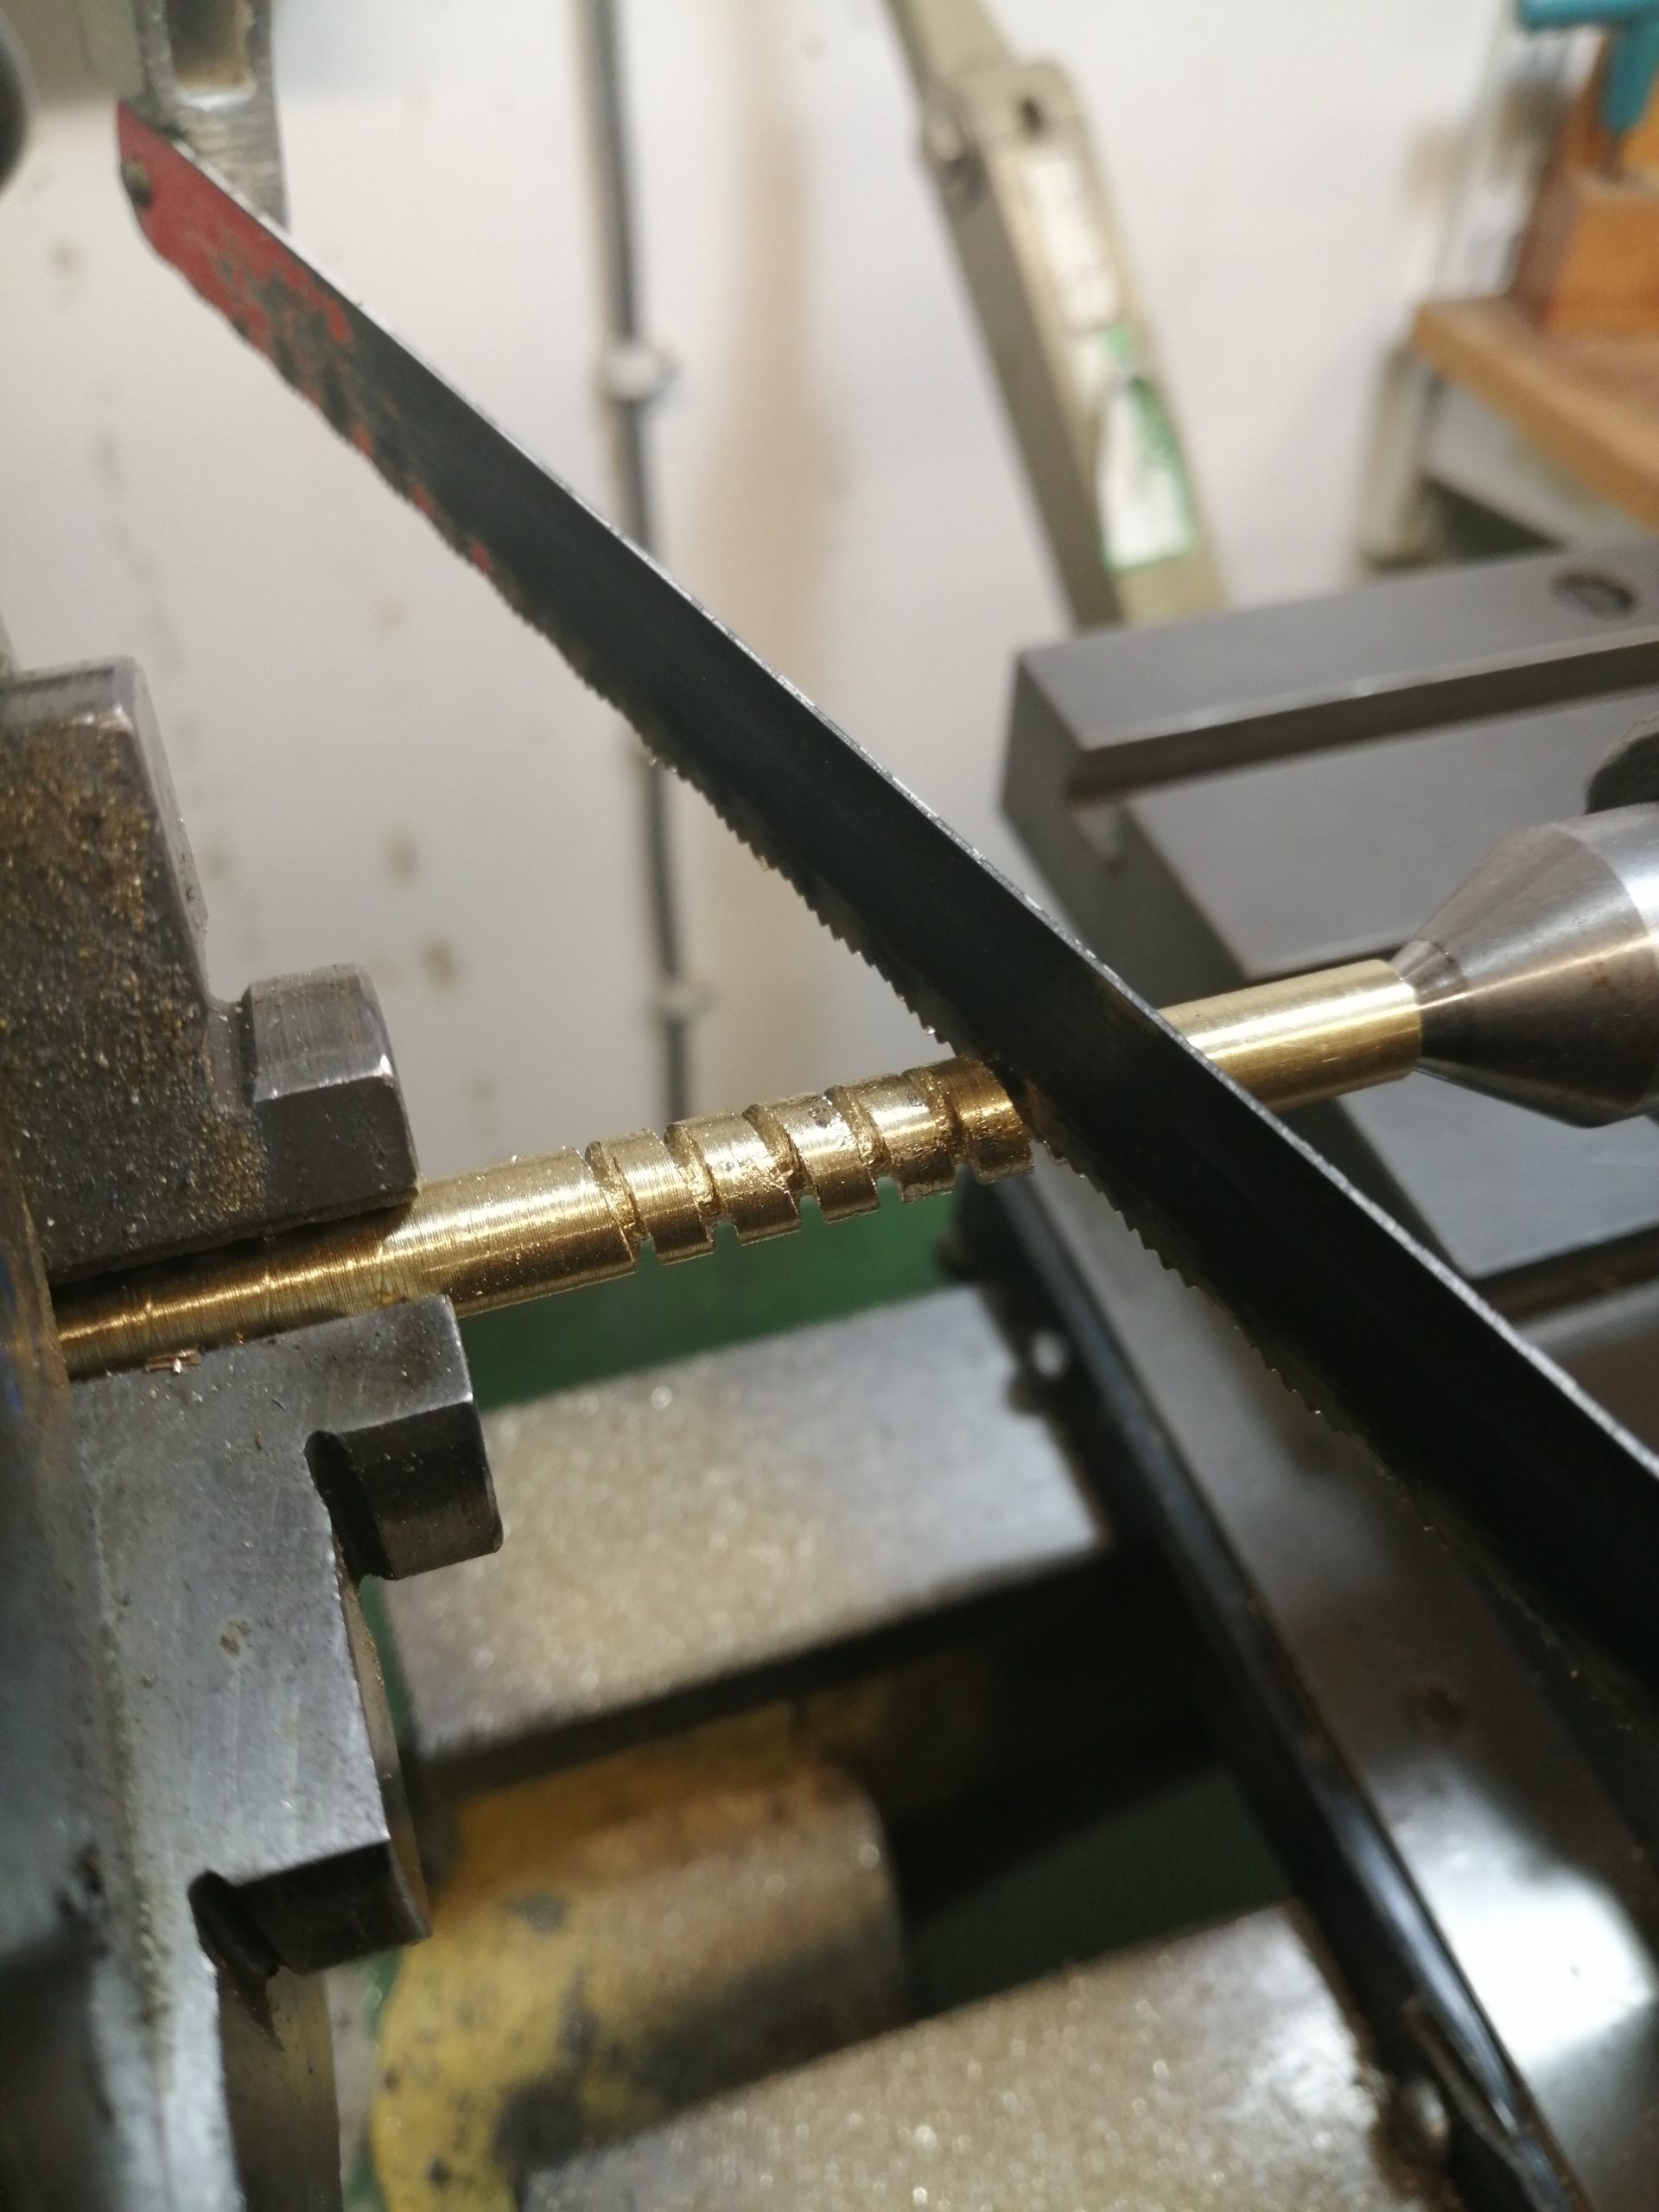
The threaded key was made using 6mm diam. brass rod. I cut the thread by holding it in place in the lathe, and carefully using a hacksaw, I cut the thread evenly along the rod while rotating the chuck by hand. (Fig 11.) The thread was kept at a 4mm distance on each rotation, then finished using needle files and polishing mops to enable smooth operation.

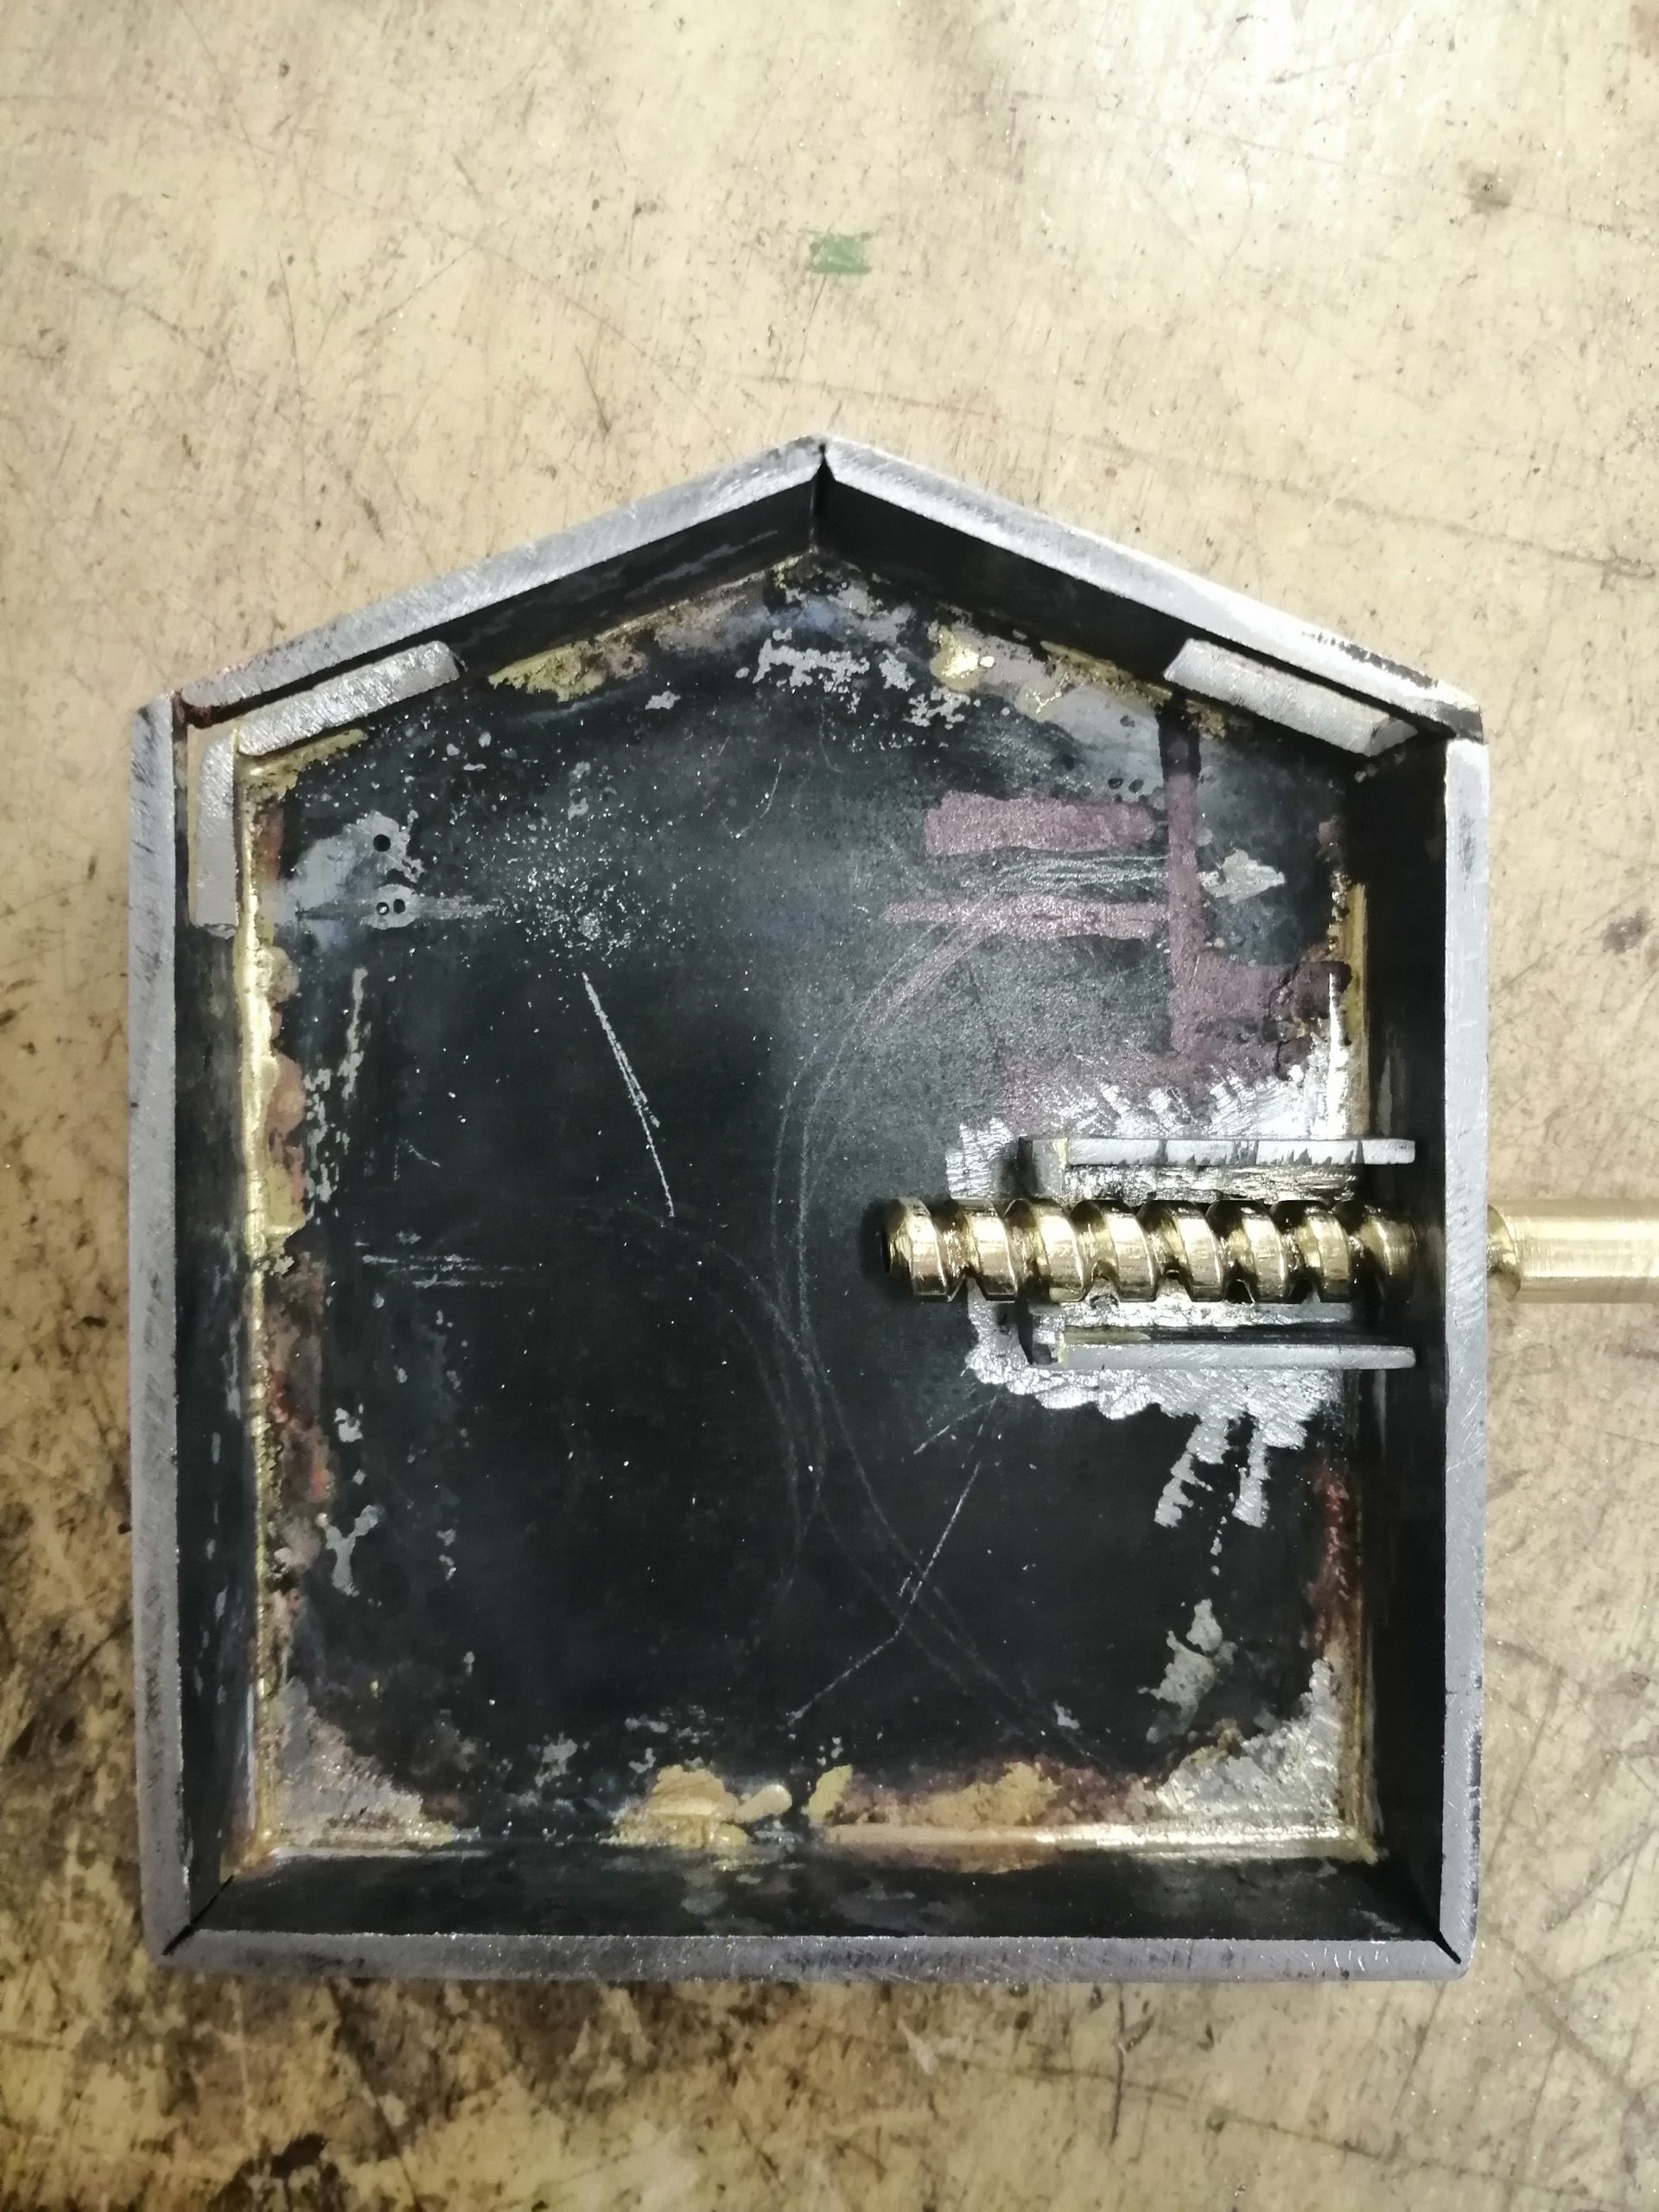
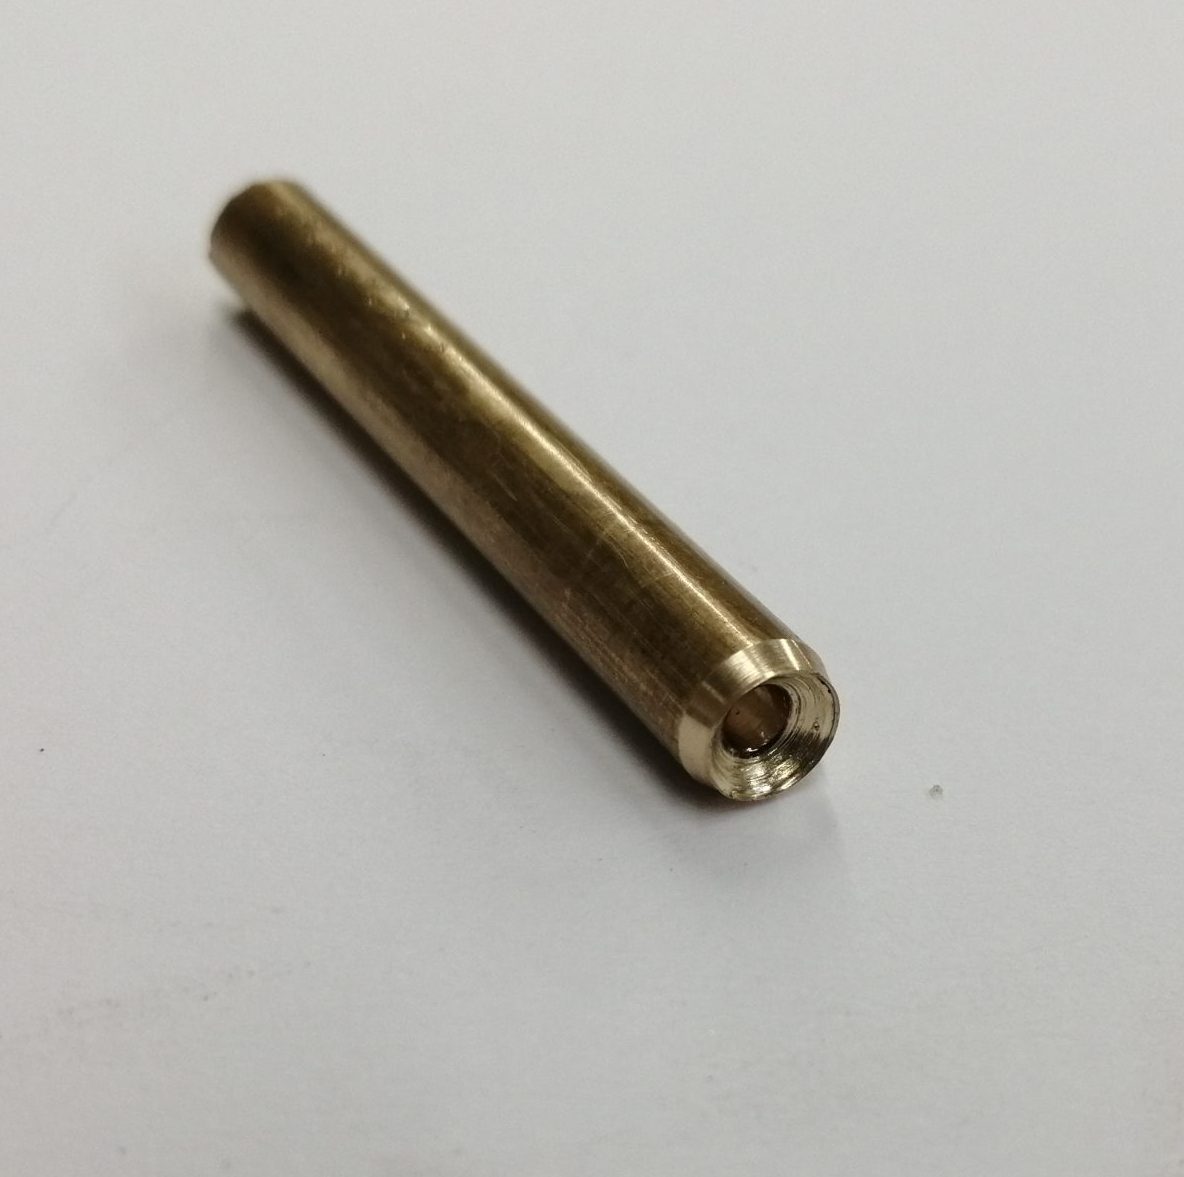
The interior key block (which the key would fit into) was made from 12mm square brass bar, with a 7.5mm hole drilled through the centre for the key, and the guide pins for the thread were made using medium mild steel ‘taper pins’. 2 x holes were drilled into the key block 4mm apart for the threaded key to run along and the pins were inserted into the holes and tapped in until they were firmly fitted. No solder was necessary. Fig 13.
INTERNAL MECHANISM – MECHANICAL ENGINEERING!
For the internal mechanism, I adapted the simple spring design (Fig 3) and tested several springs and levers to find the most effective and strongest version. The successful lever was made from a length of 3mm sheet steel, bent into an ‘L’ at the top which acted as the catch for the shackle. A small piece of spring steel was riveted to the bottom of the lever and the base of the padlock acting as a hinge for the lever, using a flush copper rivet. The shackle and lever were both chamfered at their point of contact to enable smooth operation when clicking the hasp into a lock position. Fig 14. The curled spring has enough strength to enable the lever to lock into position in the shackle, and this was also riveted into position using flush copper rivets.
DECORATIVE FRONT– SOLDERING AND ETCHING
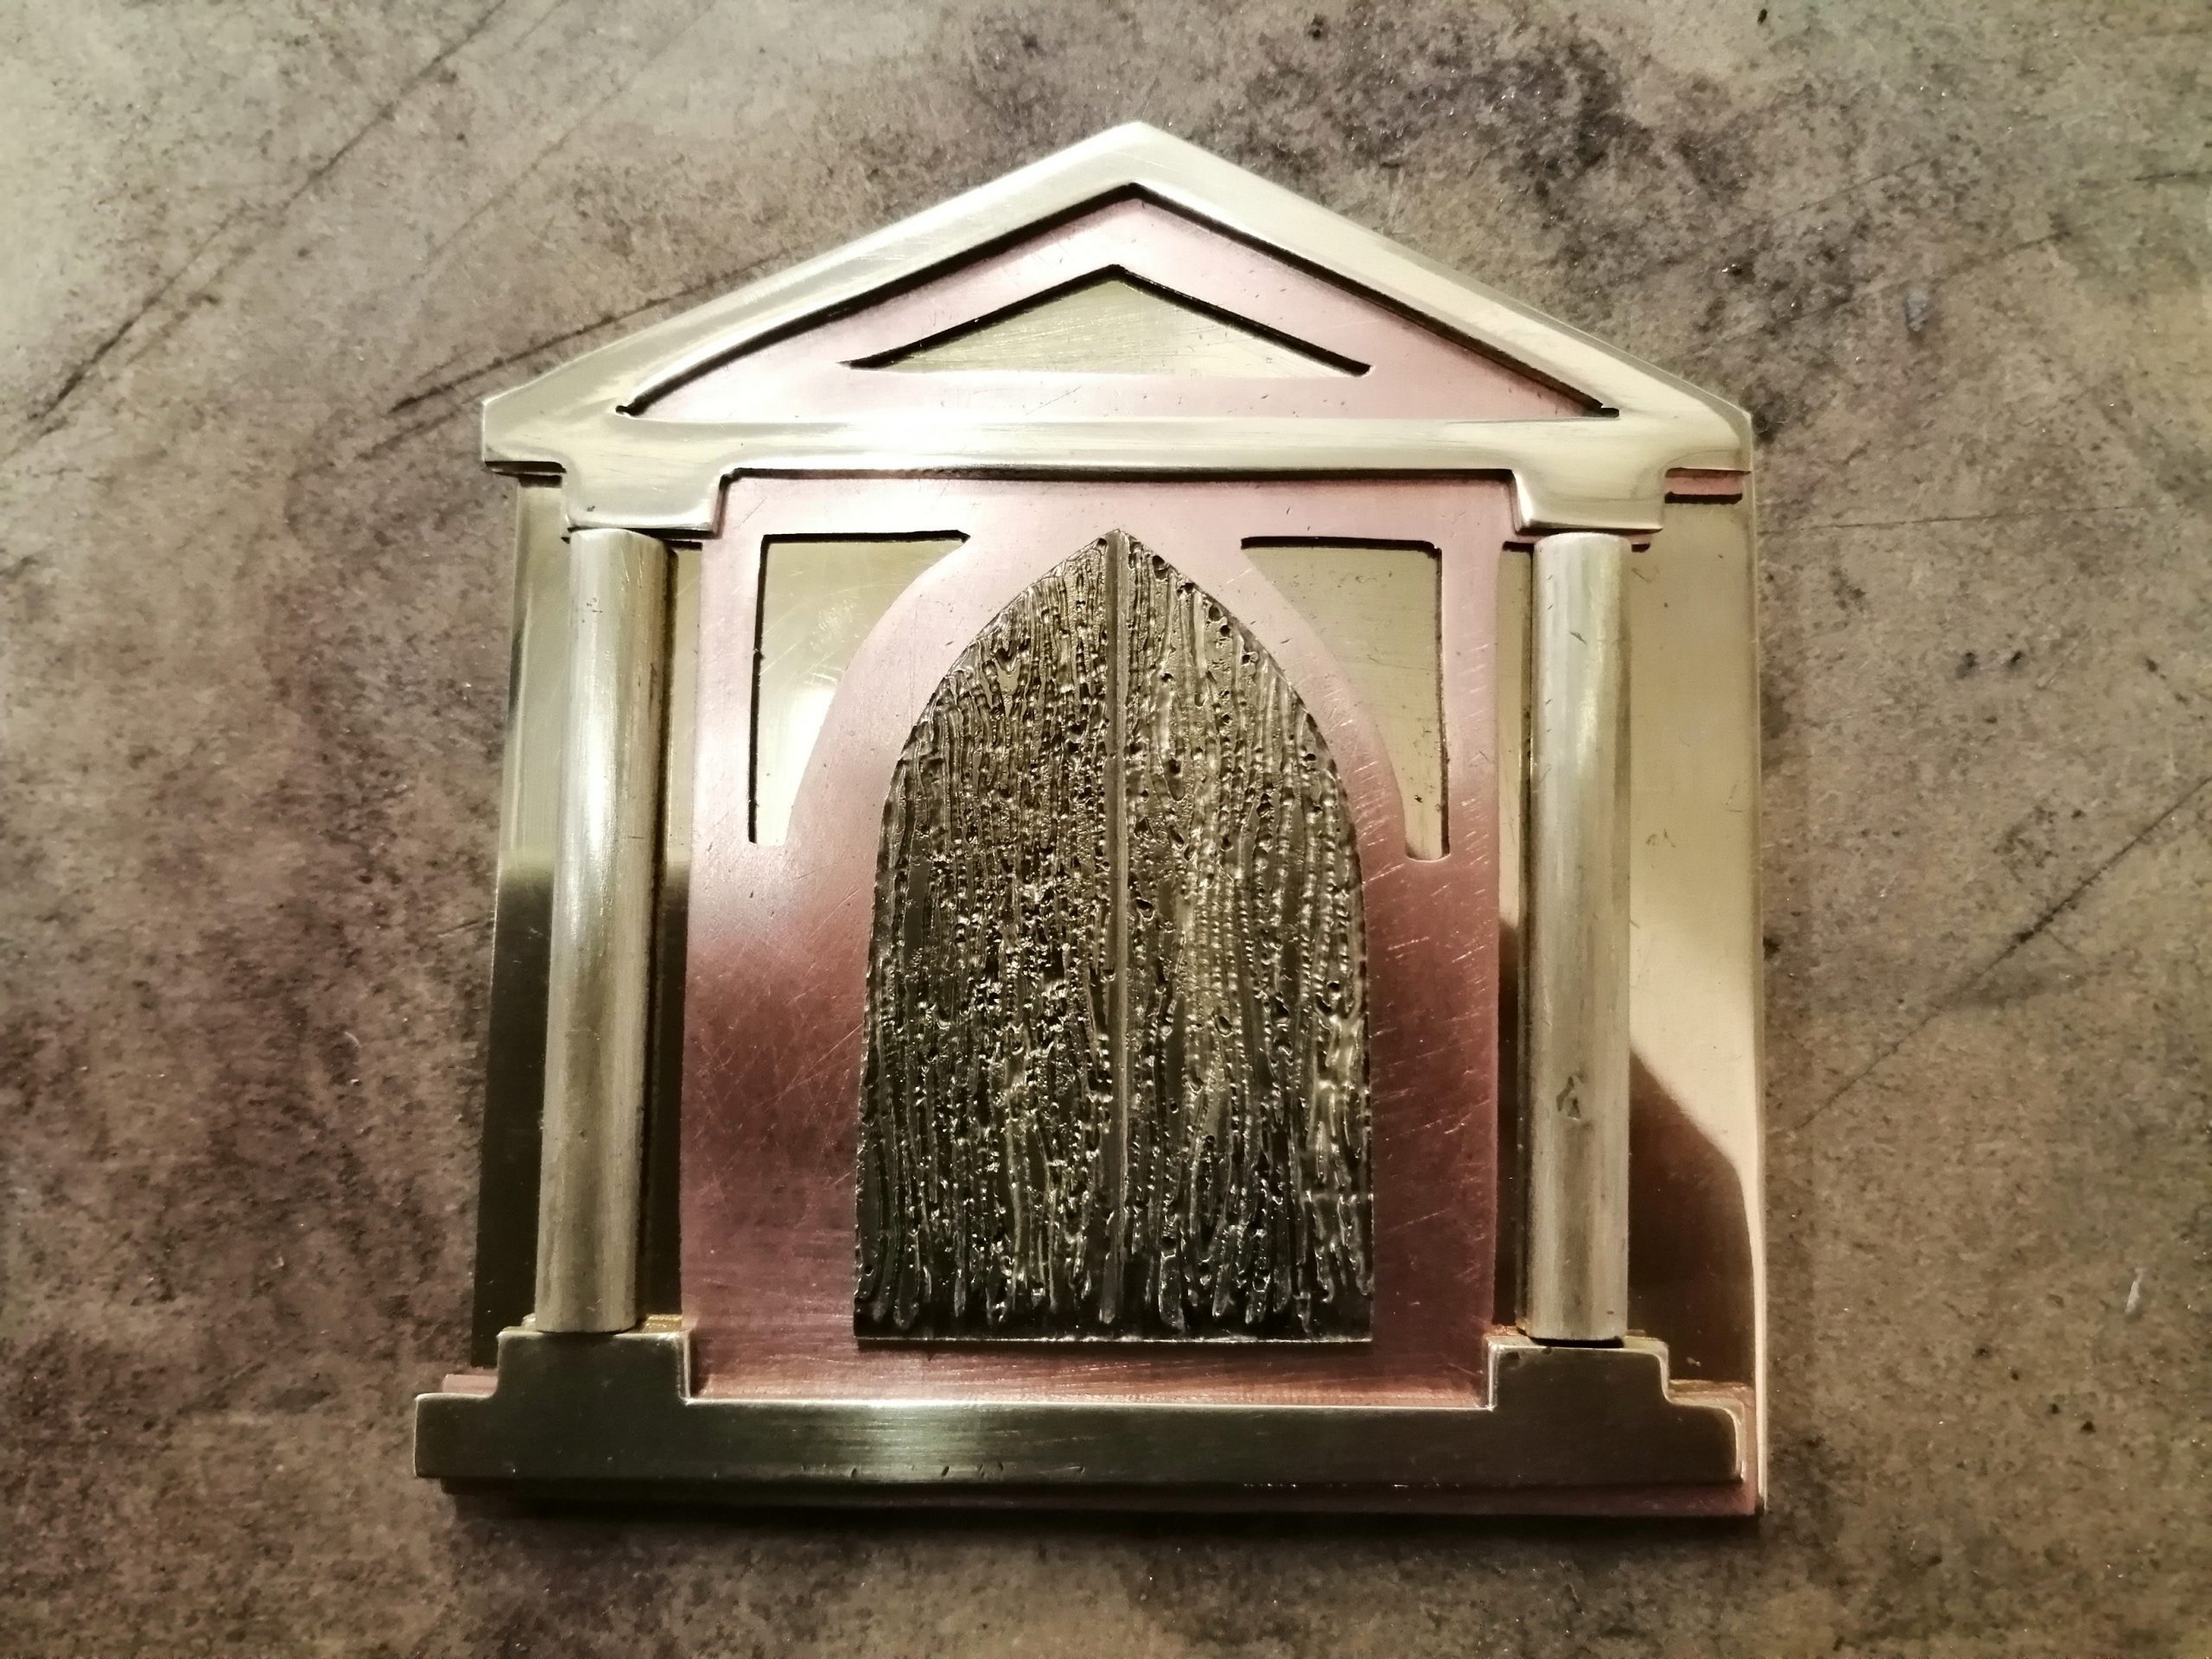
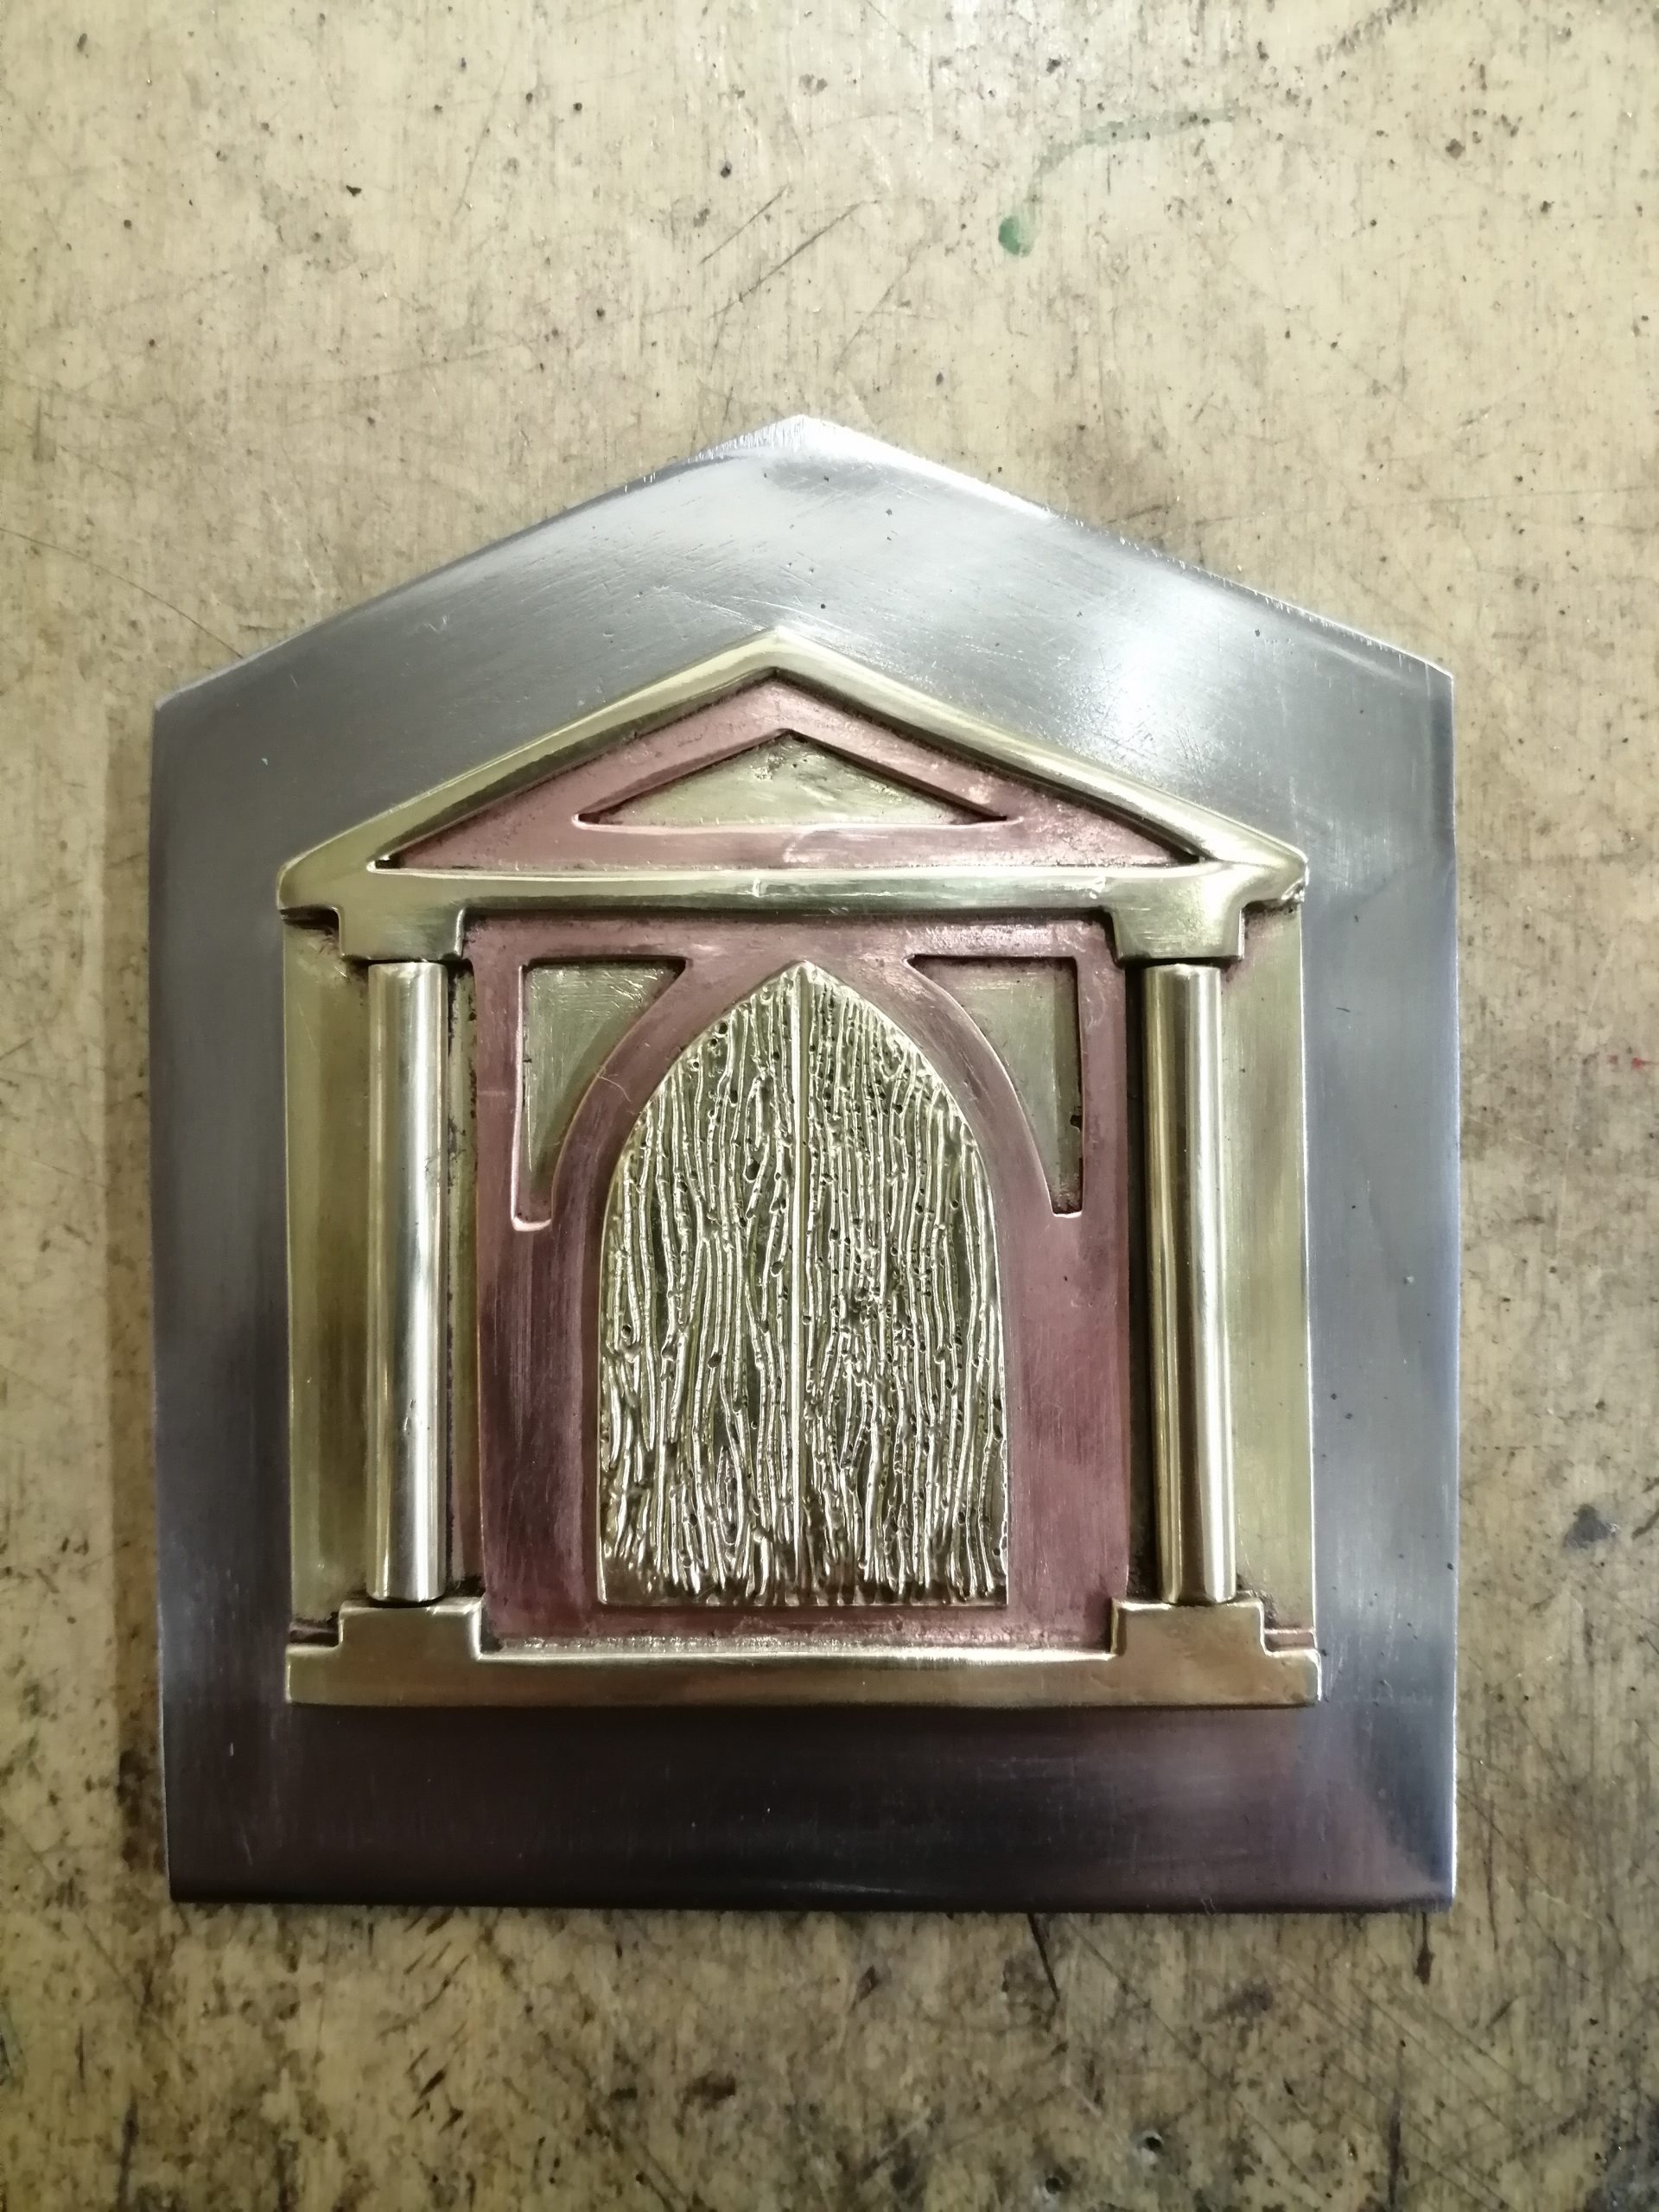
The decorative door design was made using layered brass and copper sheet, in the style of a classical doorway. The shapes were cut using a piercing saw and the edges filed smooth. The wood grain effect on the brass door in the centre was etched using a 40 % ferric chloride solution in a heated bath, after scratching a wood pattern into the resist which was a solvent based ink. Once finished, these elements were placed in position on top of each other and soldered together, then the whole piece was soldered onto the front steel plate and finished off. Fig 15 and 16.
RIVETS AND DOME HEAD RIVETING TOOL
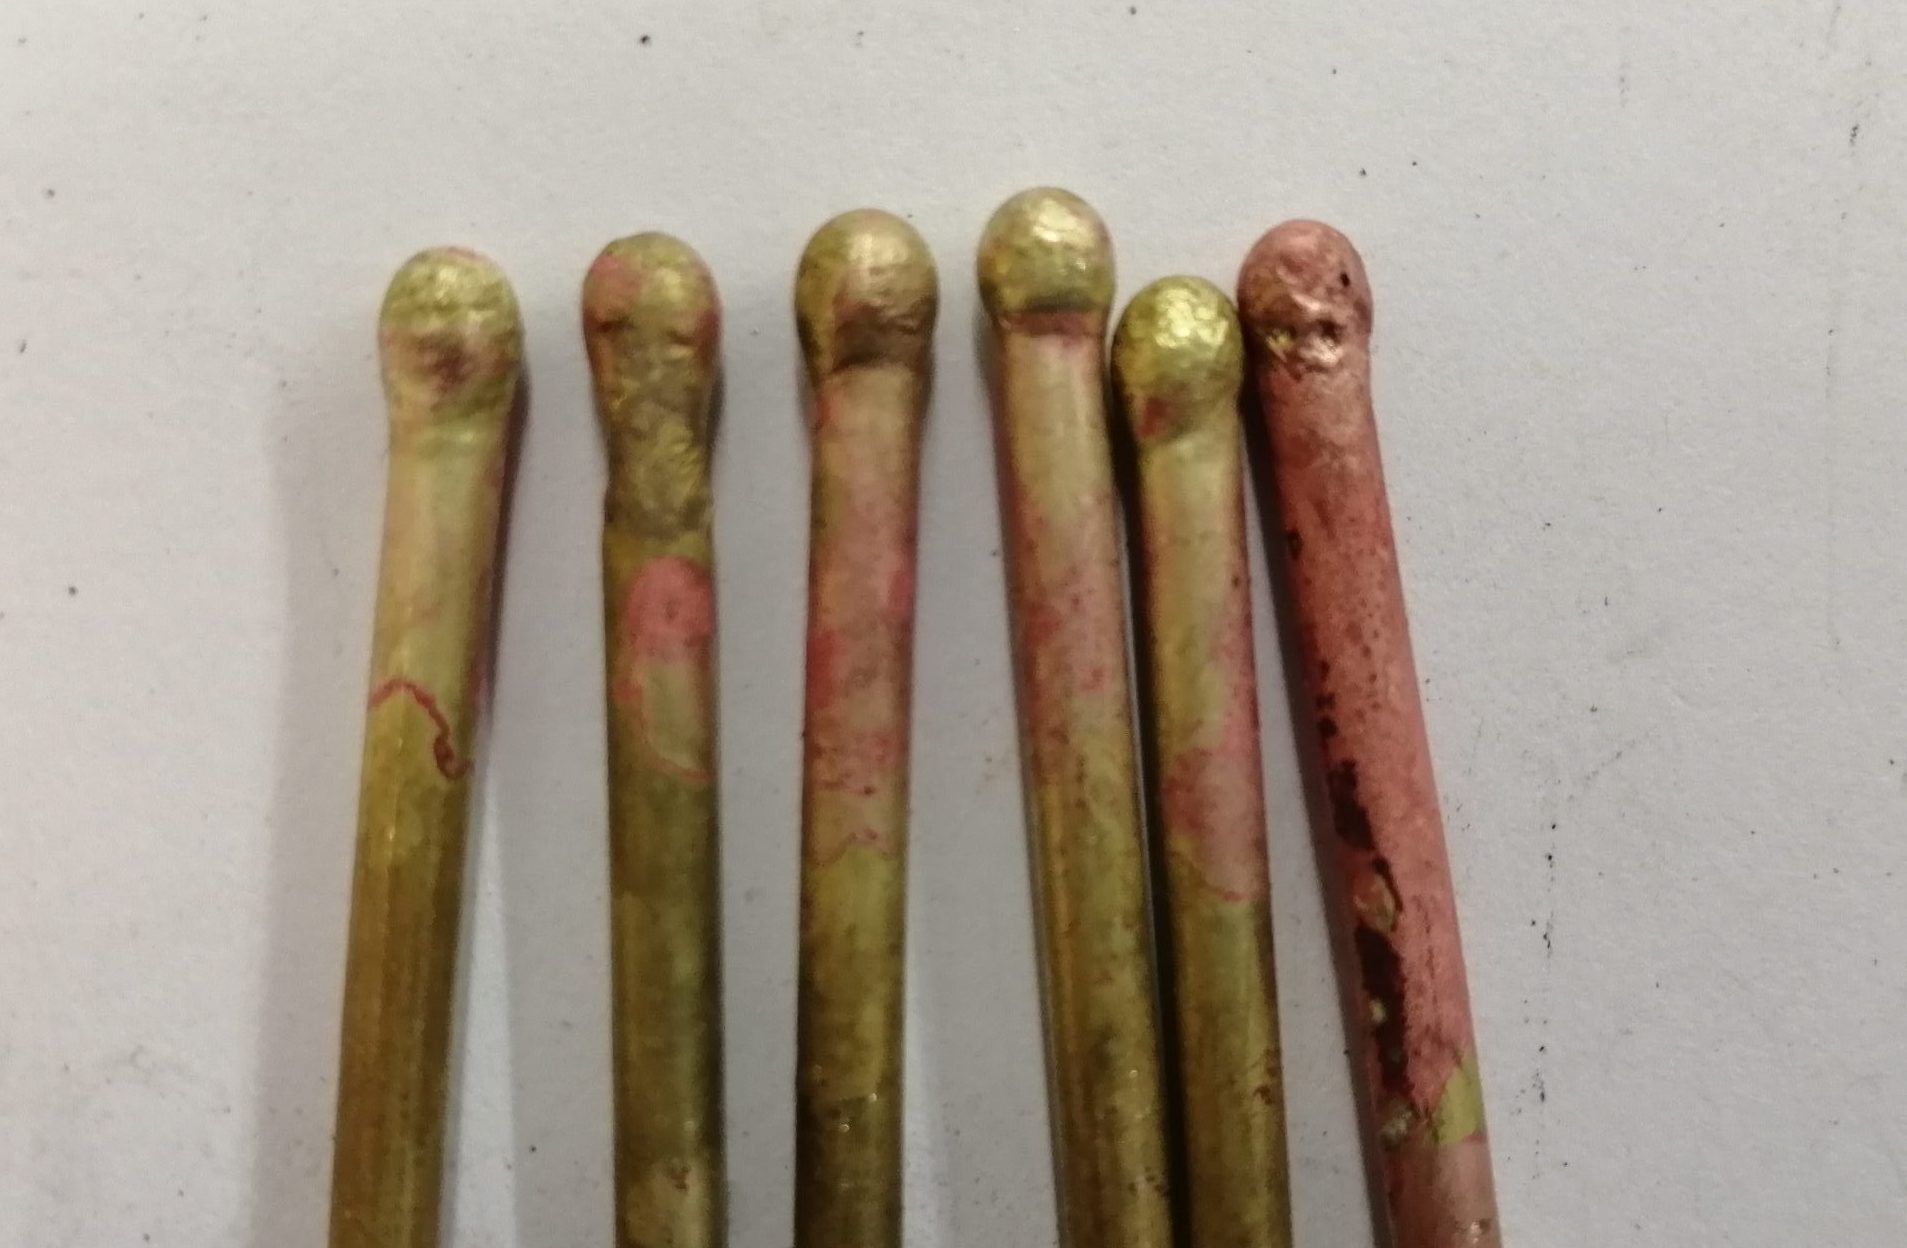
The front plate of the padlock was to be riveted onto the body, and this was my first attempt at making rivets! I used 3mm brass rod, coated one end of the rod in Easy-floTM flux and gently heated that end until the flux changed to glass, then intensified the heat to create the rivet head. This took some practice, but finally I achieved 6 useable rivets. I then created a riveting tool using brass rod, with a rounded indentation in the end, to keep the rivet heads round when hammering them into place. Fig 17.
FINISHING OFF THE BODY AND KEY
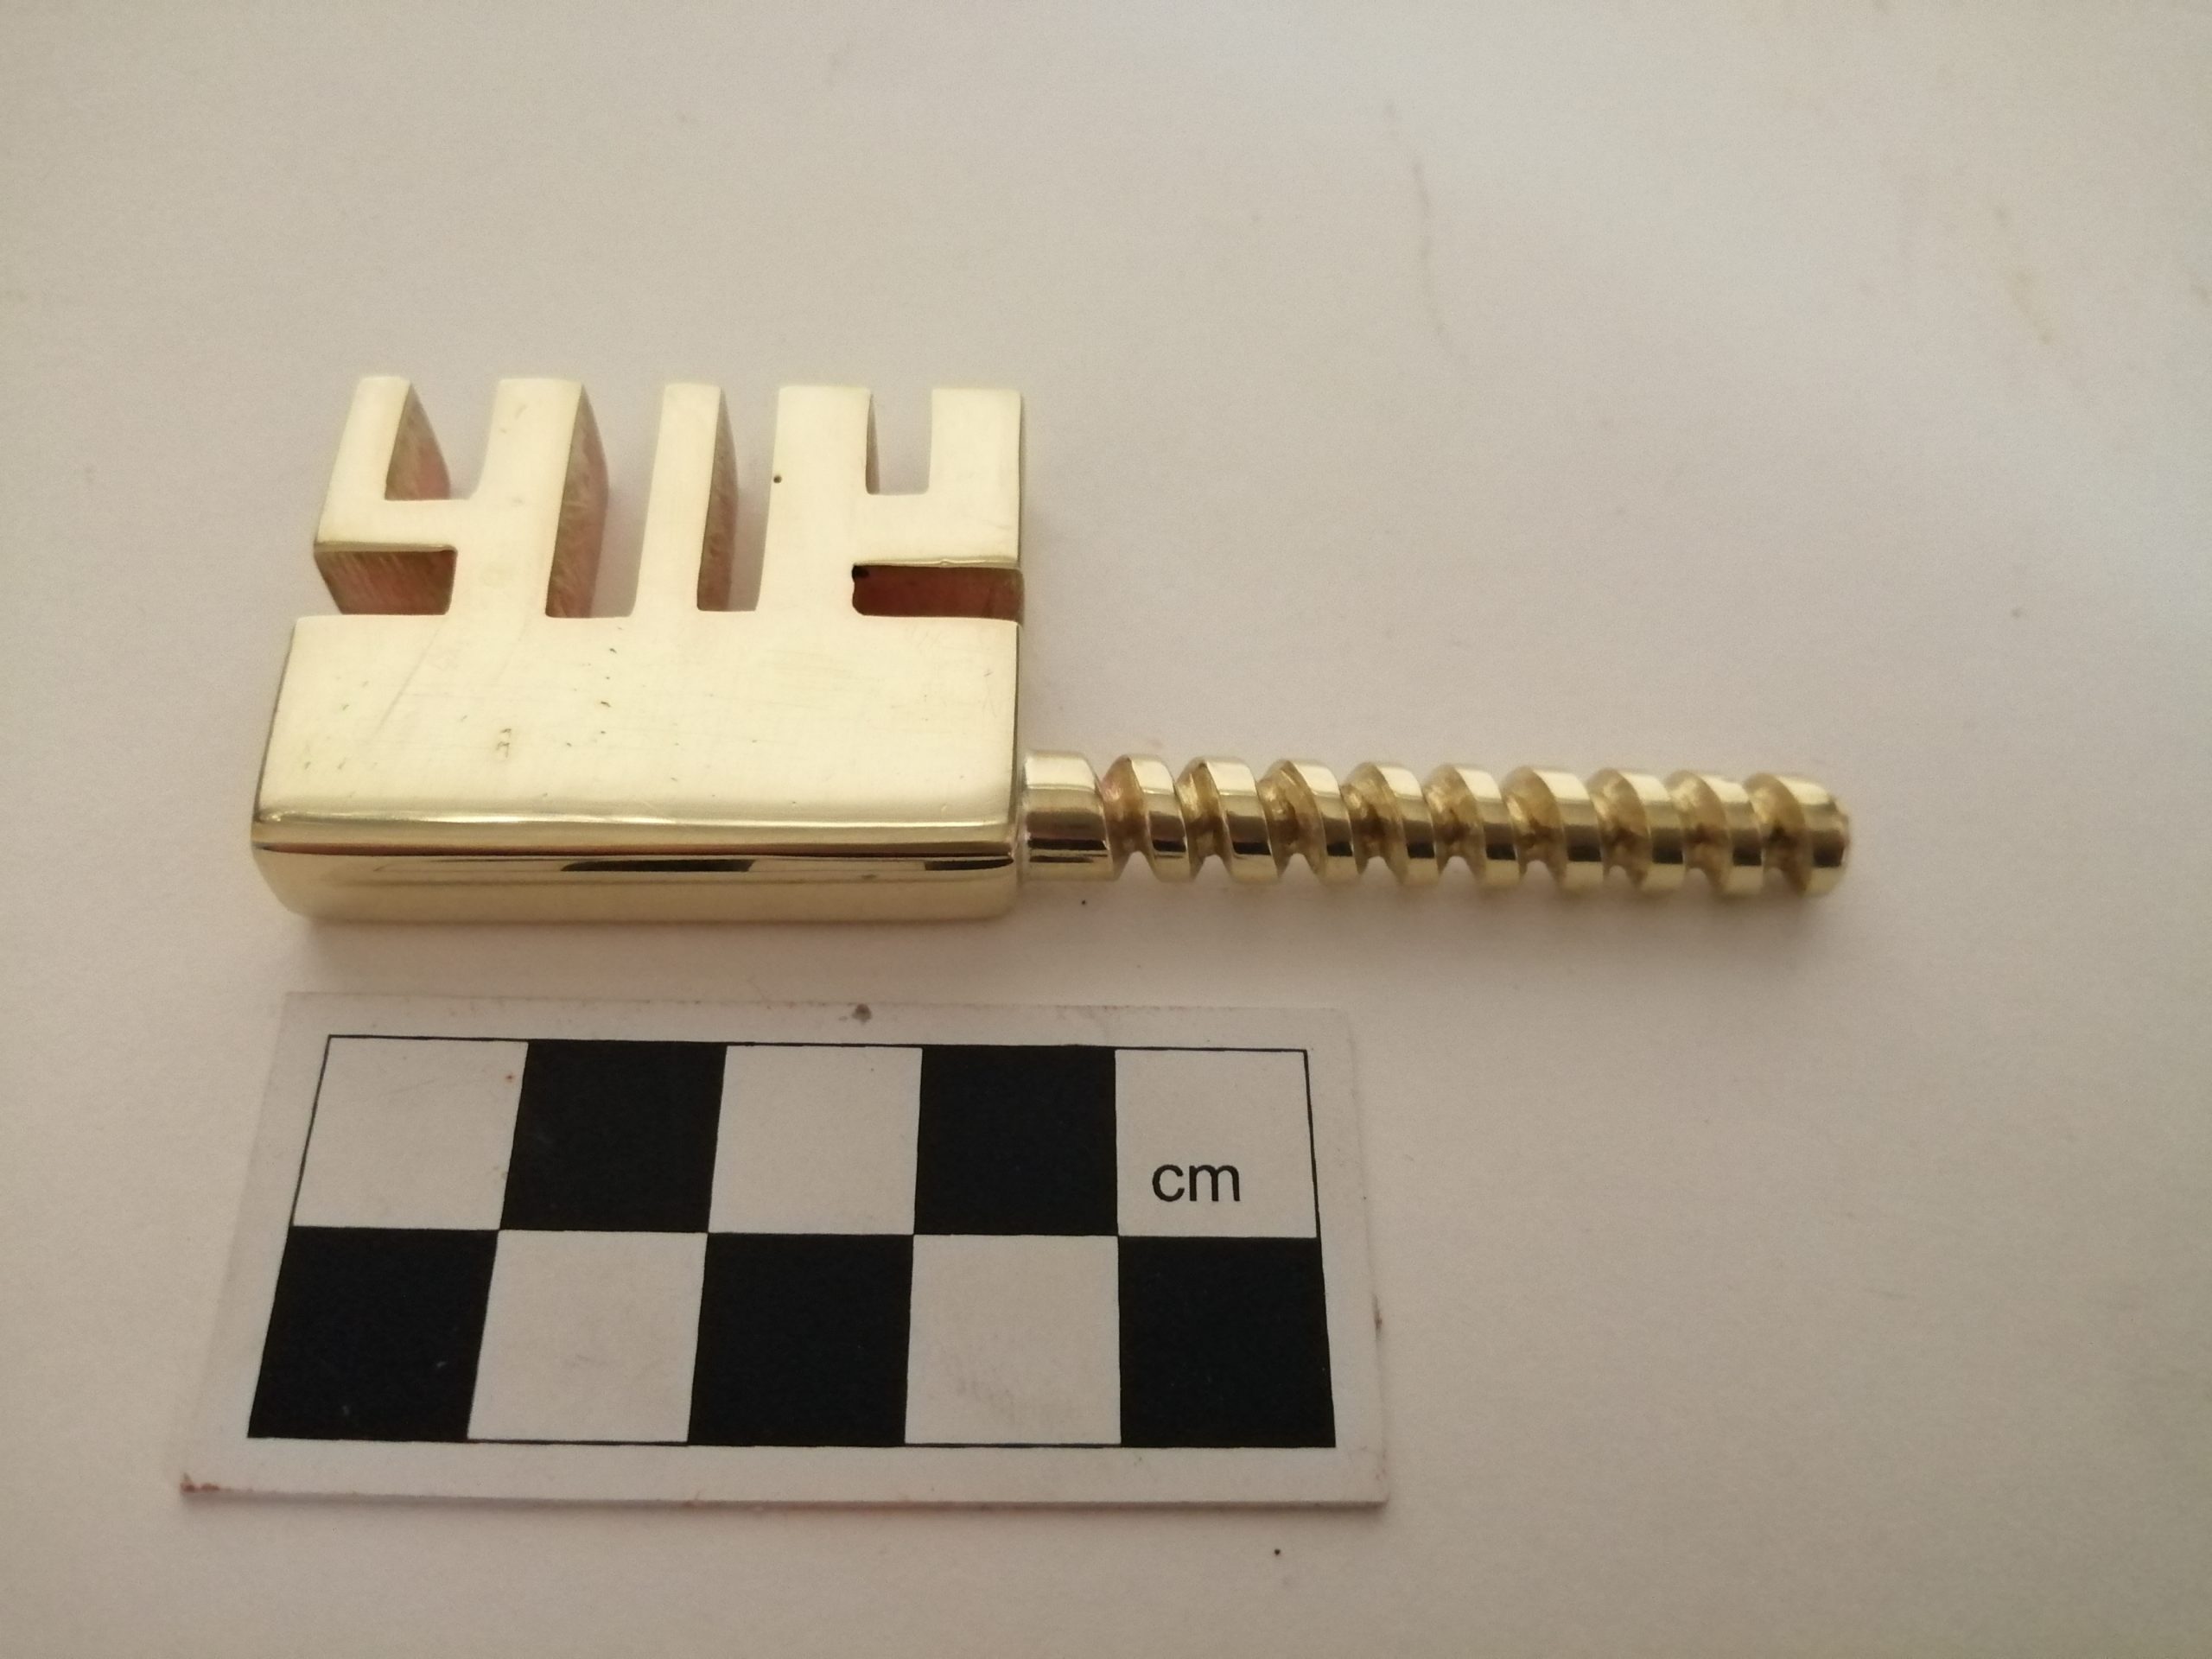
The padlock was riveted together with round heads on the front, and filed flush on the back. The whole padlock was then brushed with wire wool and polished. To finish the key, I used 9mm brass plate for the bow (handle) and decided on a design which resembled the ‘bit’ of a key. I cut the ‘wards’ using the bandsaw and piercing saw, and drilled a 7.5mm hole into one edge for the threaded key stem, soldering it into place. Fig 18.


SUMMARY
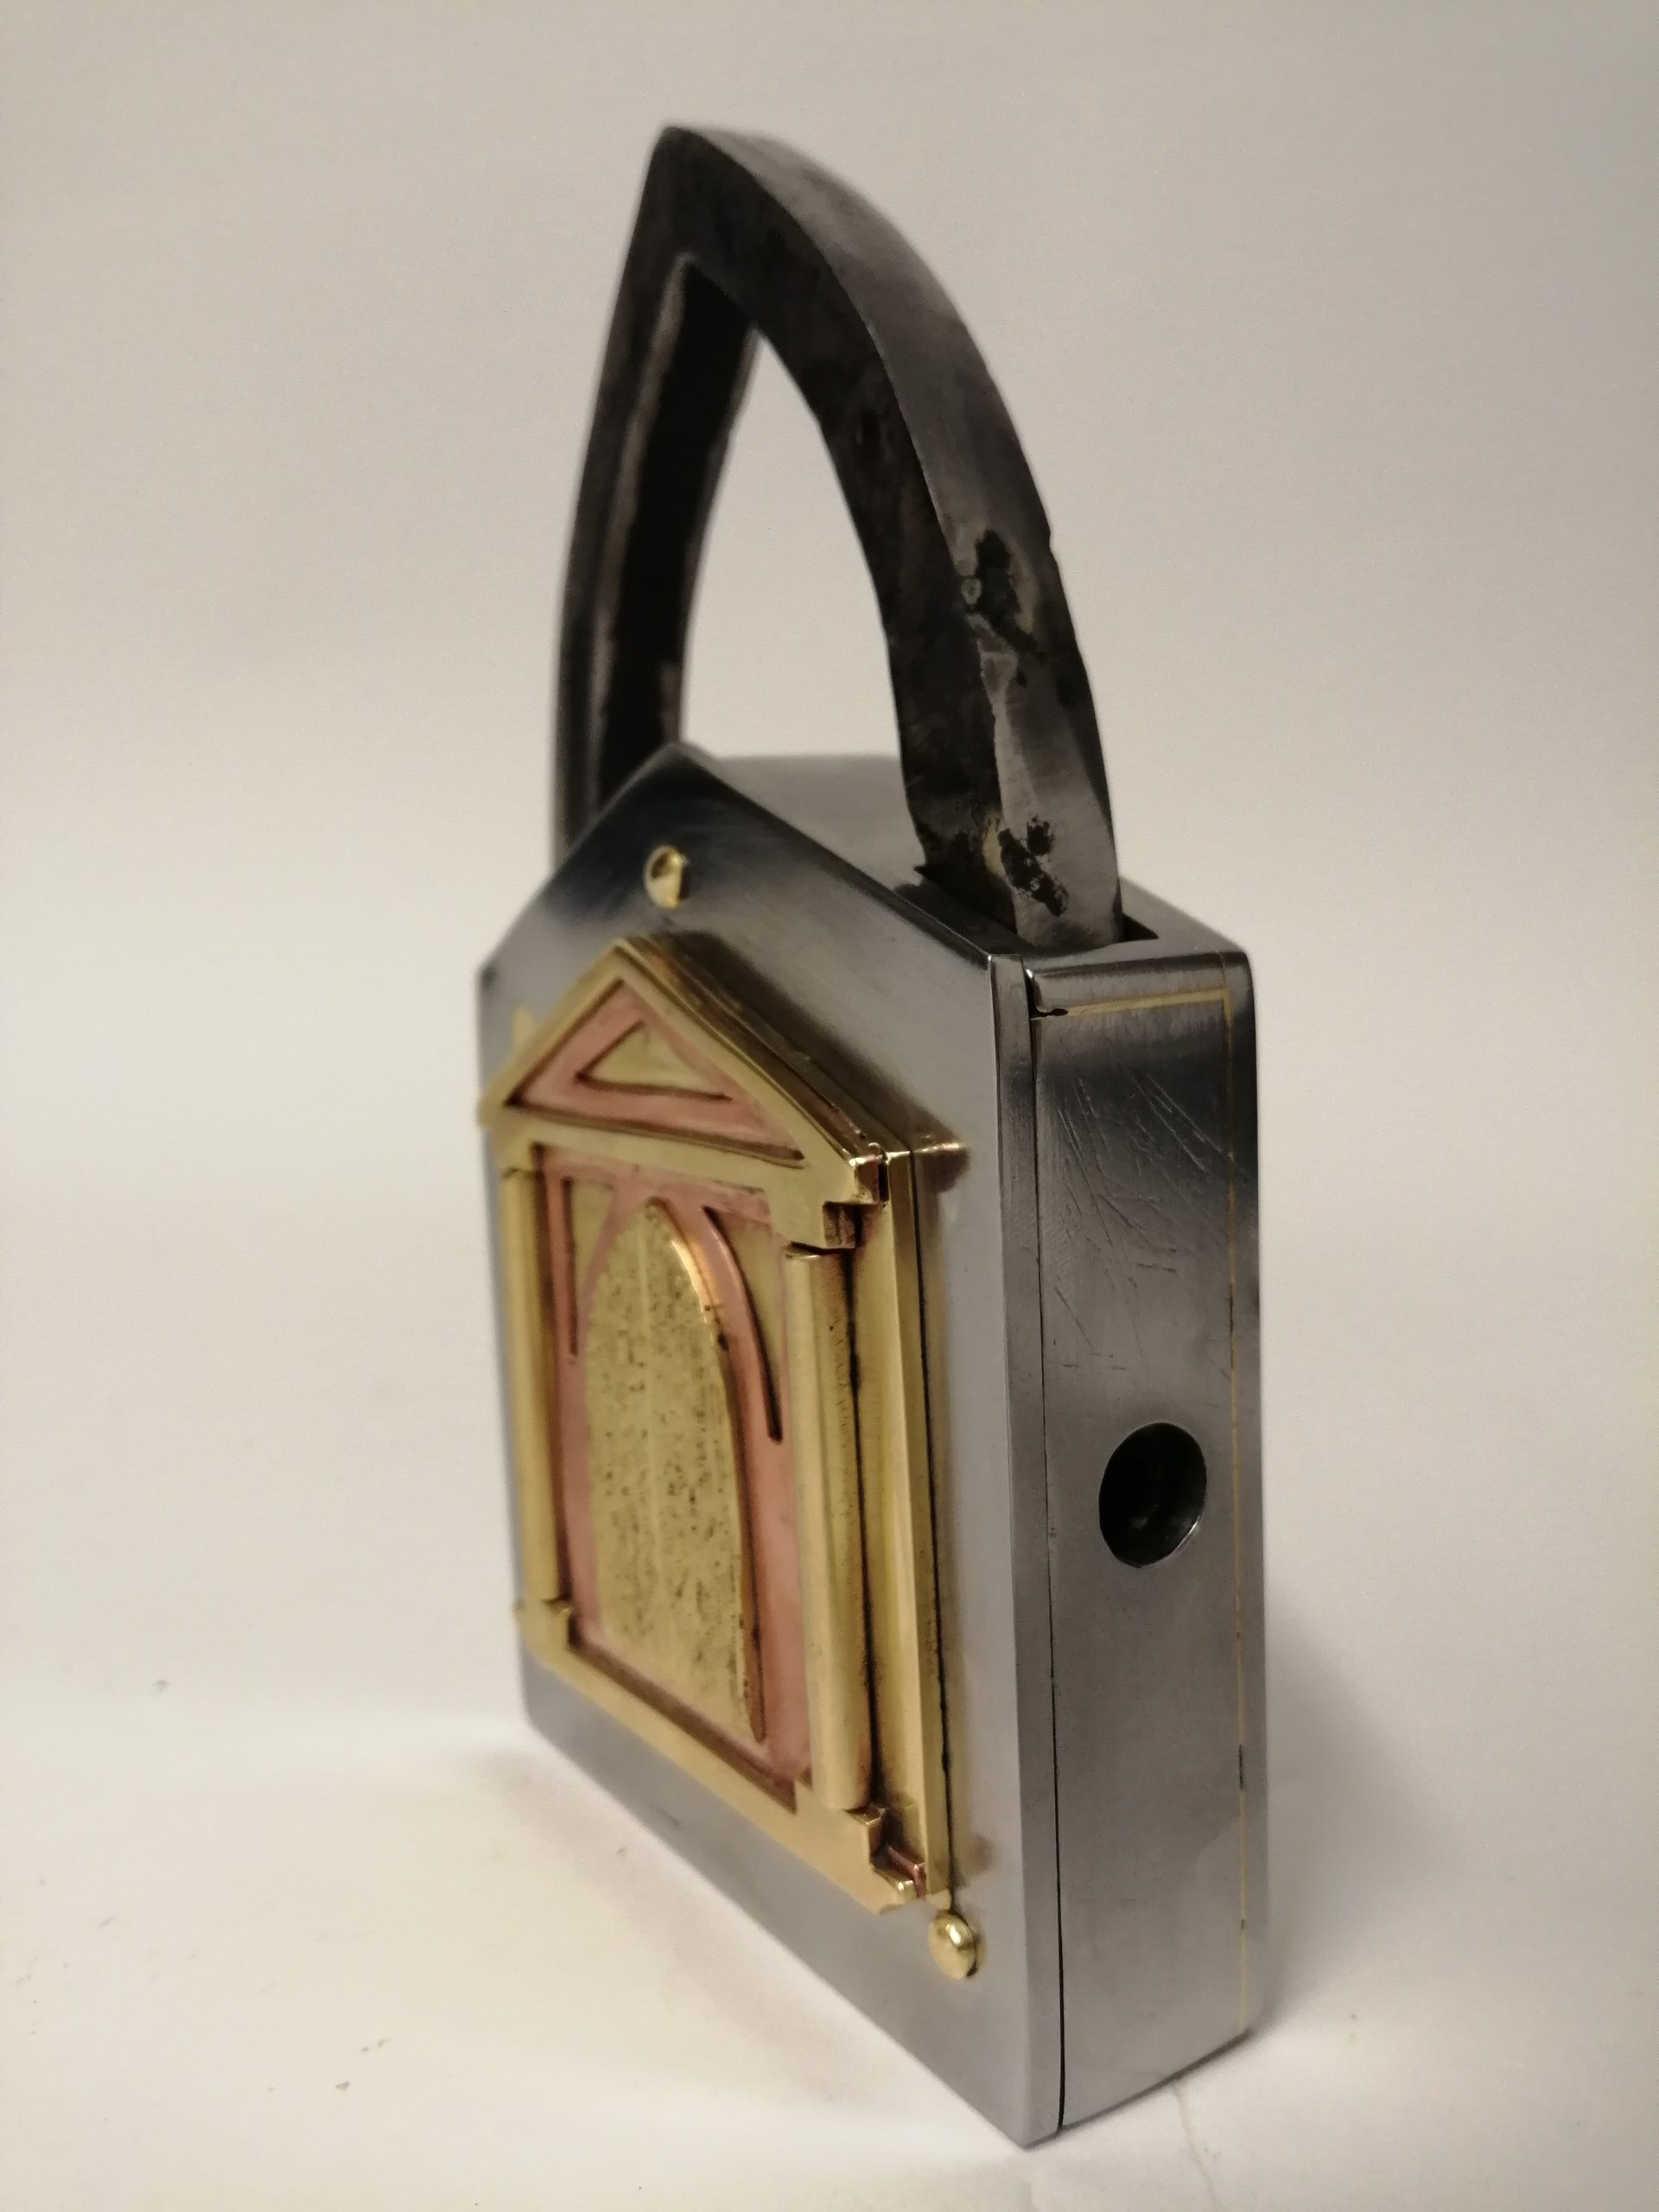
For a first (and probably only) attempt at making a working padlock, I was happy with the result. It posed many enjoyable challenges such as designing the locking mechanism, analytical thinking, the experimental process of trialling the levers, and the research involved in reaching the final design. The finished piece was functional and strong, and I was pleased with the blocky, layered aesthetic. Additionally almost every technique used, I learned as I went along, so as an educational project I felt that the journey was equally as important as the result.
BIBLIOGRAPHY
Books:
McCreight, T. The Complete Metalsmith: An Illustrated Handbook. Pub: Davis Publications Inc. 1991.
Meilach, D. Decorative and Sculptural Ironwork. Pub: Crown Publishing Group, 1977.
Pall, Martina. The European Padlock. Objects from the Hanns Schell Collection. Pub: Hanns Schell Collection, Graz, 2009.
Slocum, J. Sonneveld, D. Romano-Celtic Mask Puzzle Padlocks: A study in their design, technology and security. Pub: Archaeopress Archaeology, 2017.
Websites:
Historical Locks – A great resource for padlocks and keys of historical civilisations.
Ancient Resource – A great resource for padlocks and keys of historical civilisations.
Coode Conservation Partnership – website for Alex Coode, heritage blacksmith and tutor mentioned in blog.
V & A – Search the collections for padlocks, keys, metalwork, ironwork etc by adding filters
Old Locks – J. Dempsey’s review of Parviz Tanavoli and John T. Wertime’s book ‘Locks from Iran’.
Figures:
1 and 2 – Historical Locks
3 – Old Locks
4 to 7 – Pall, Martina: The European Padlock. Objects from the Hanns Schell Collection
8 to 19 – Author’s own