During my final semester at West Dean College in 2020, I was presented with this Roman copper alloy lamp. As you can see it is an archaeological object, and I was excited to gain this experience. This is an informal blog post, which describes the processes I went through to assess and treat the lamp, including reasons why I made certain decisions. I have included a bibliography at the end containing literature I referred to during the treatment, and some excellent references.
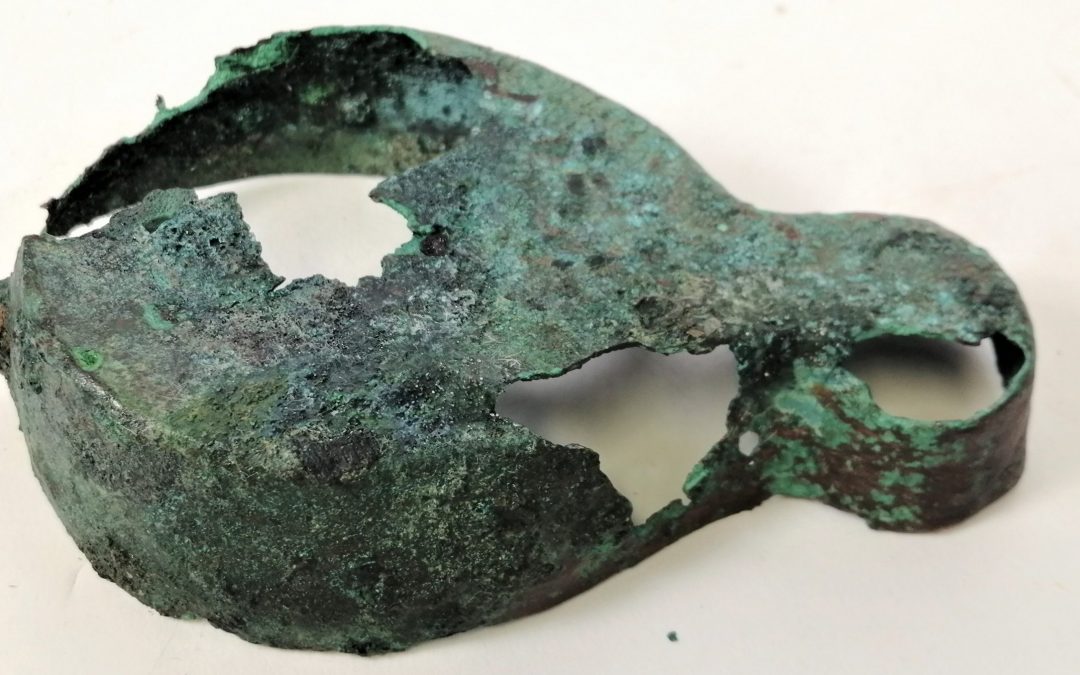
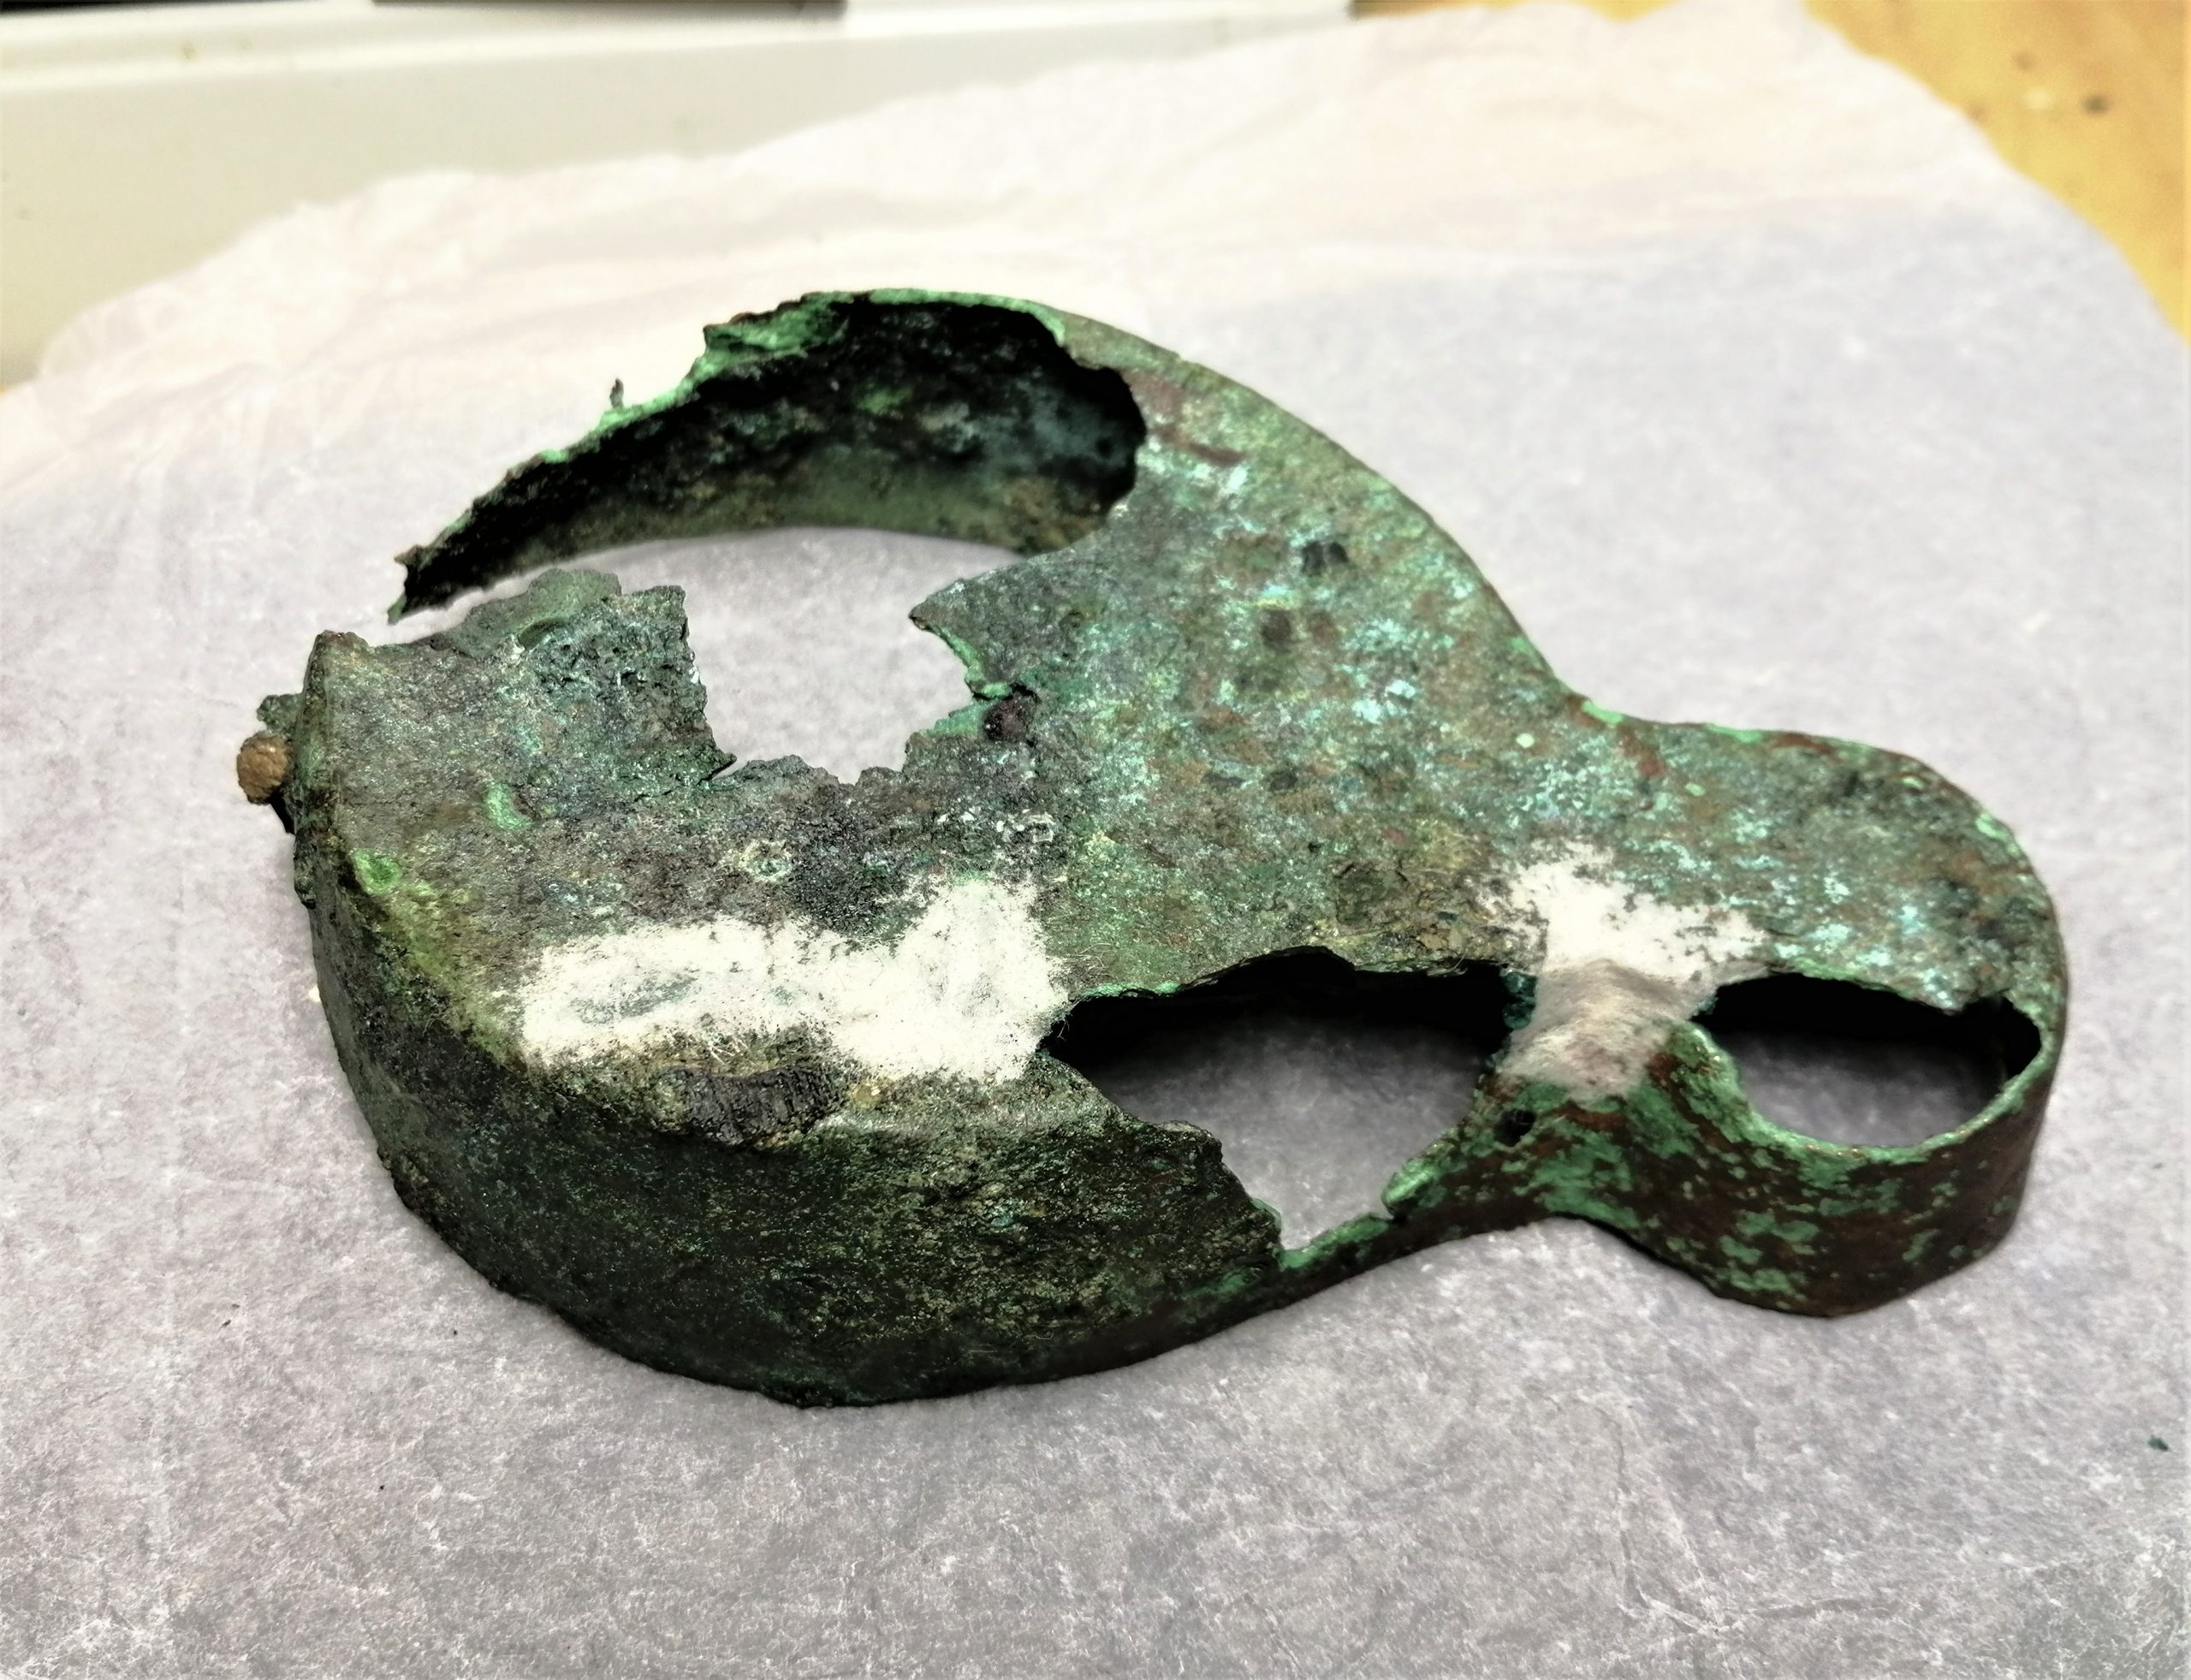
Lamp before treatment
When the lamp arrived on my desk, it was extremely fragile and still had soil residues attached. Handling it very gently I could see that under these residues it was also mineralised. In archaeological objects, the original material will have reacted with the burial environment and may have been completely replaced by corrosion products, leaving it even more fragile than you might expect.
Assessment and analysis
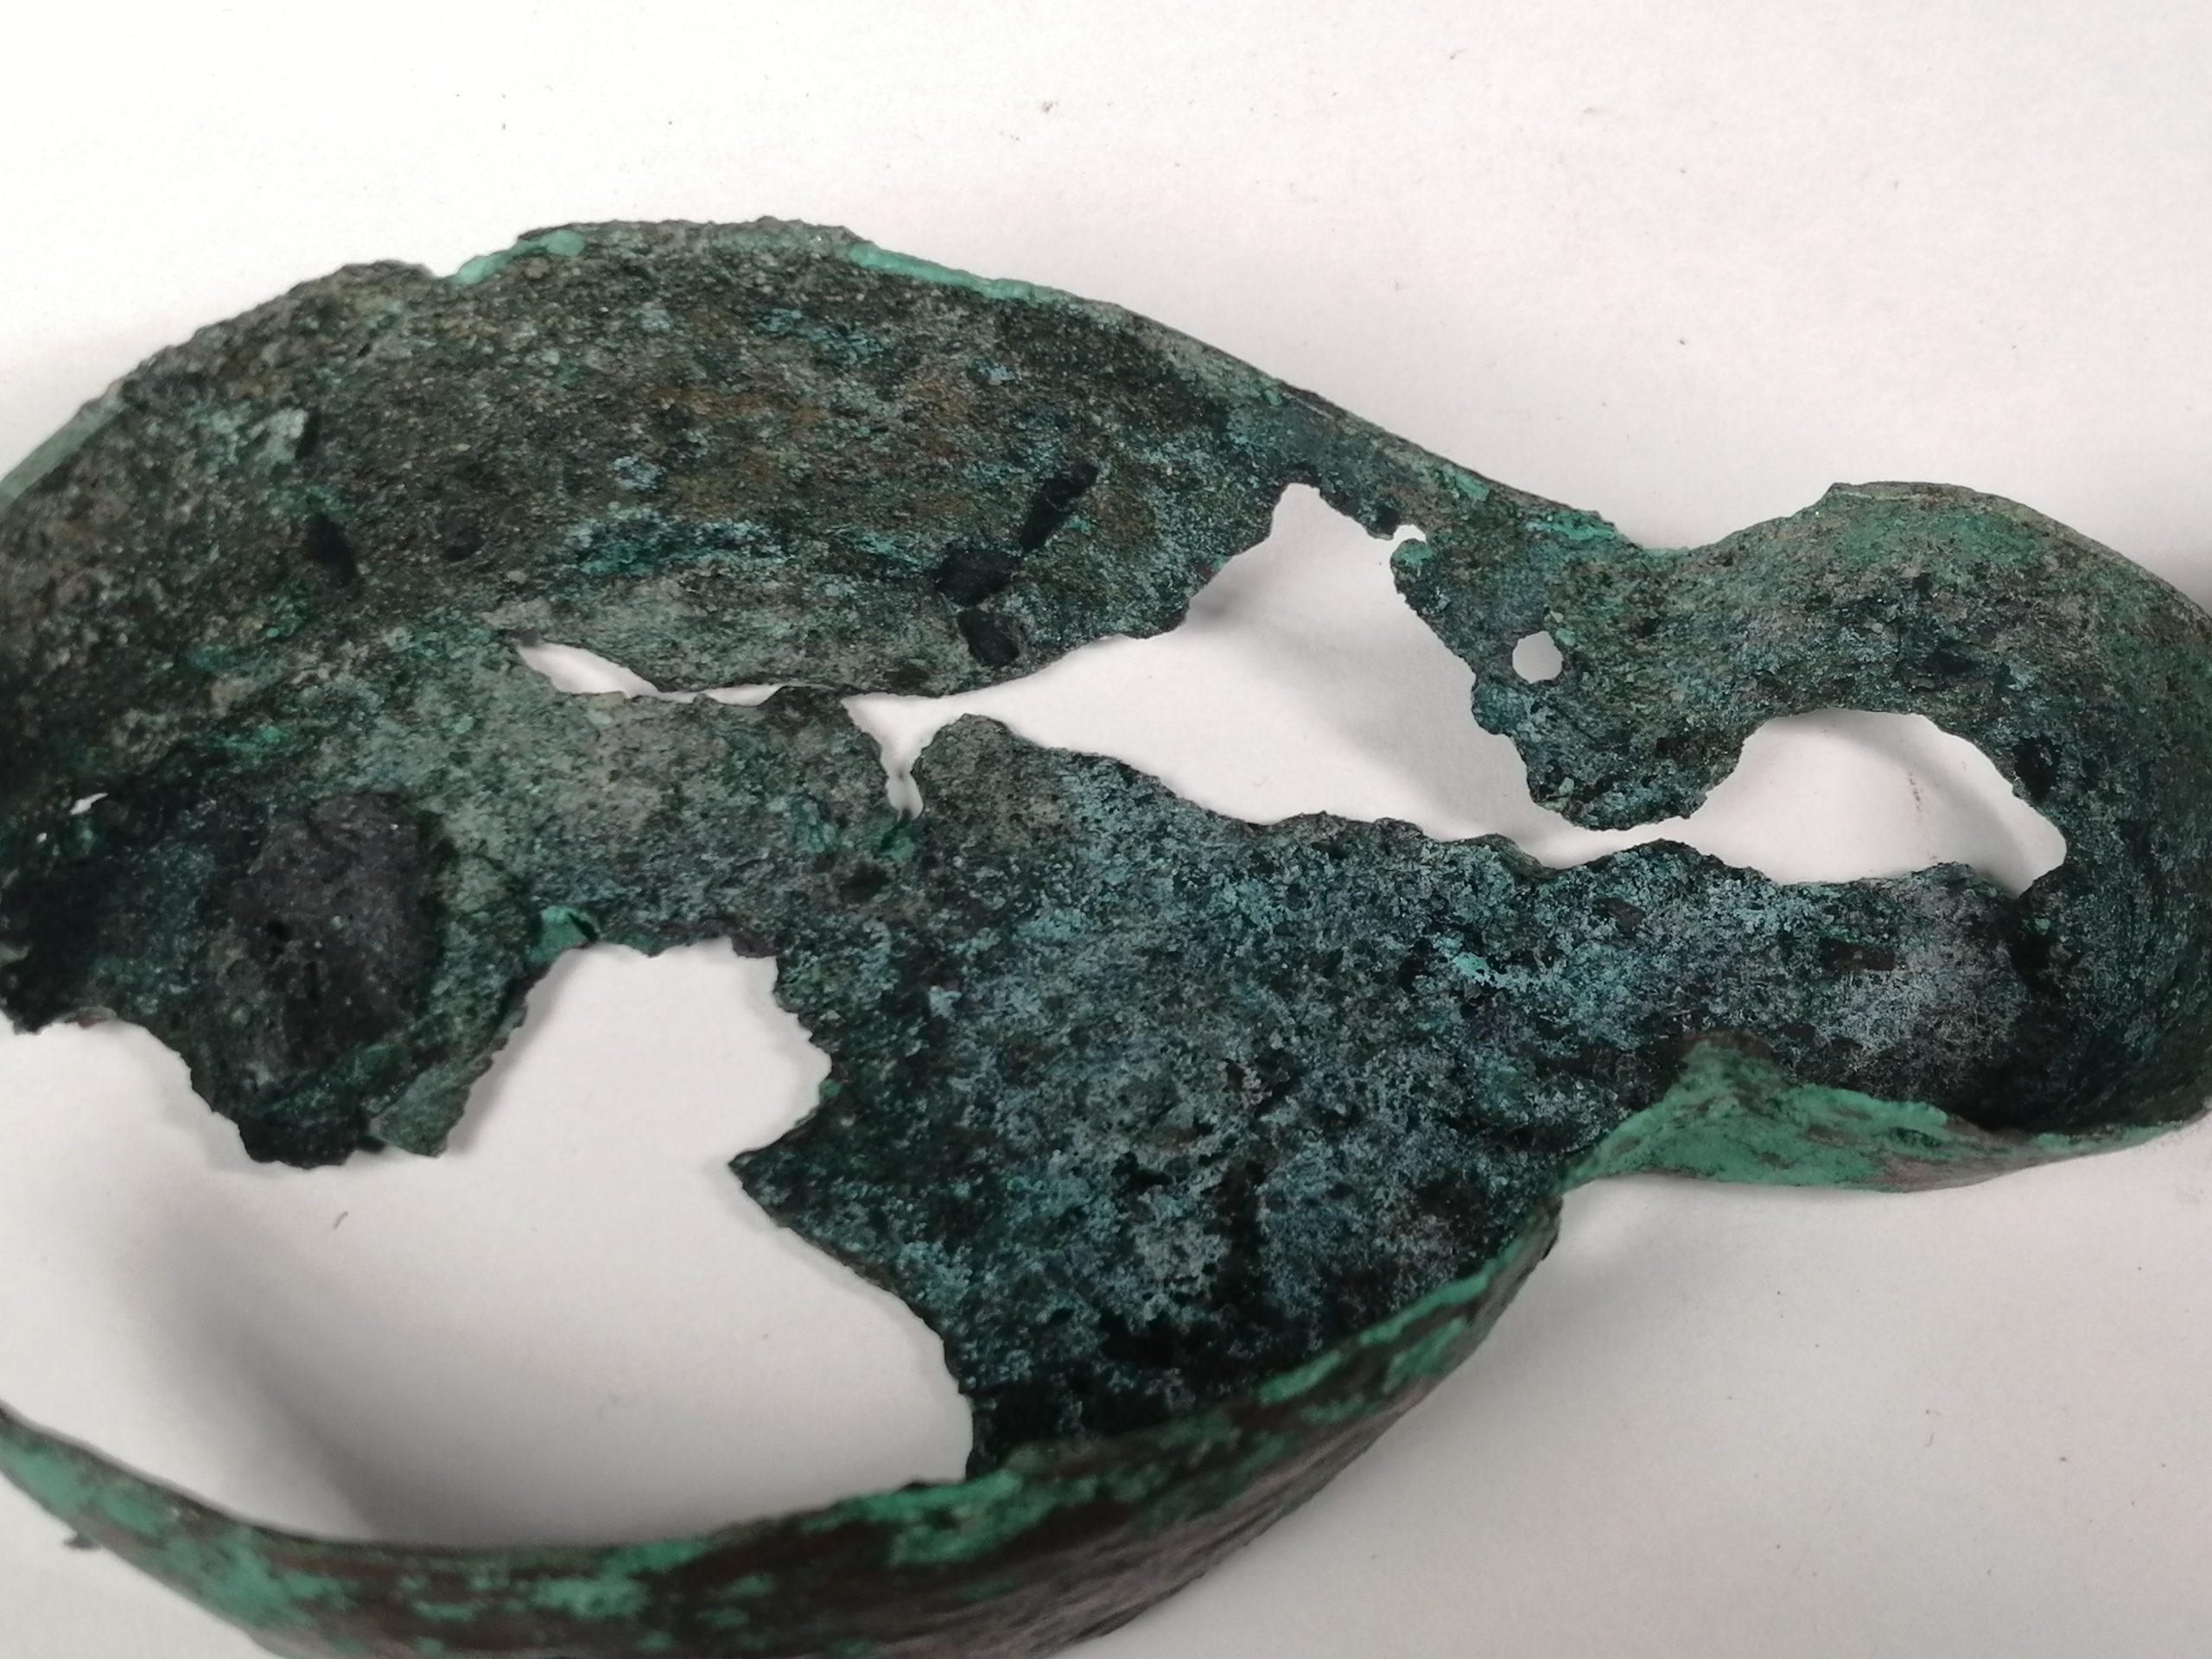
To determine how much of the original metal was remaining, I X-rayed the object. As suspected, much of the metal had corroded, leaving some blue and green corrosion products holding the lamp together. The X-ray helped me to clearly see the gaps and cracks in the object, however in places the original metal was still present, and the ancient tool marks were still visible.
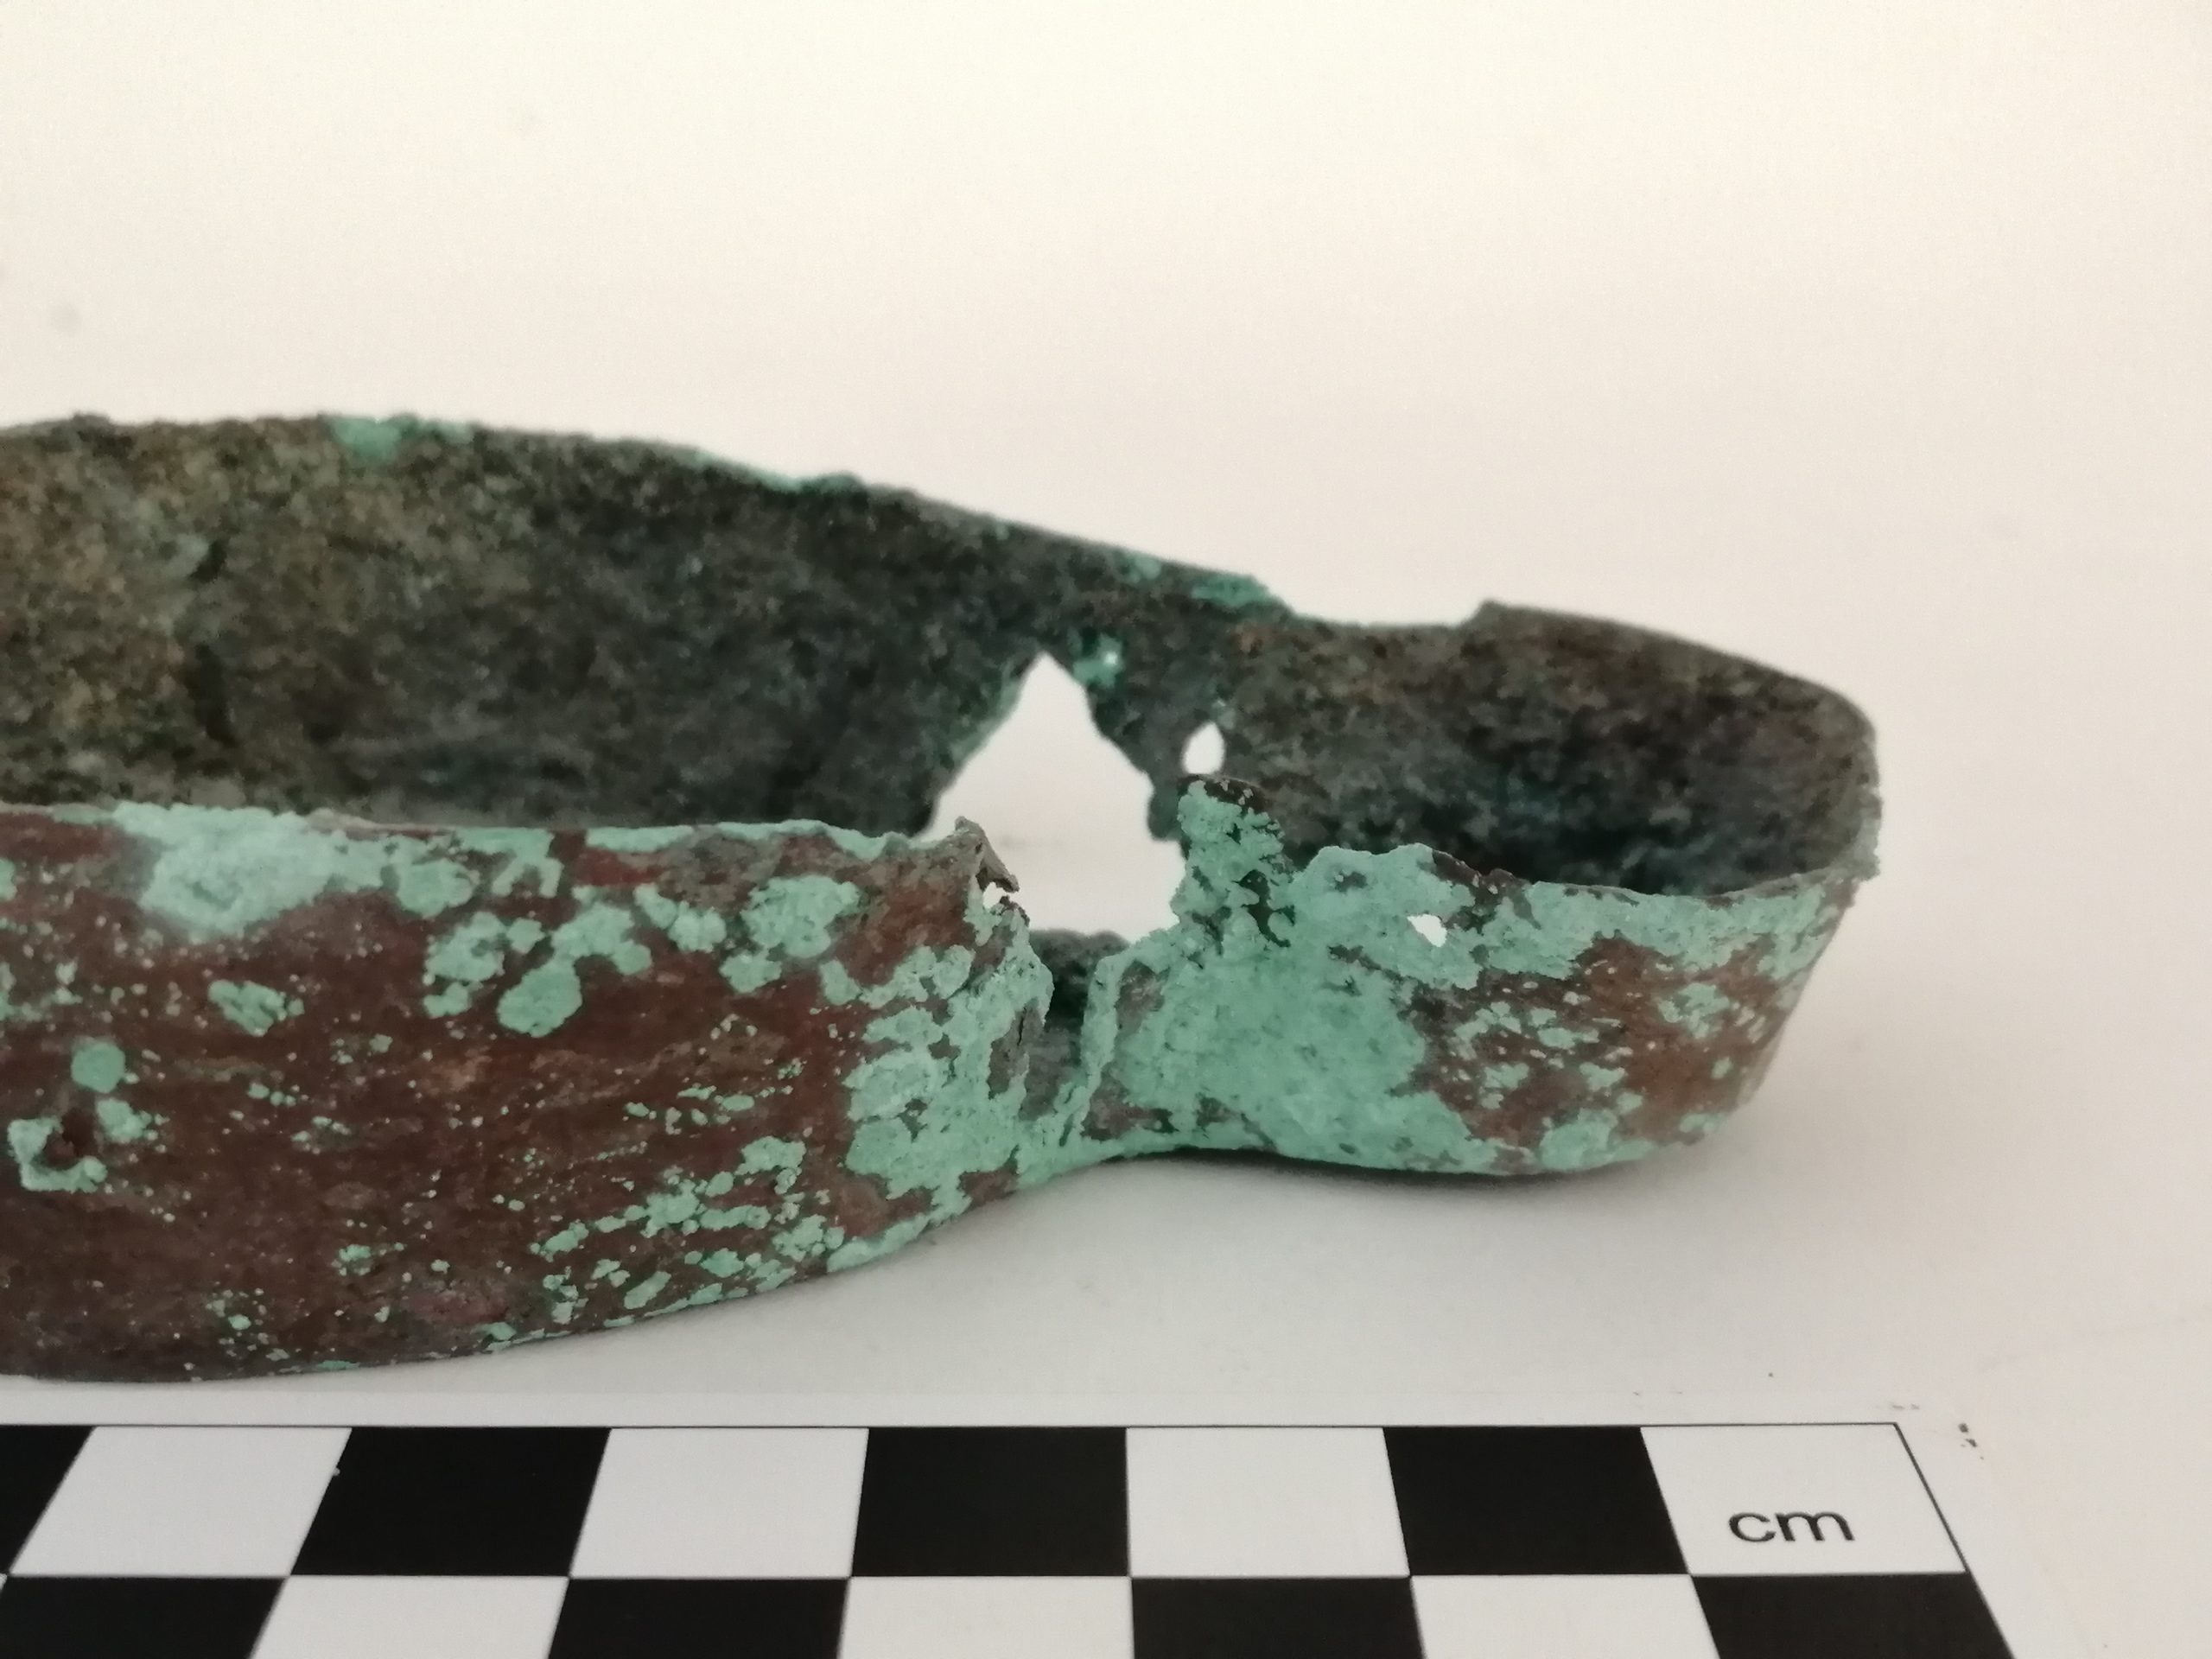
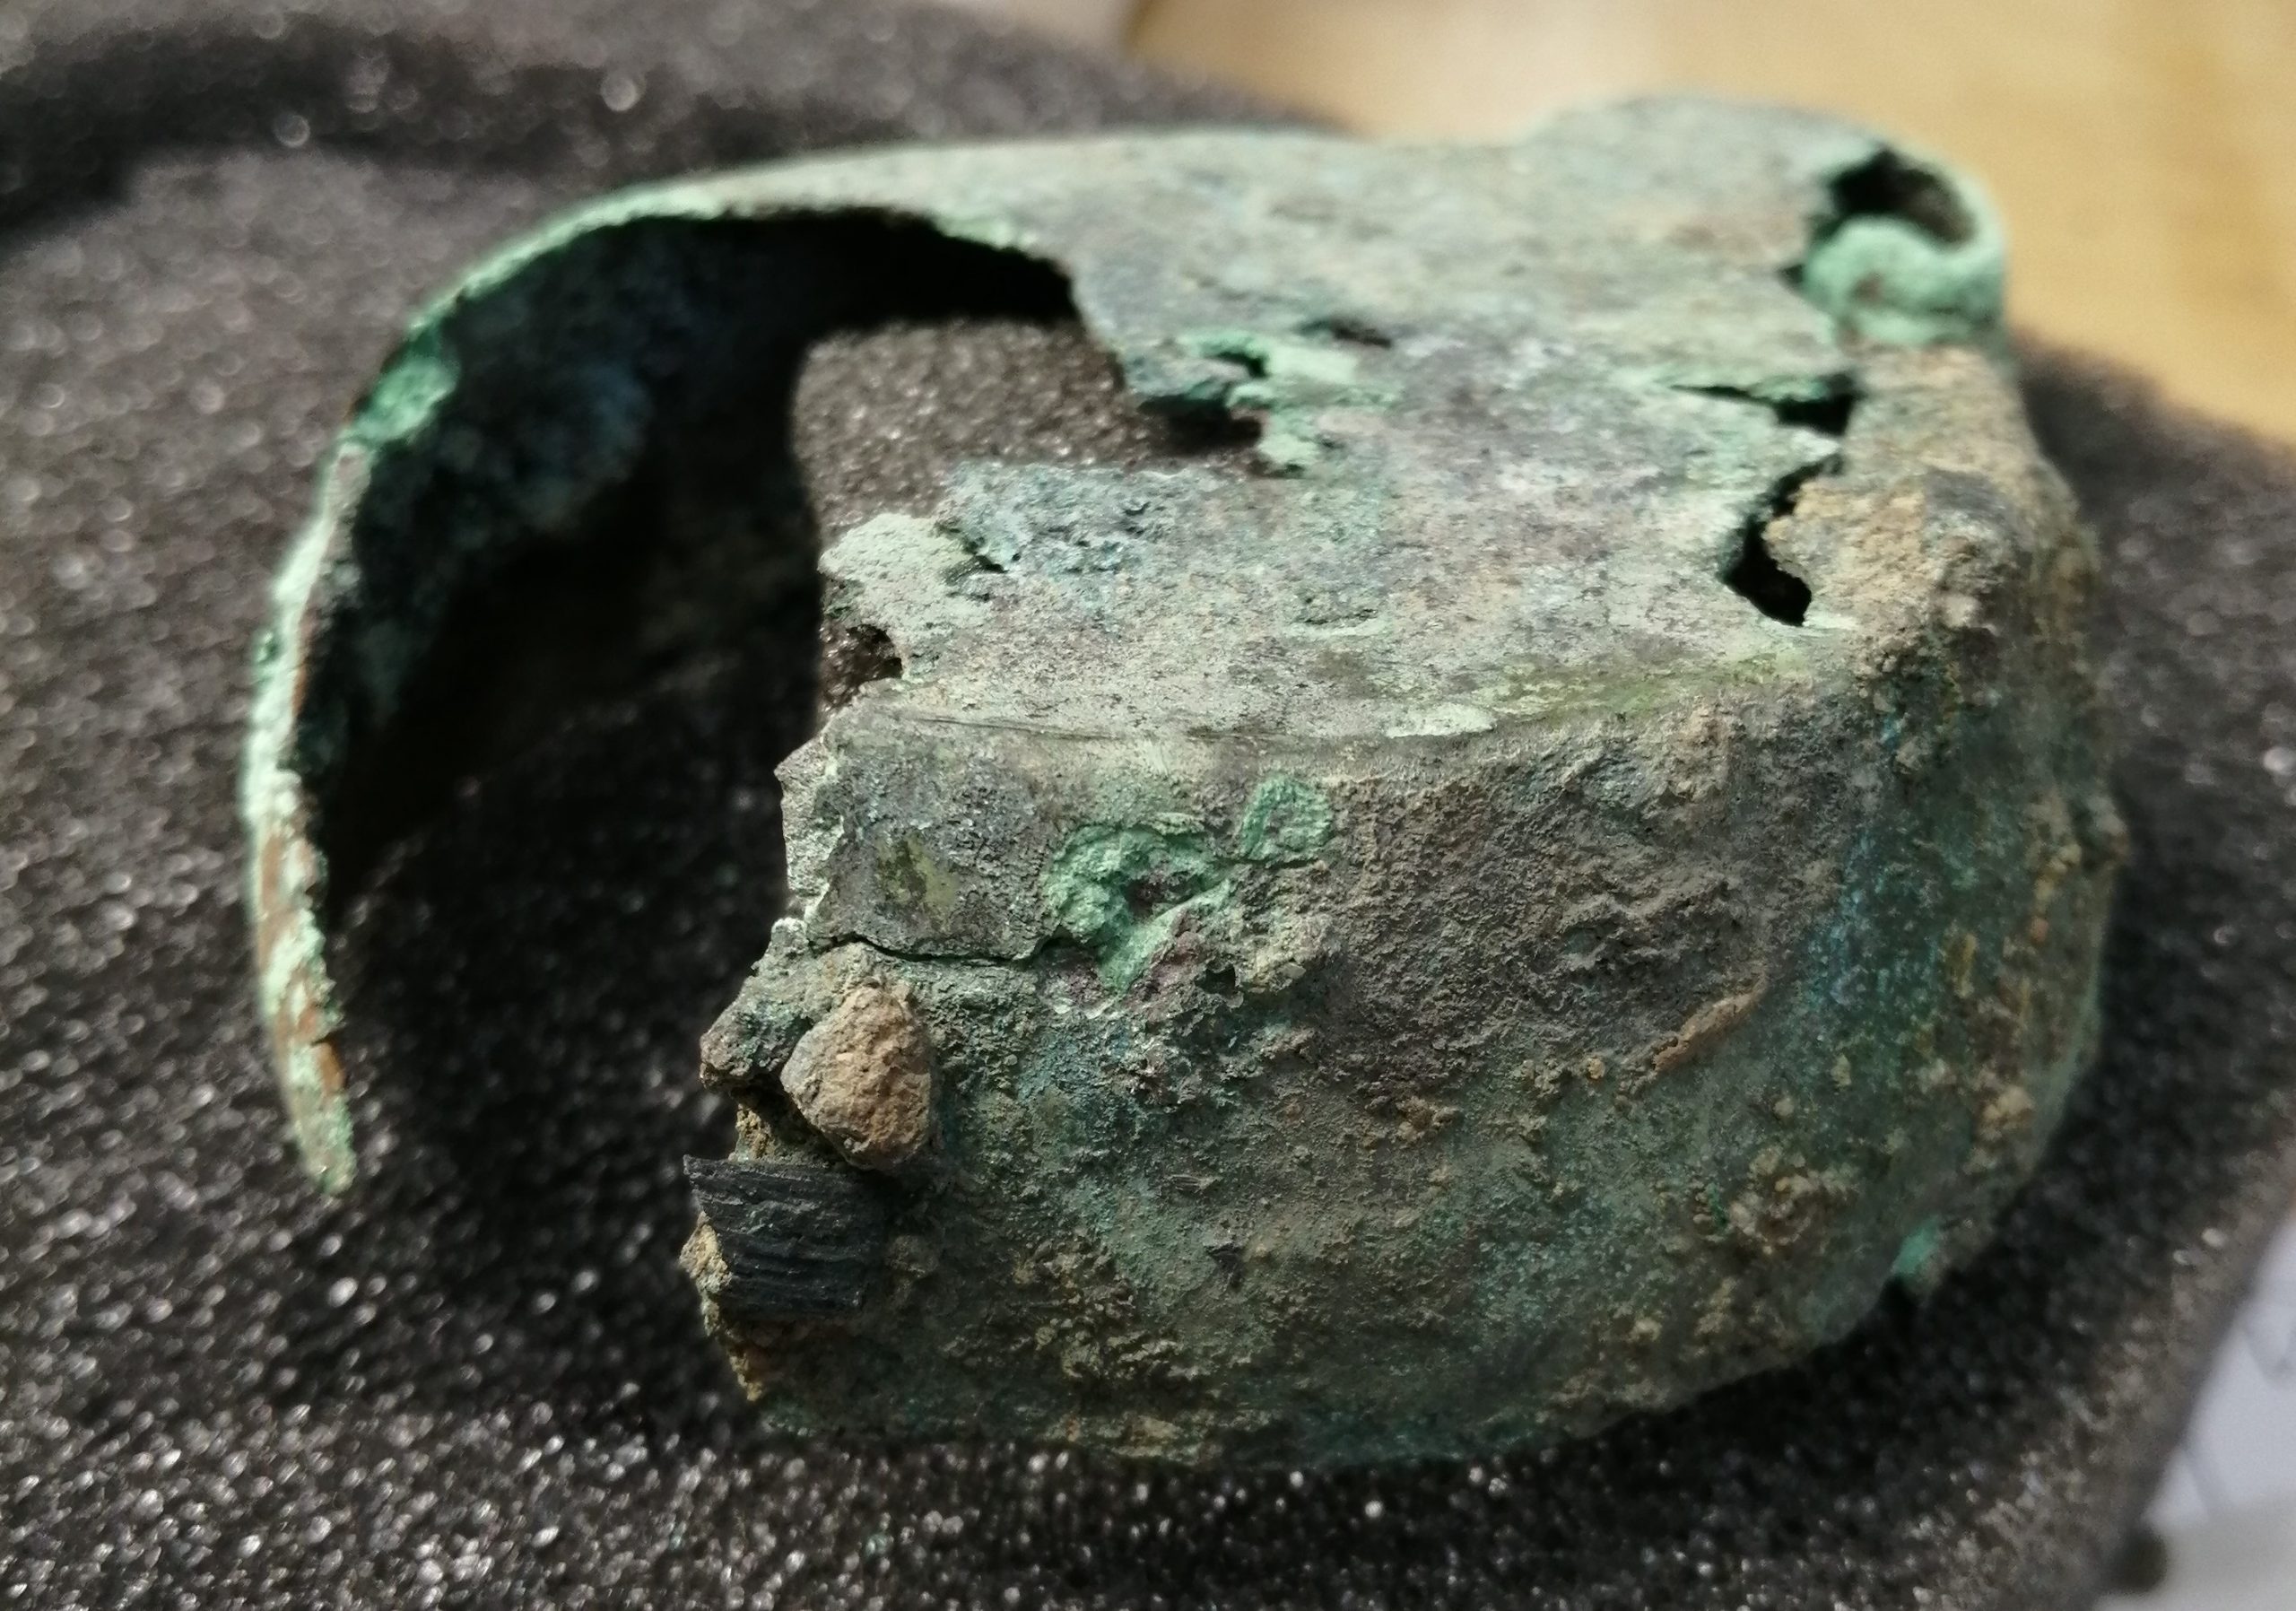
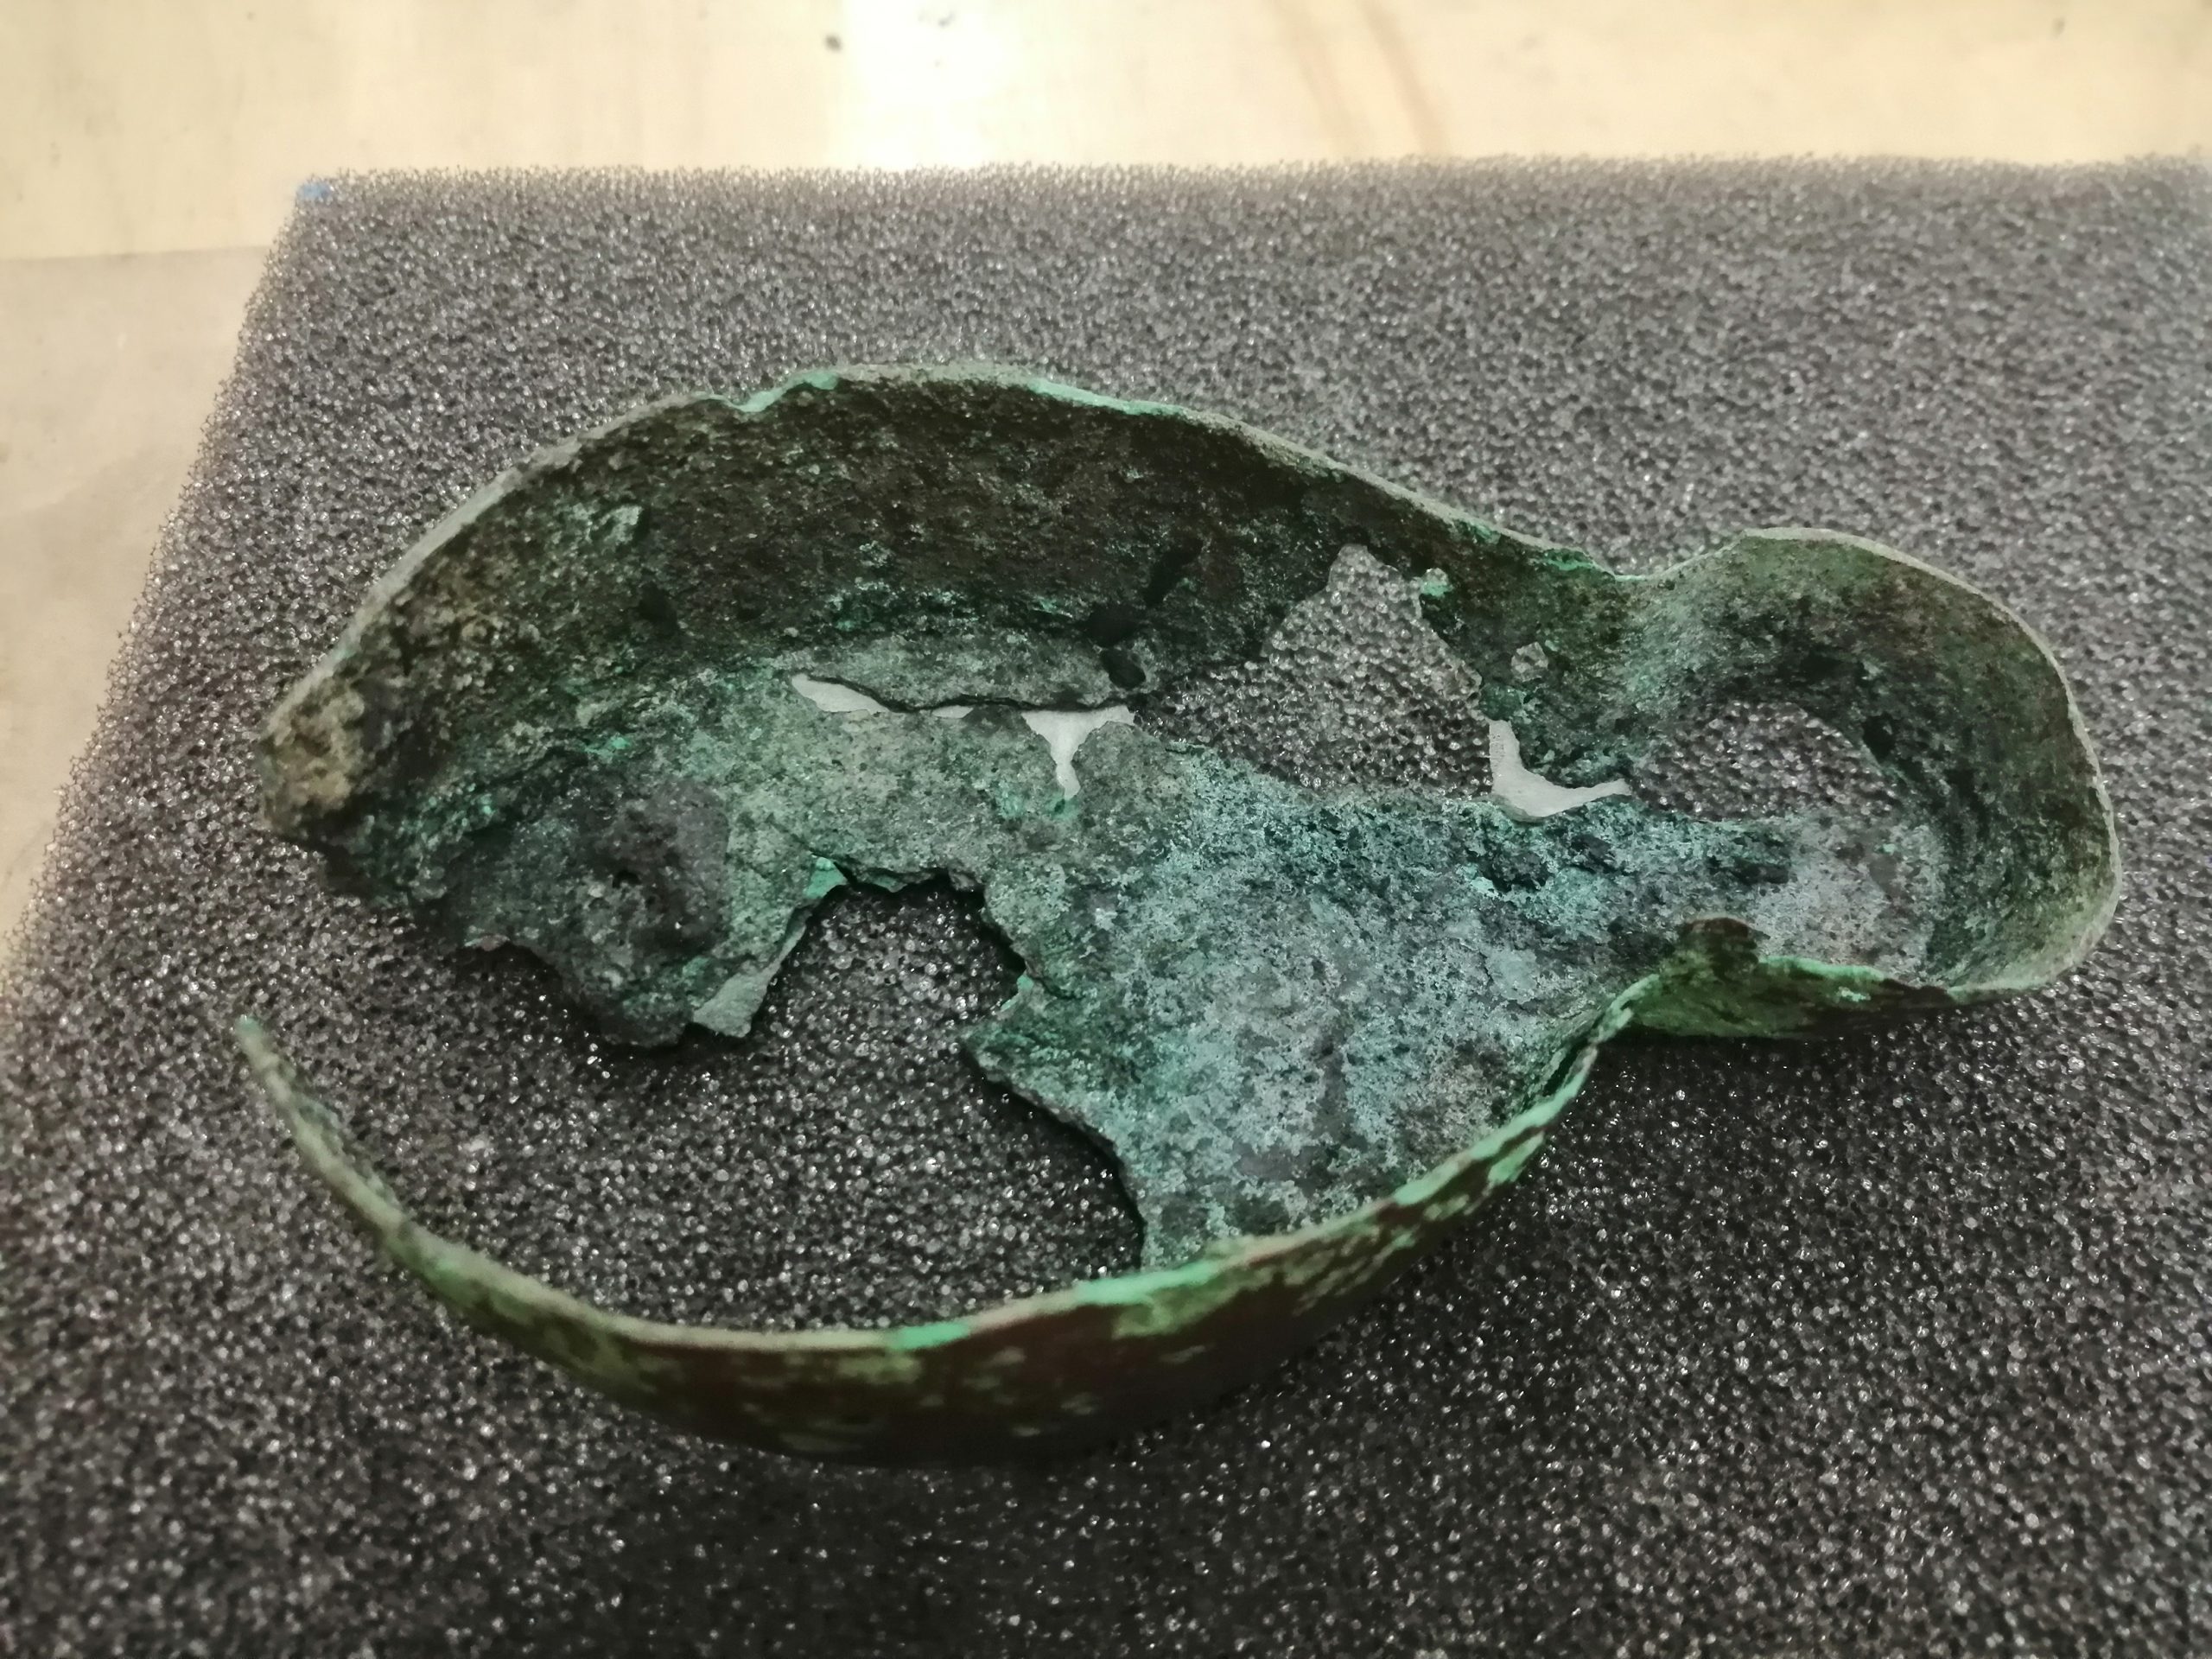
Analysis, tool marks and corrosion
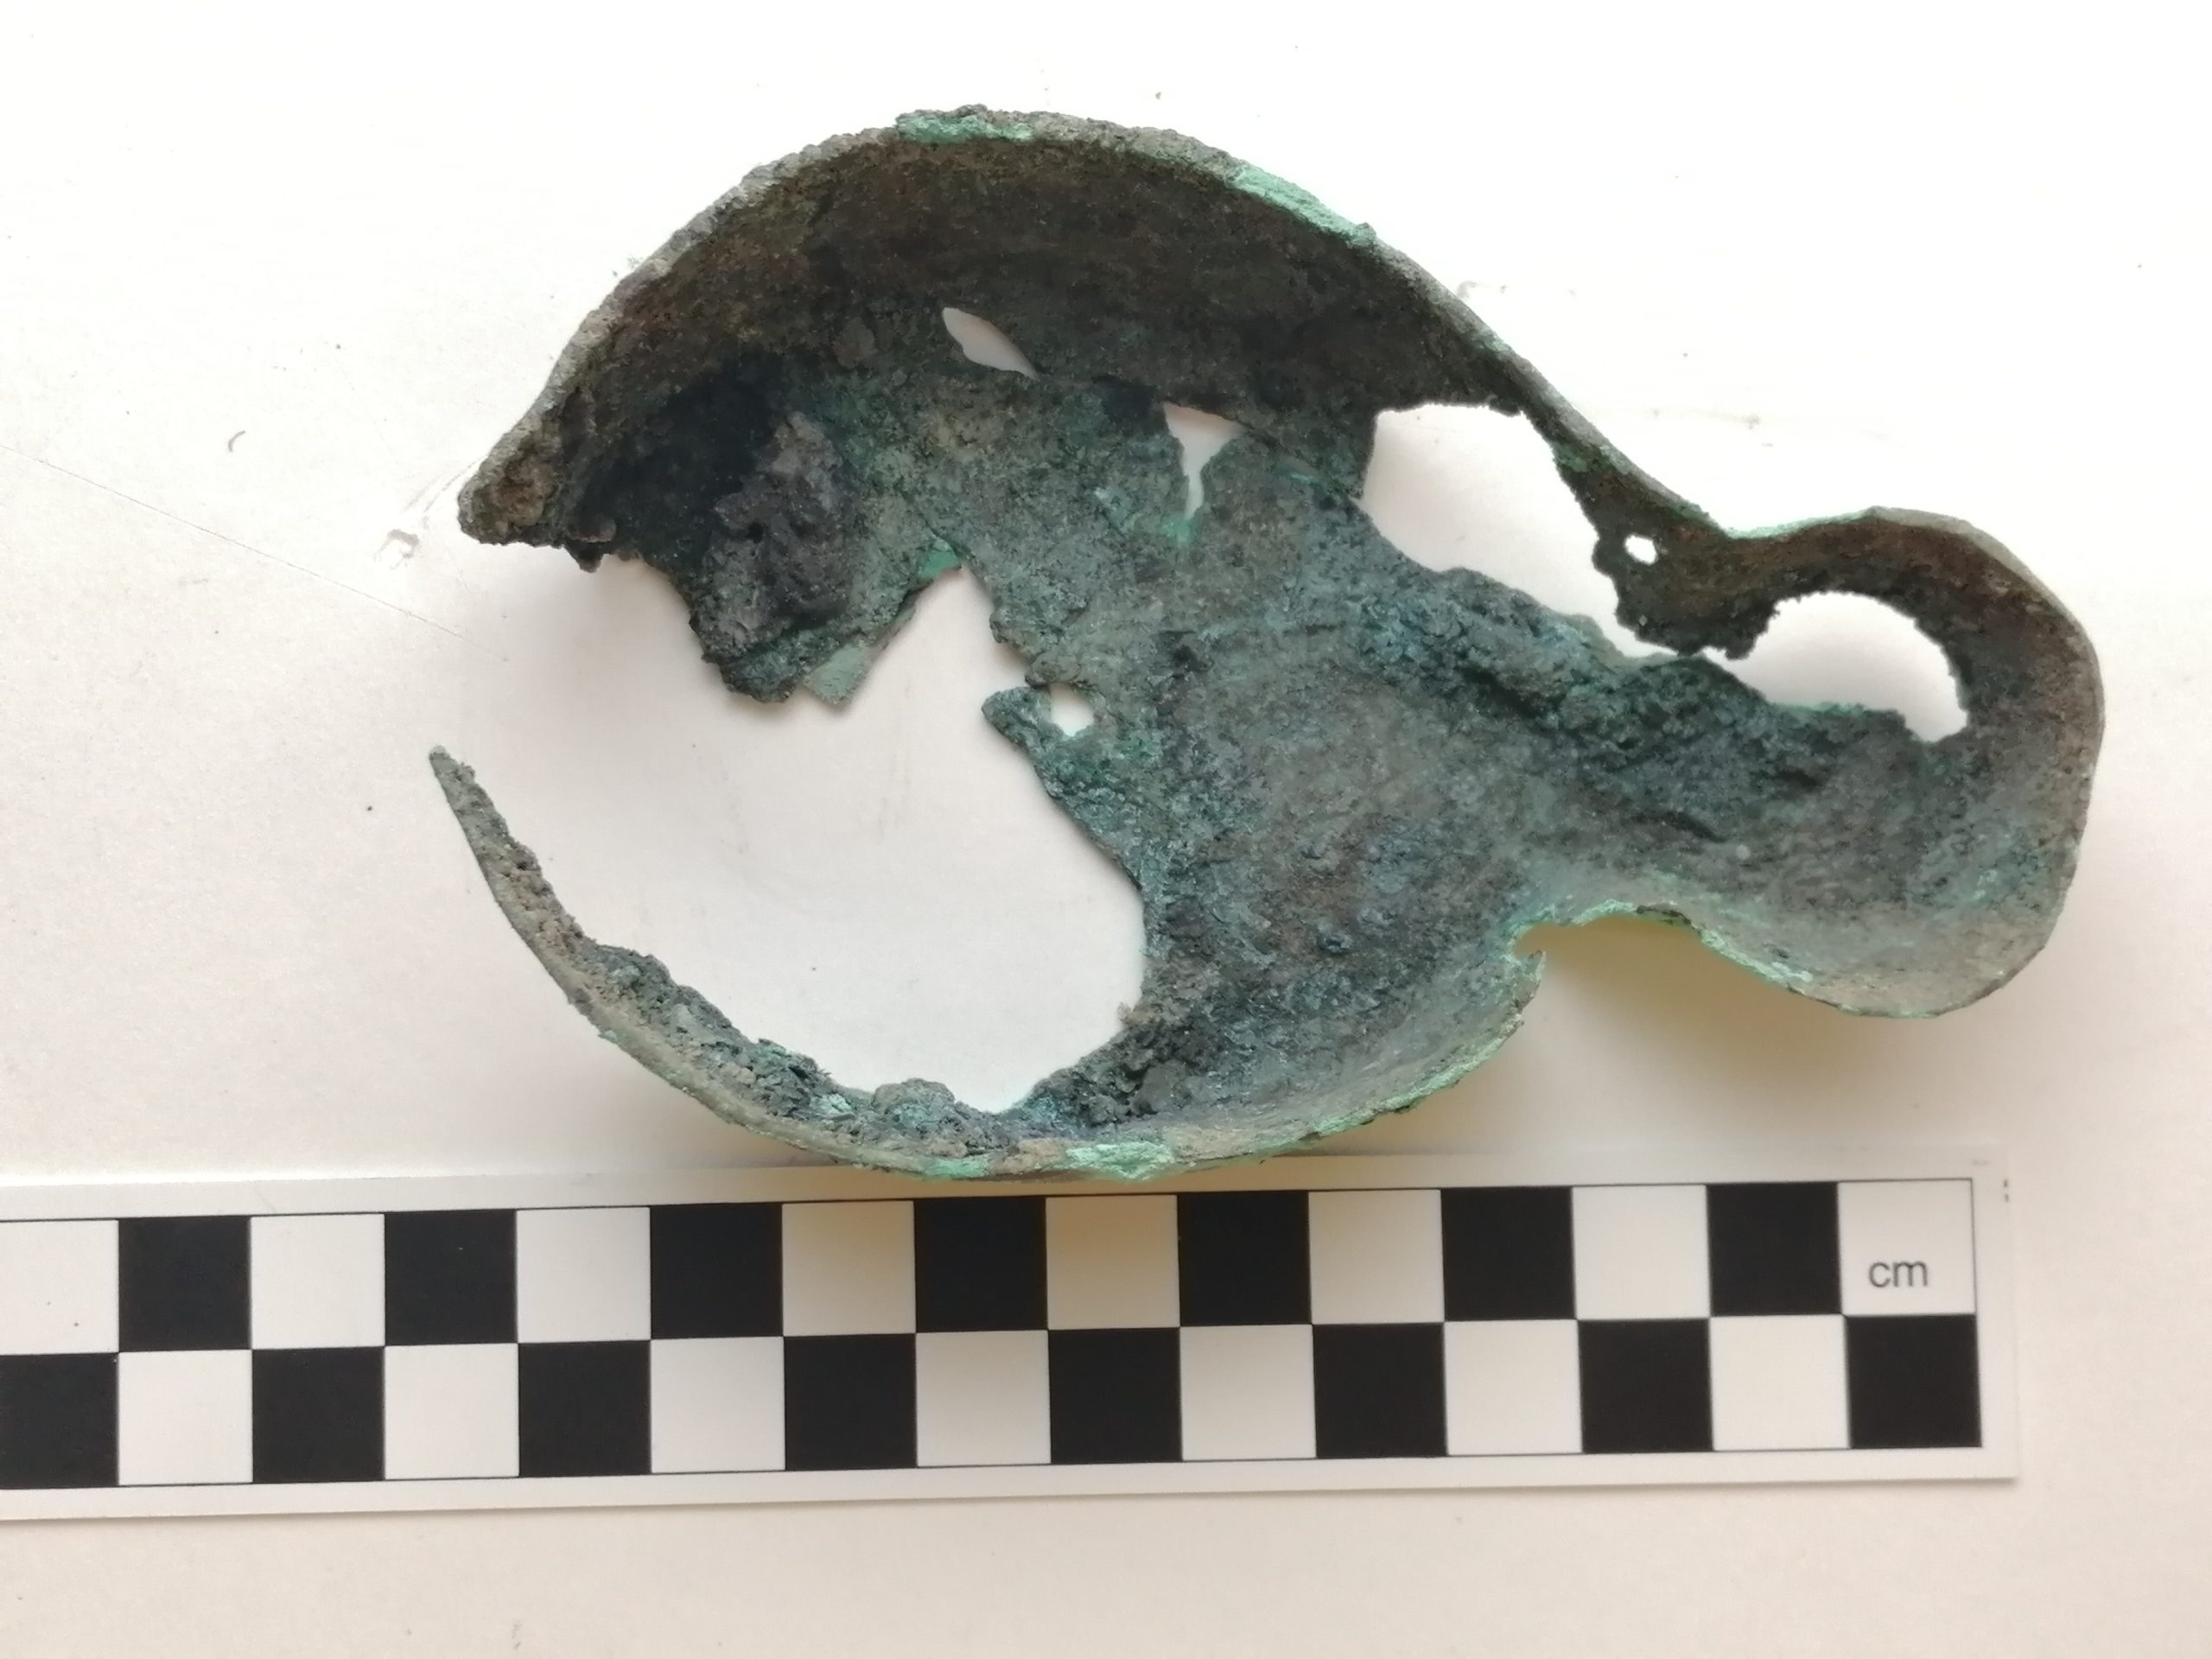
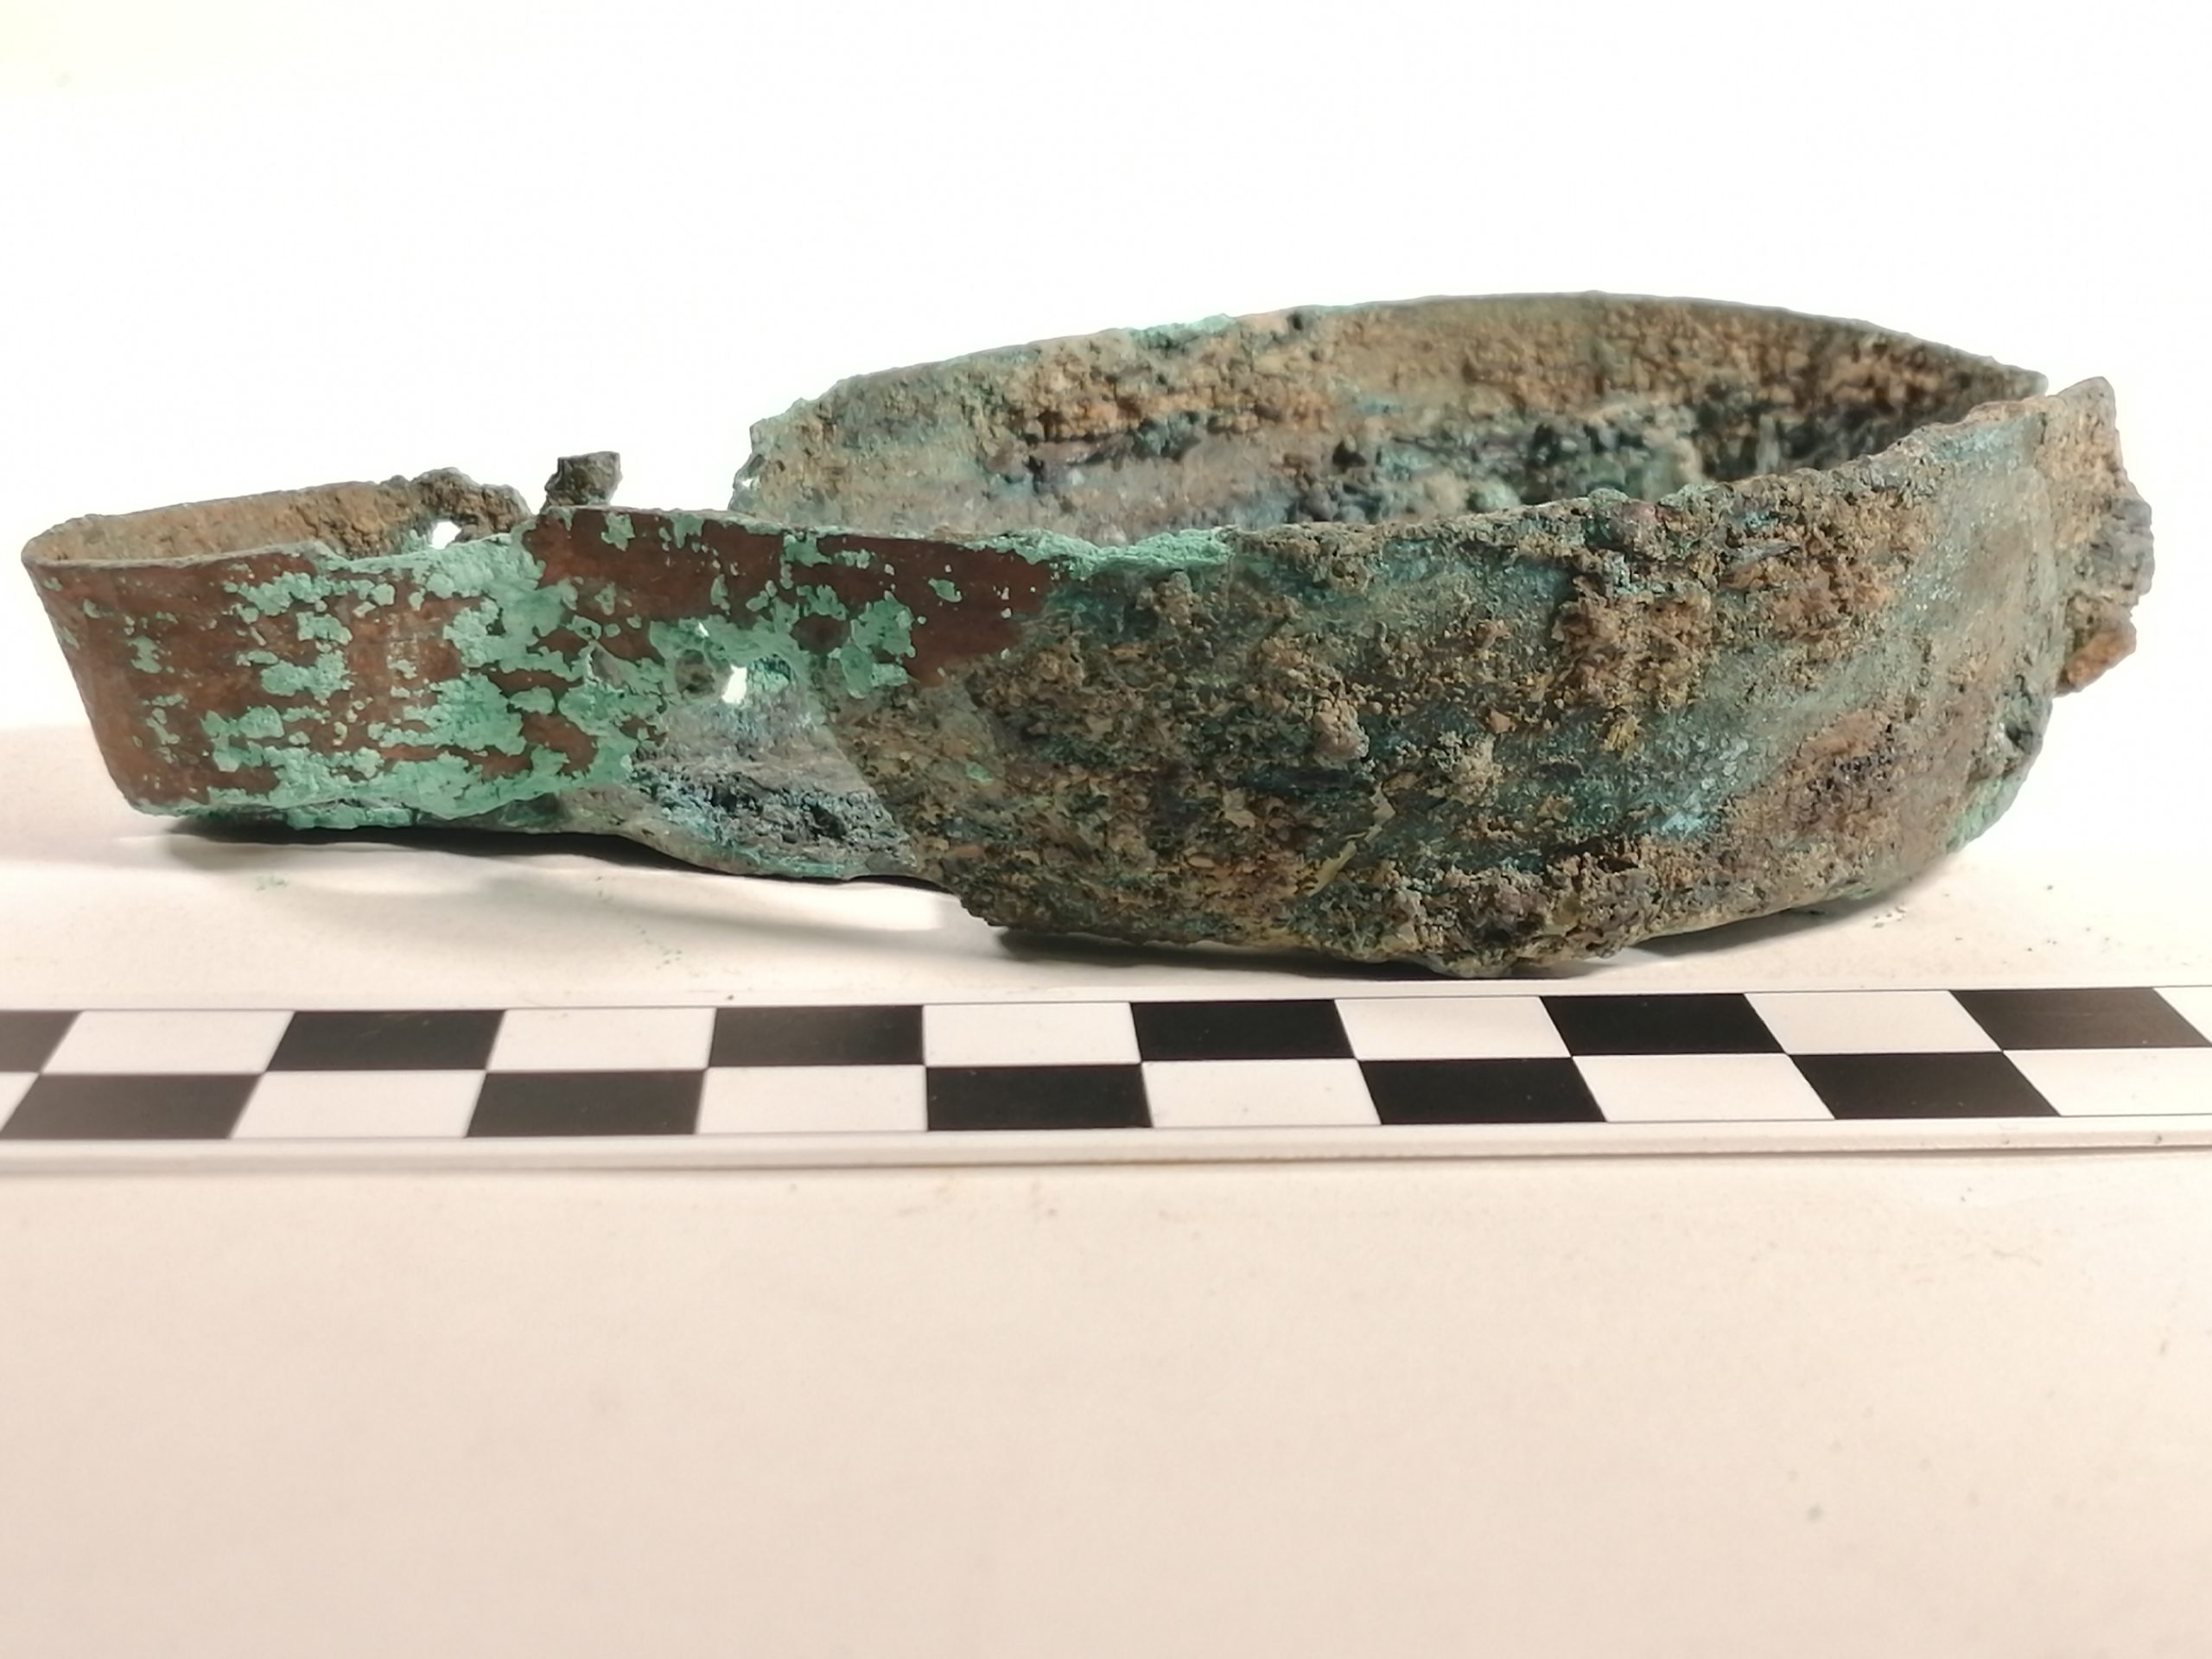
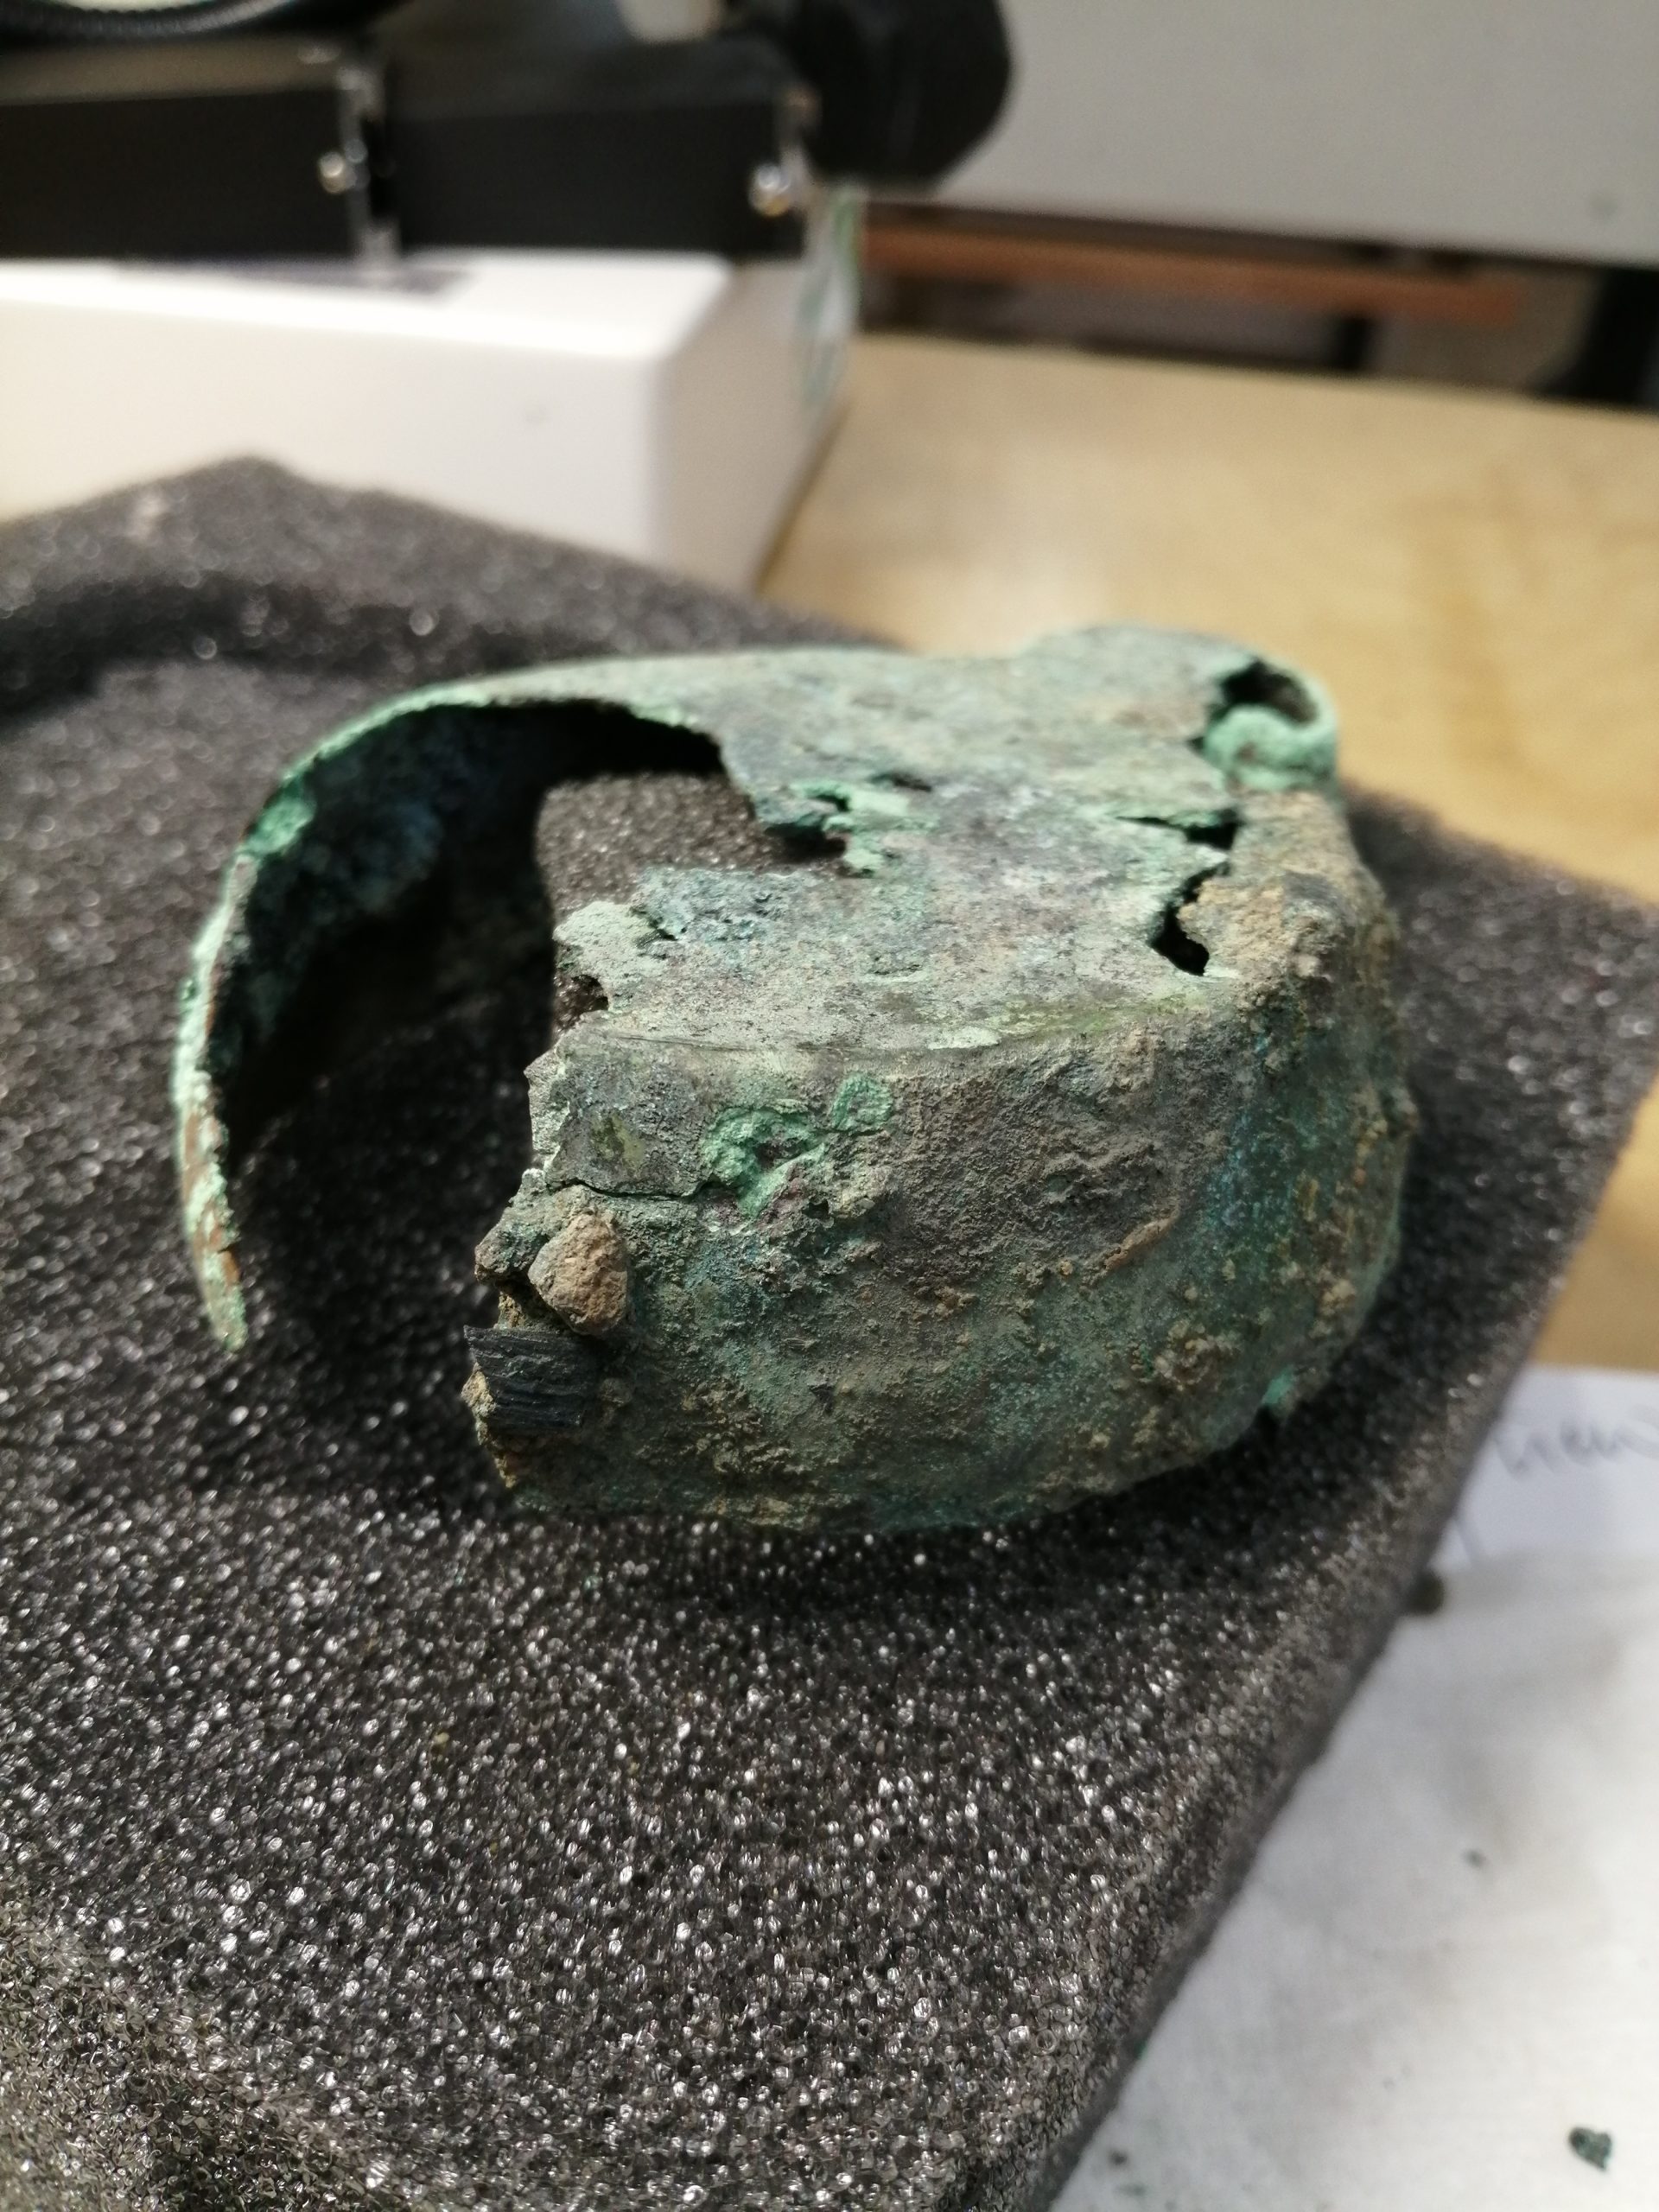


The lamp was in 2 main pieces – the body and the handle, which can be seen in the pictures. The main body was still in one piece, although some small fragments had come away. I kept these pieces but could not establish where exactly they had come from. The handle had become detached from the body, and you could still see that it had been originally attached with rivets, which were still in place on the handle.
The next process was to carry out an elemental analysis using the pXRF machine. (Portable X-Ray Fluorescence) This equipment uses X-rays to tell us which elements make up the object, at the point where the X-rays are ‘fired’. The results showed that the lamp was indeed a copper alloy, made of 96% copper (Cu) and some trace elements of iron (Fe), tin (Sb) and lead (Pb – seen as Arsenic (As) in the data).
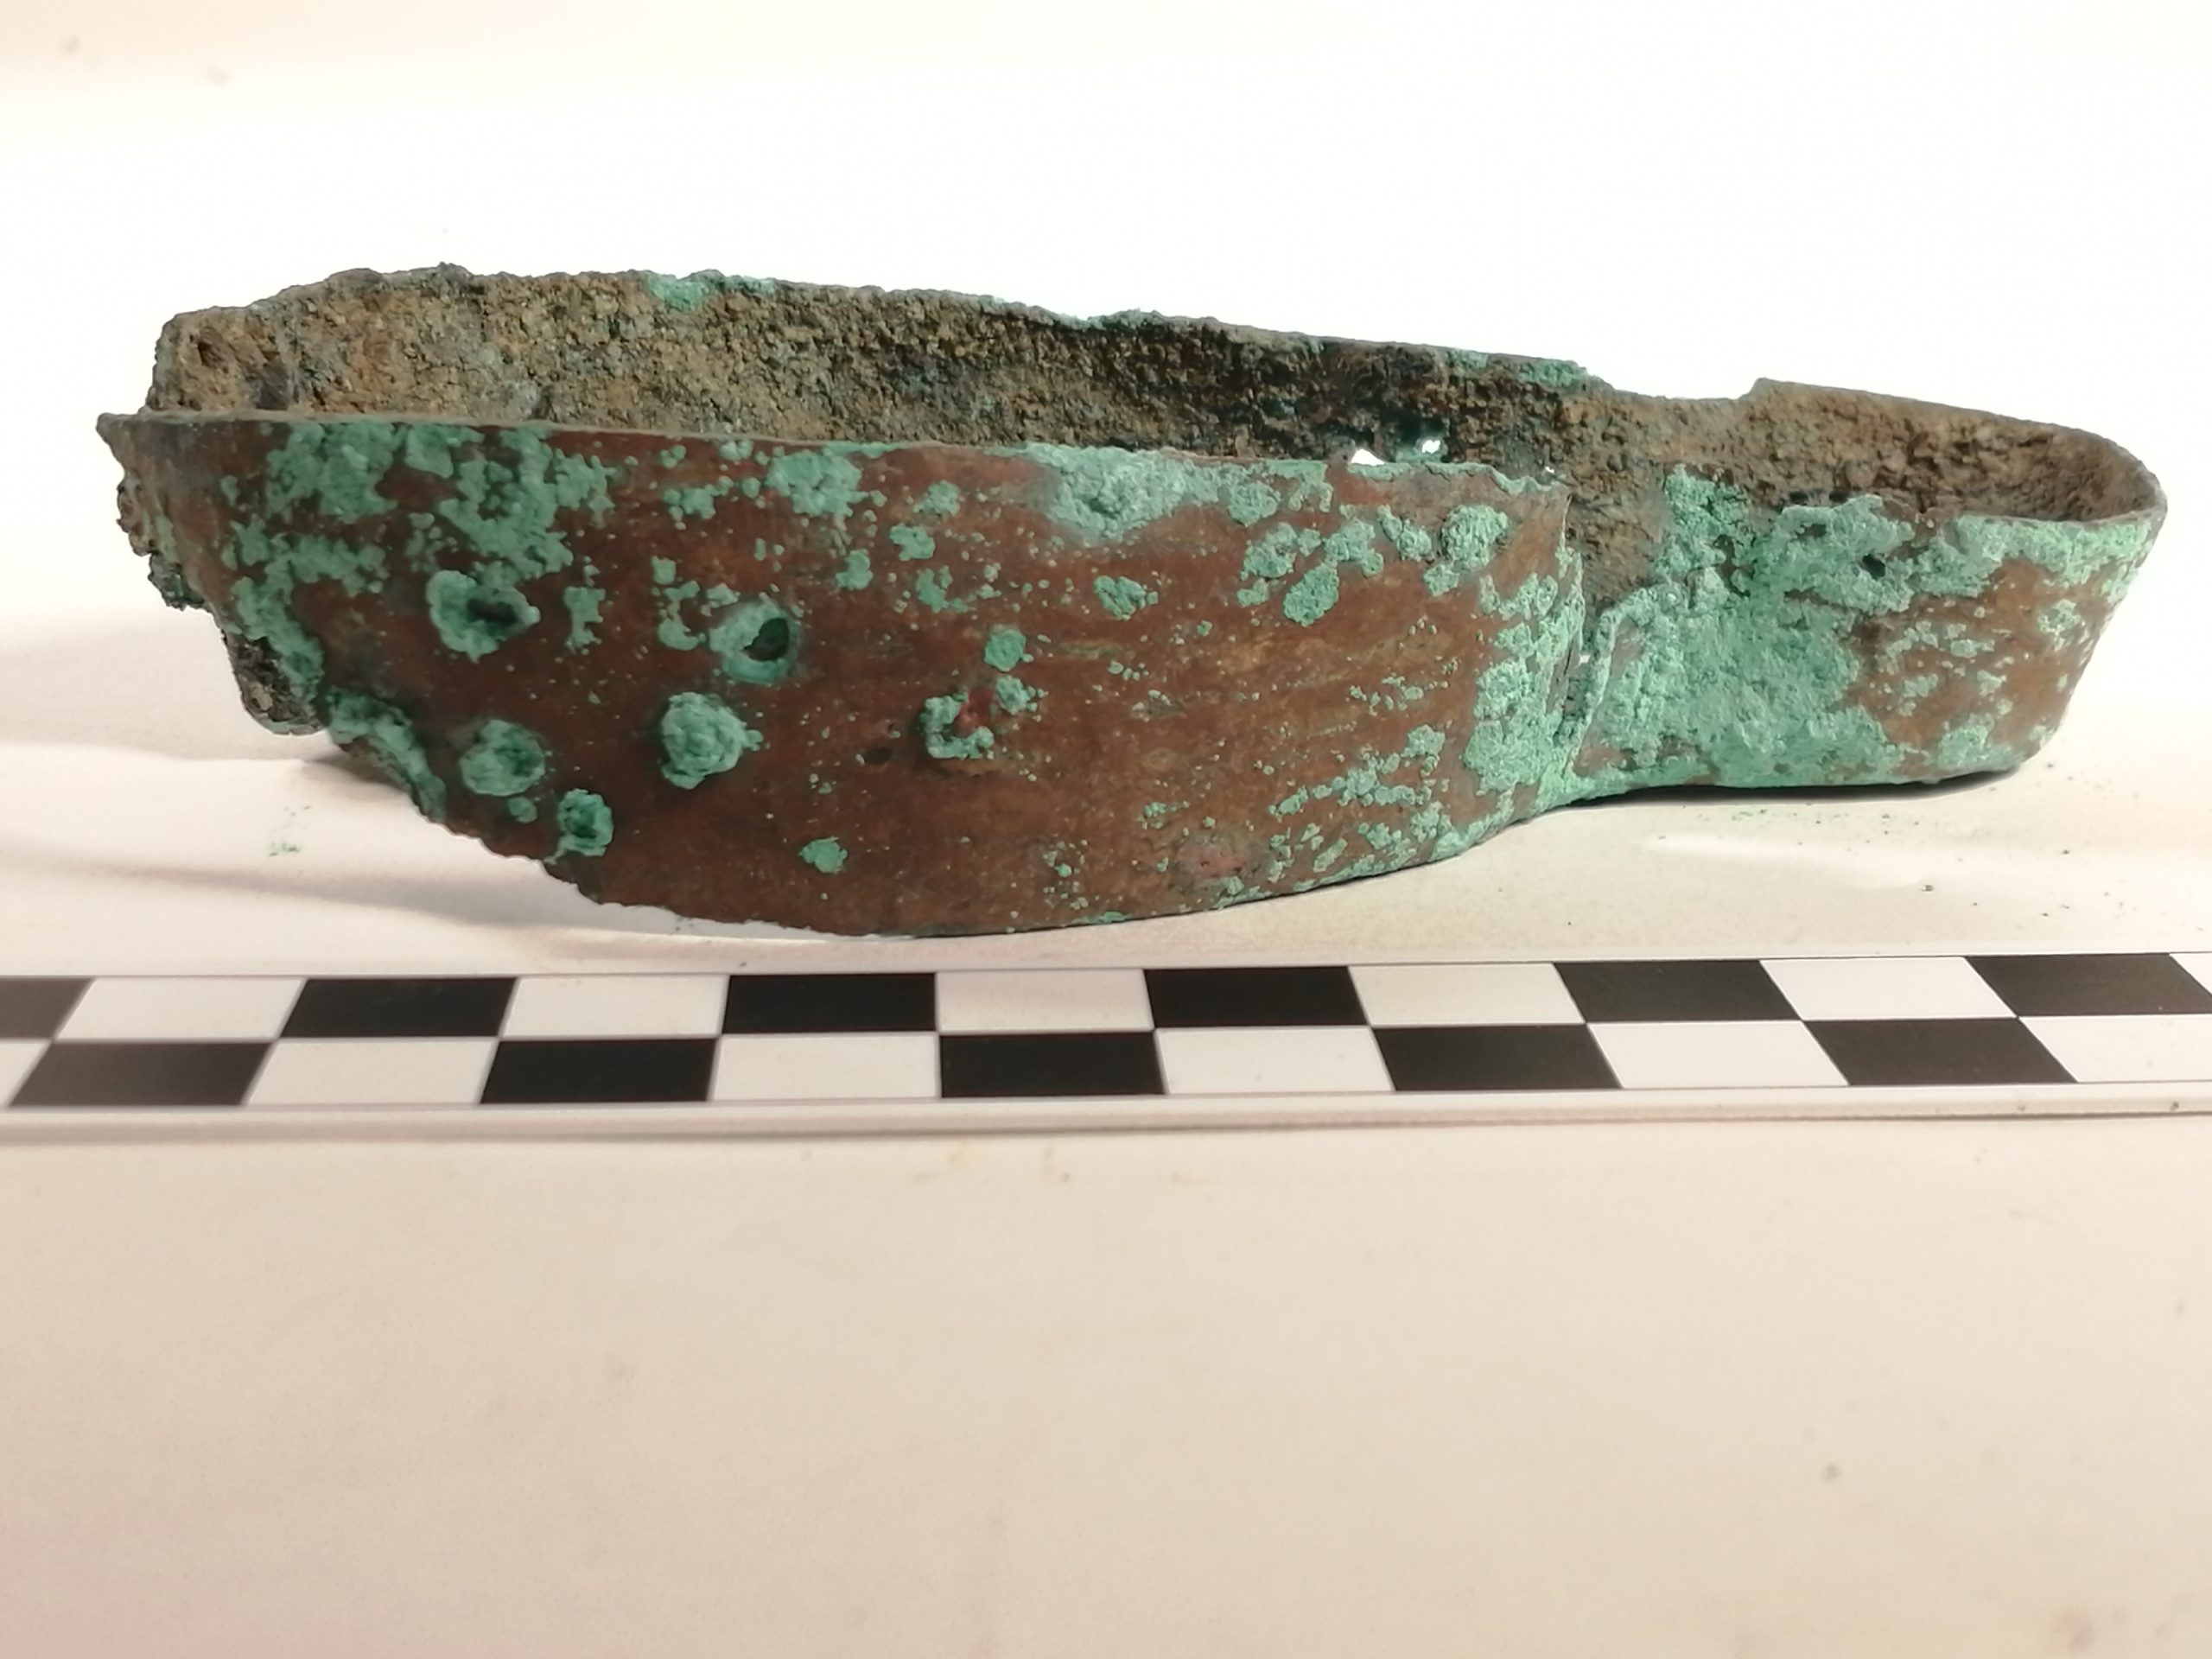
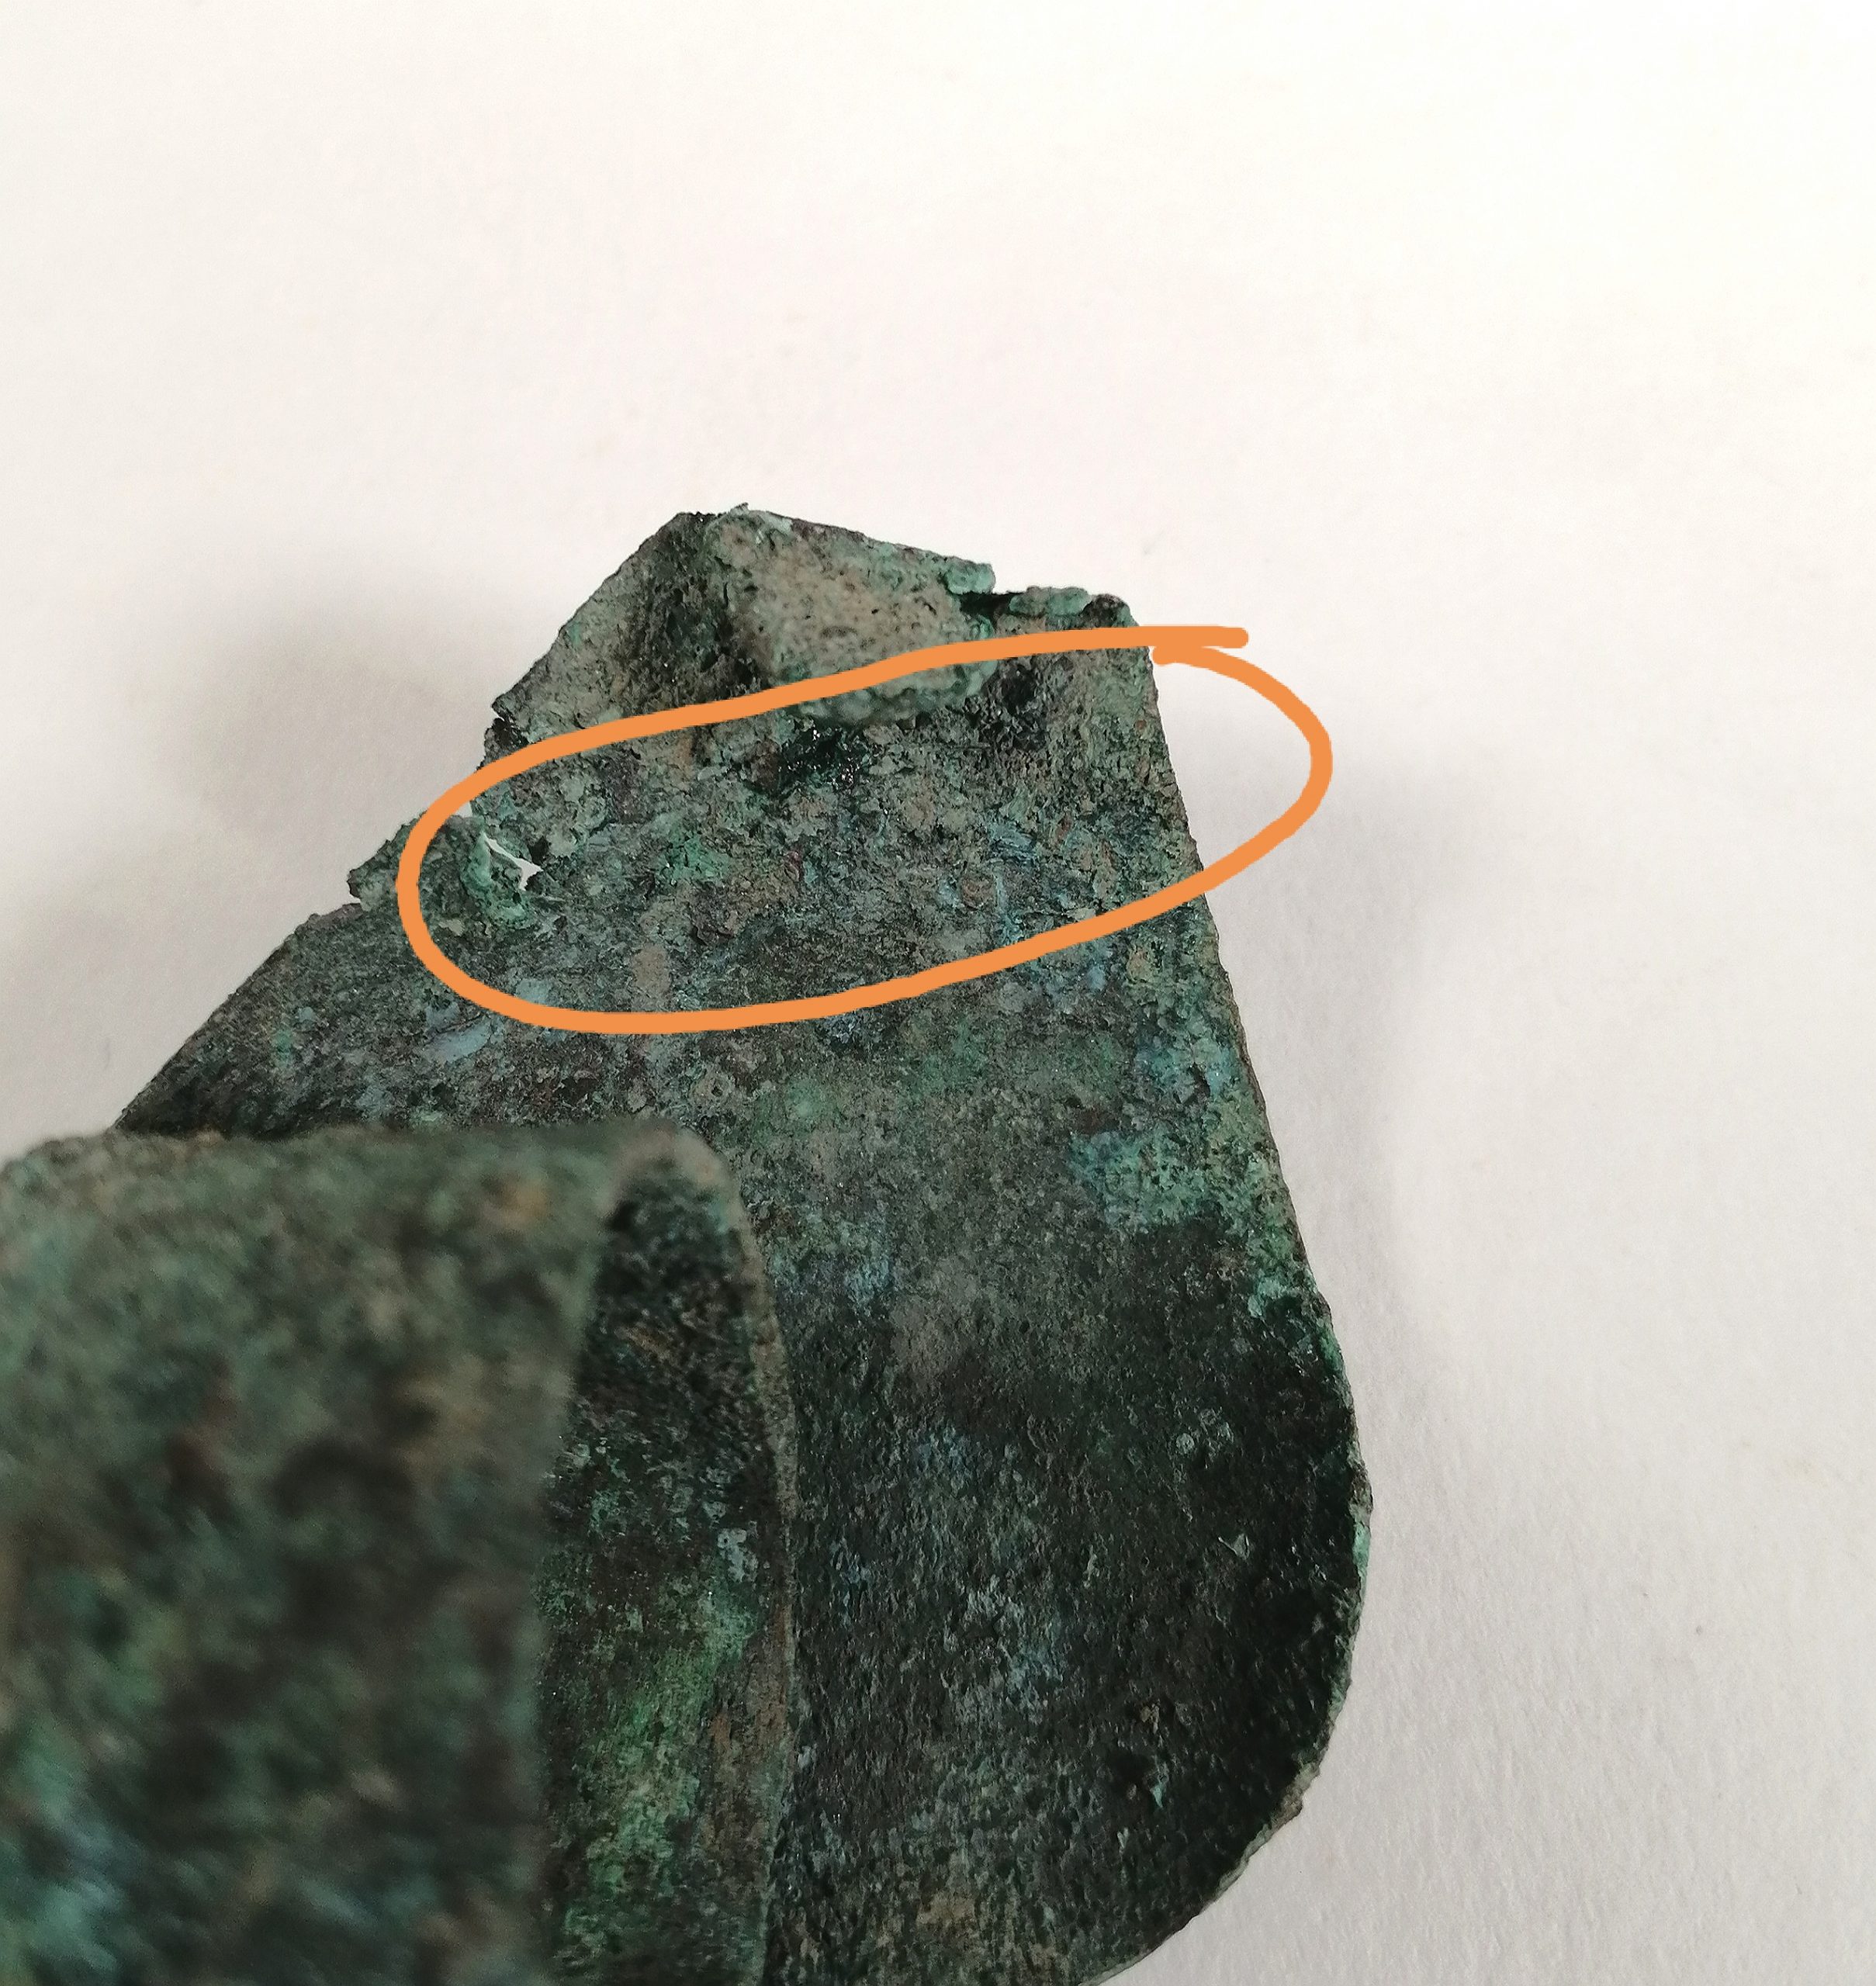
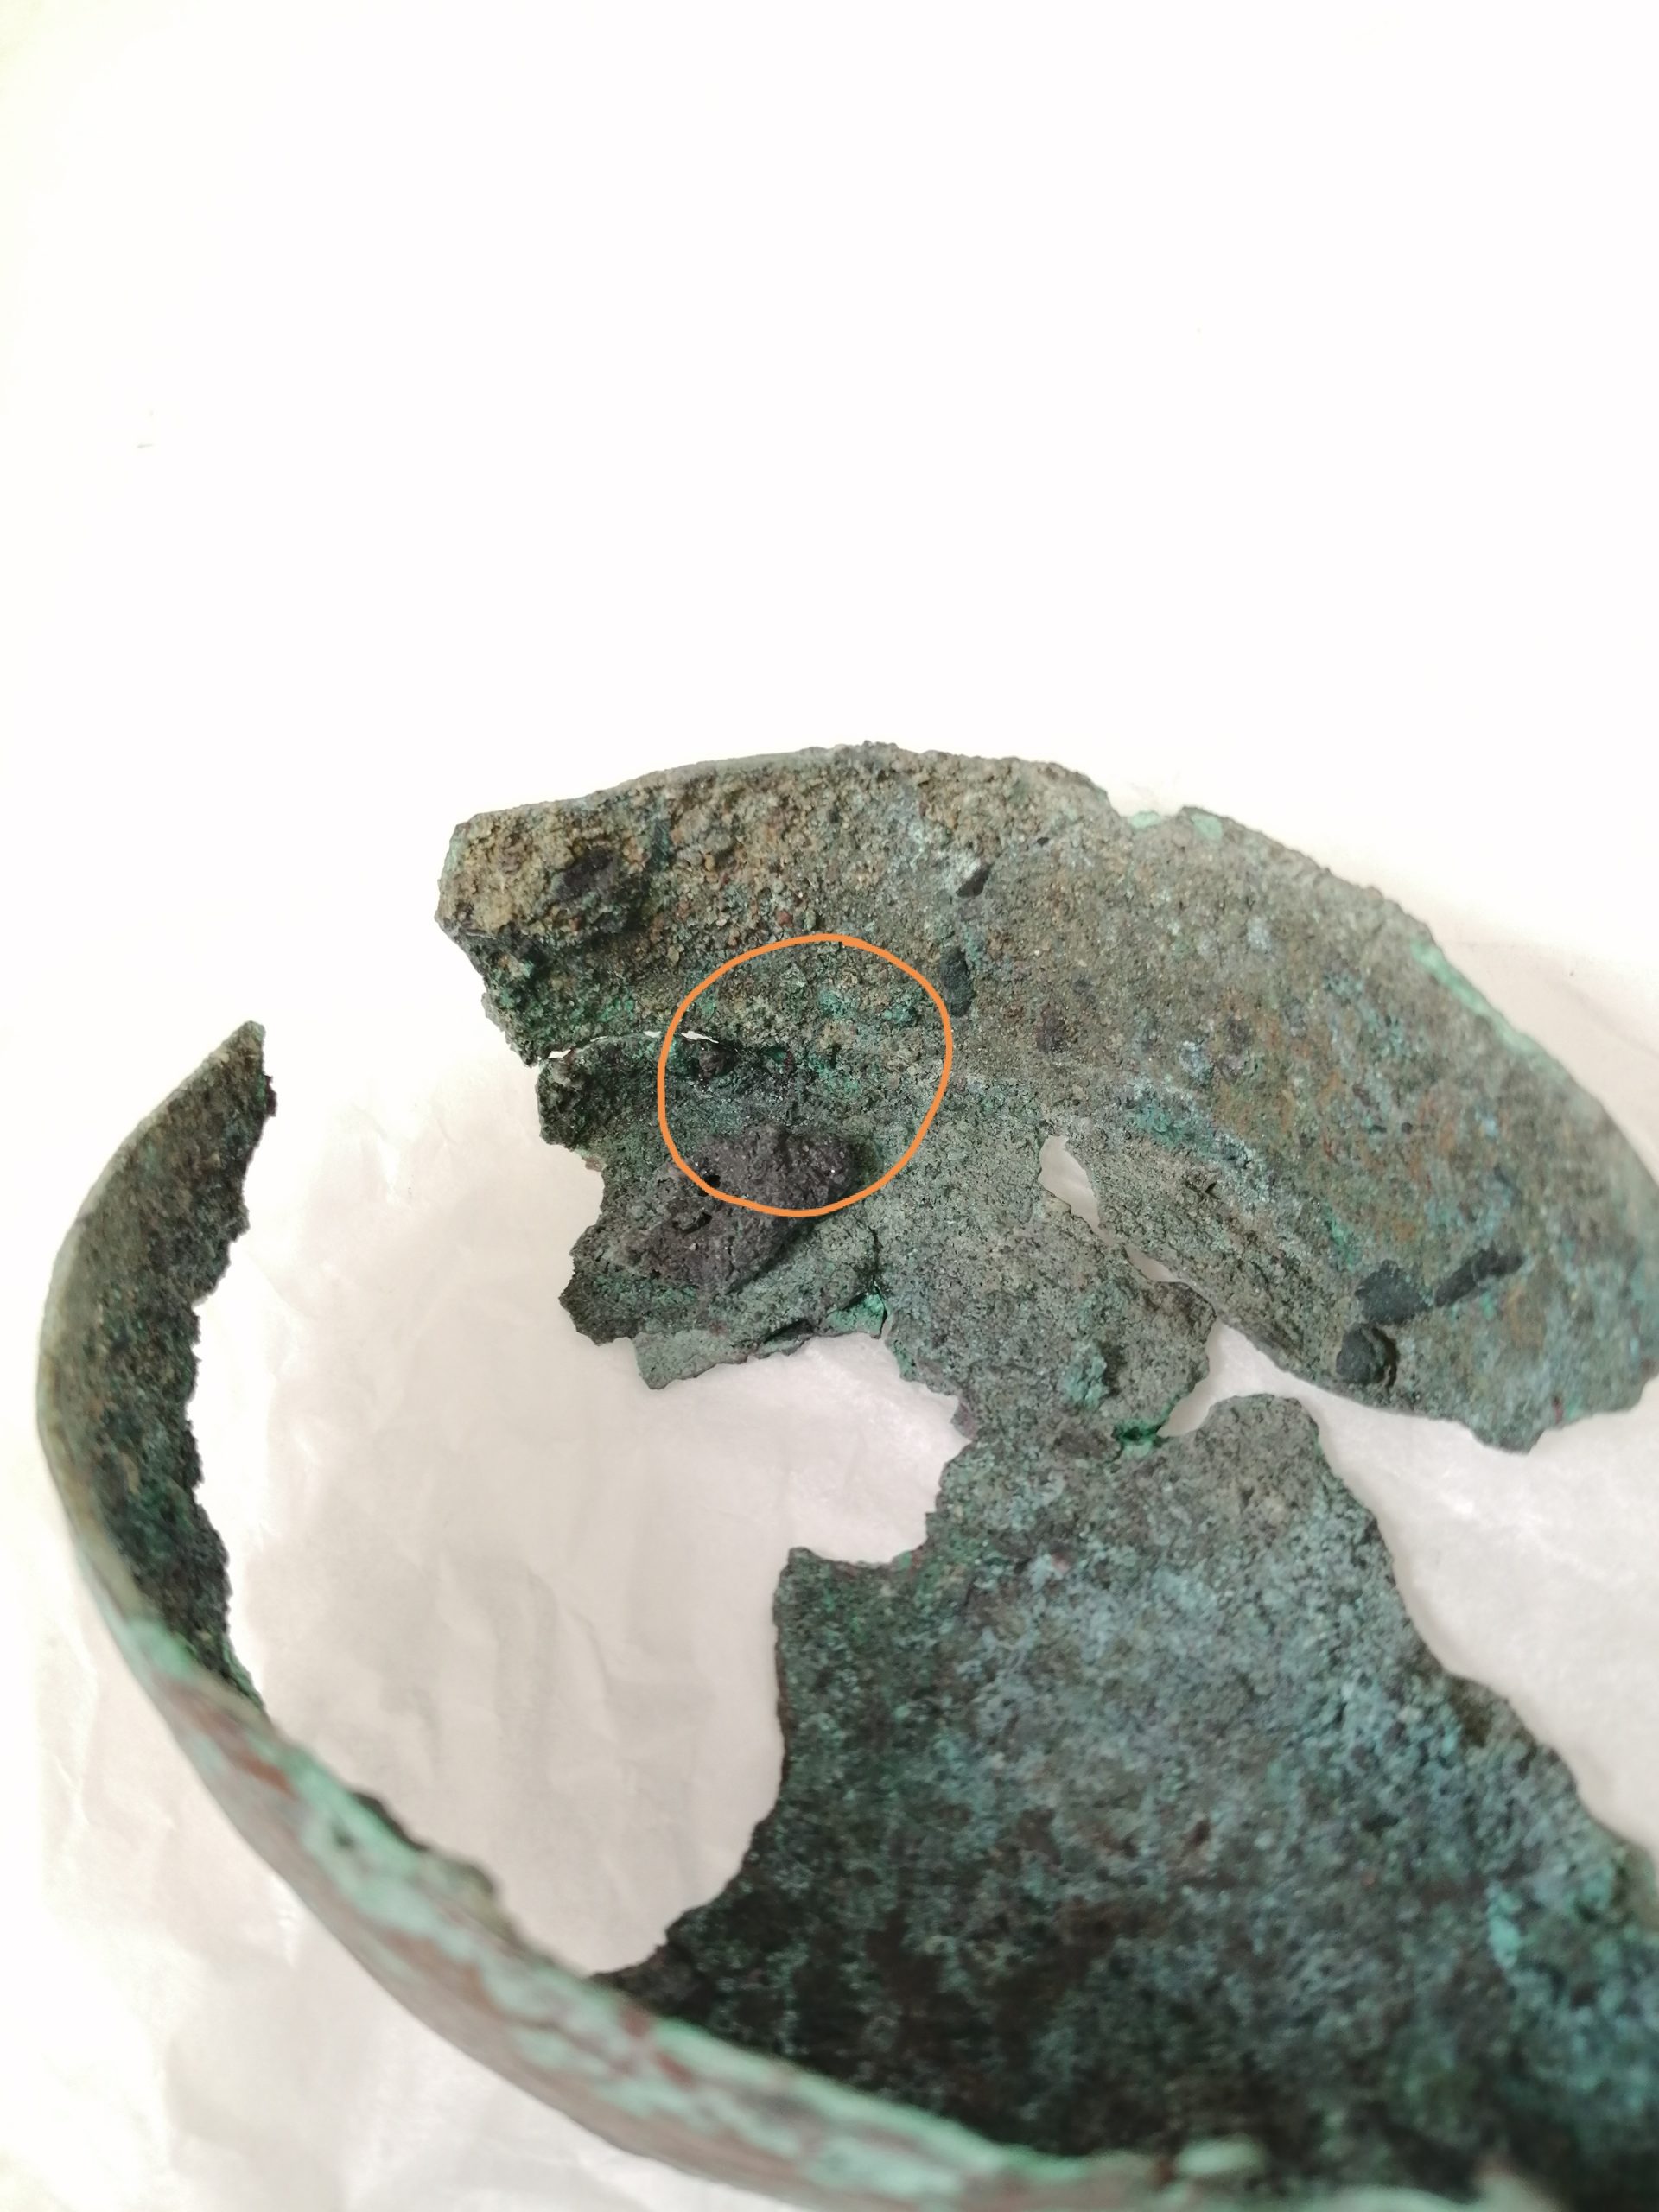
Next for the condition – The lamp had been in a monitored storage environment at West Dean for several years, and it is possible that the low RH (<30%) may have arrested some corrosion which looked like bronze disease. Bronze disease is active corrosion caused by a chemical reaction which forms hydrochloric acid. It affects copper alloys, and is self-perpetuating, progressive, and if not arrested it could reduce your object to dust! The signs of bronze disease are bright green powdery spots appearing on the surface of the metal, although this may have begun under the surface. Unfortunately I could not analyse the corrosion, but after discussion with my tutor I took the precaution of treating the lamp for bronze disease.
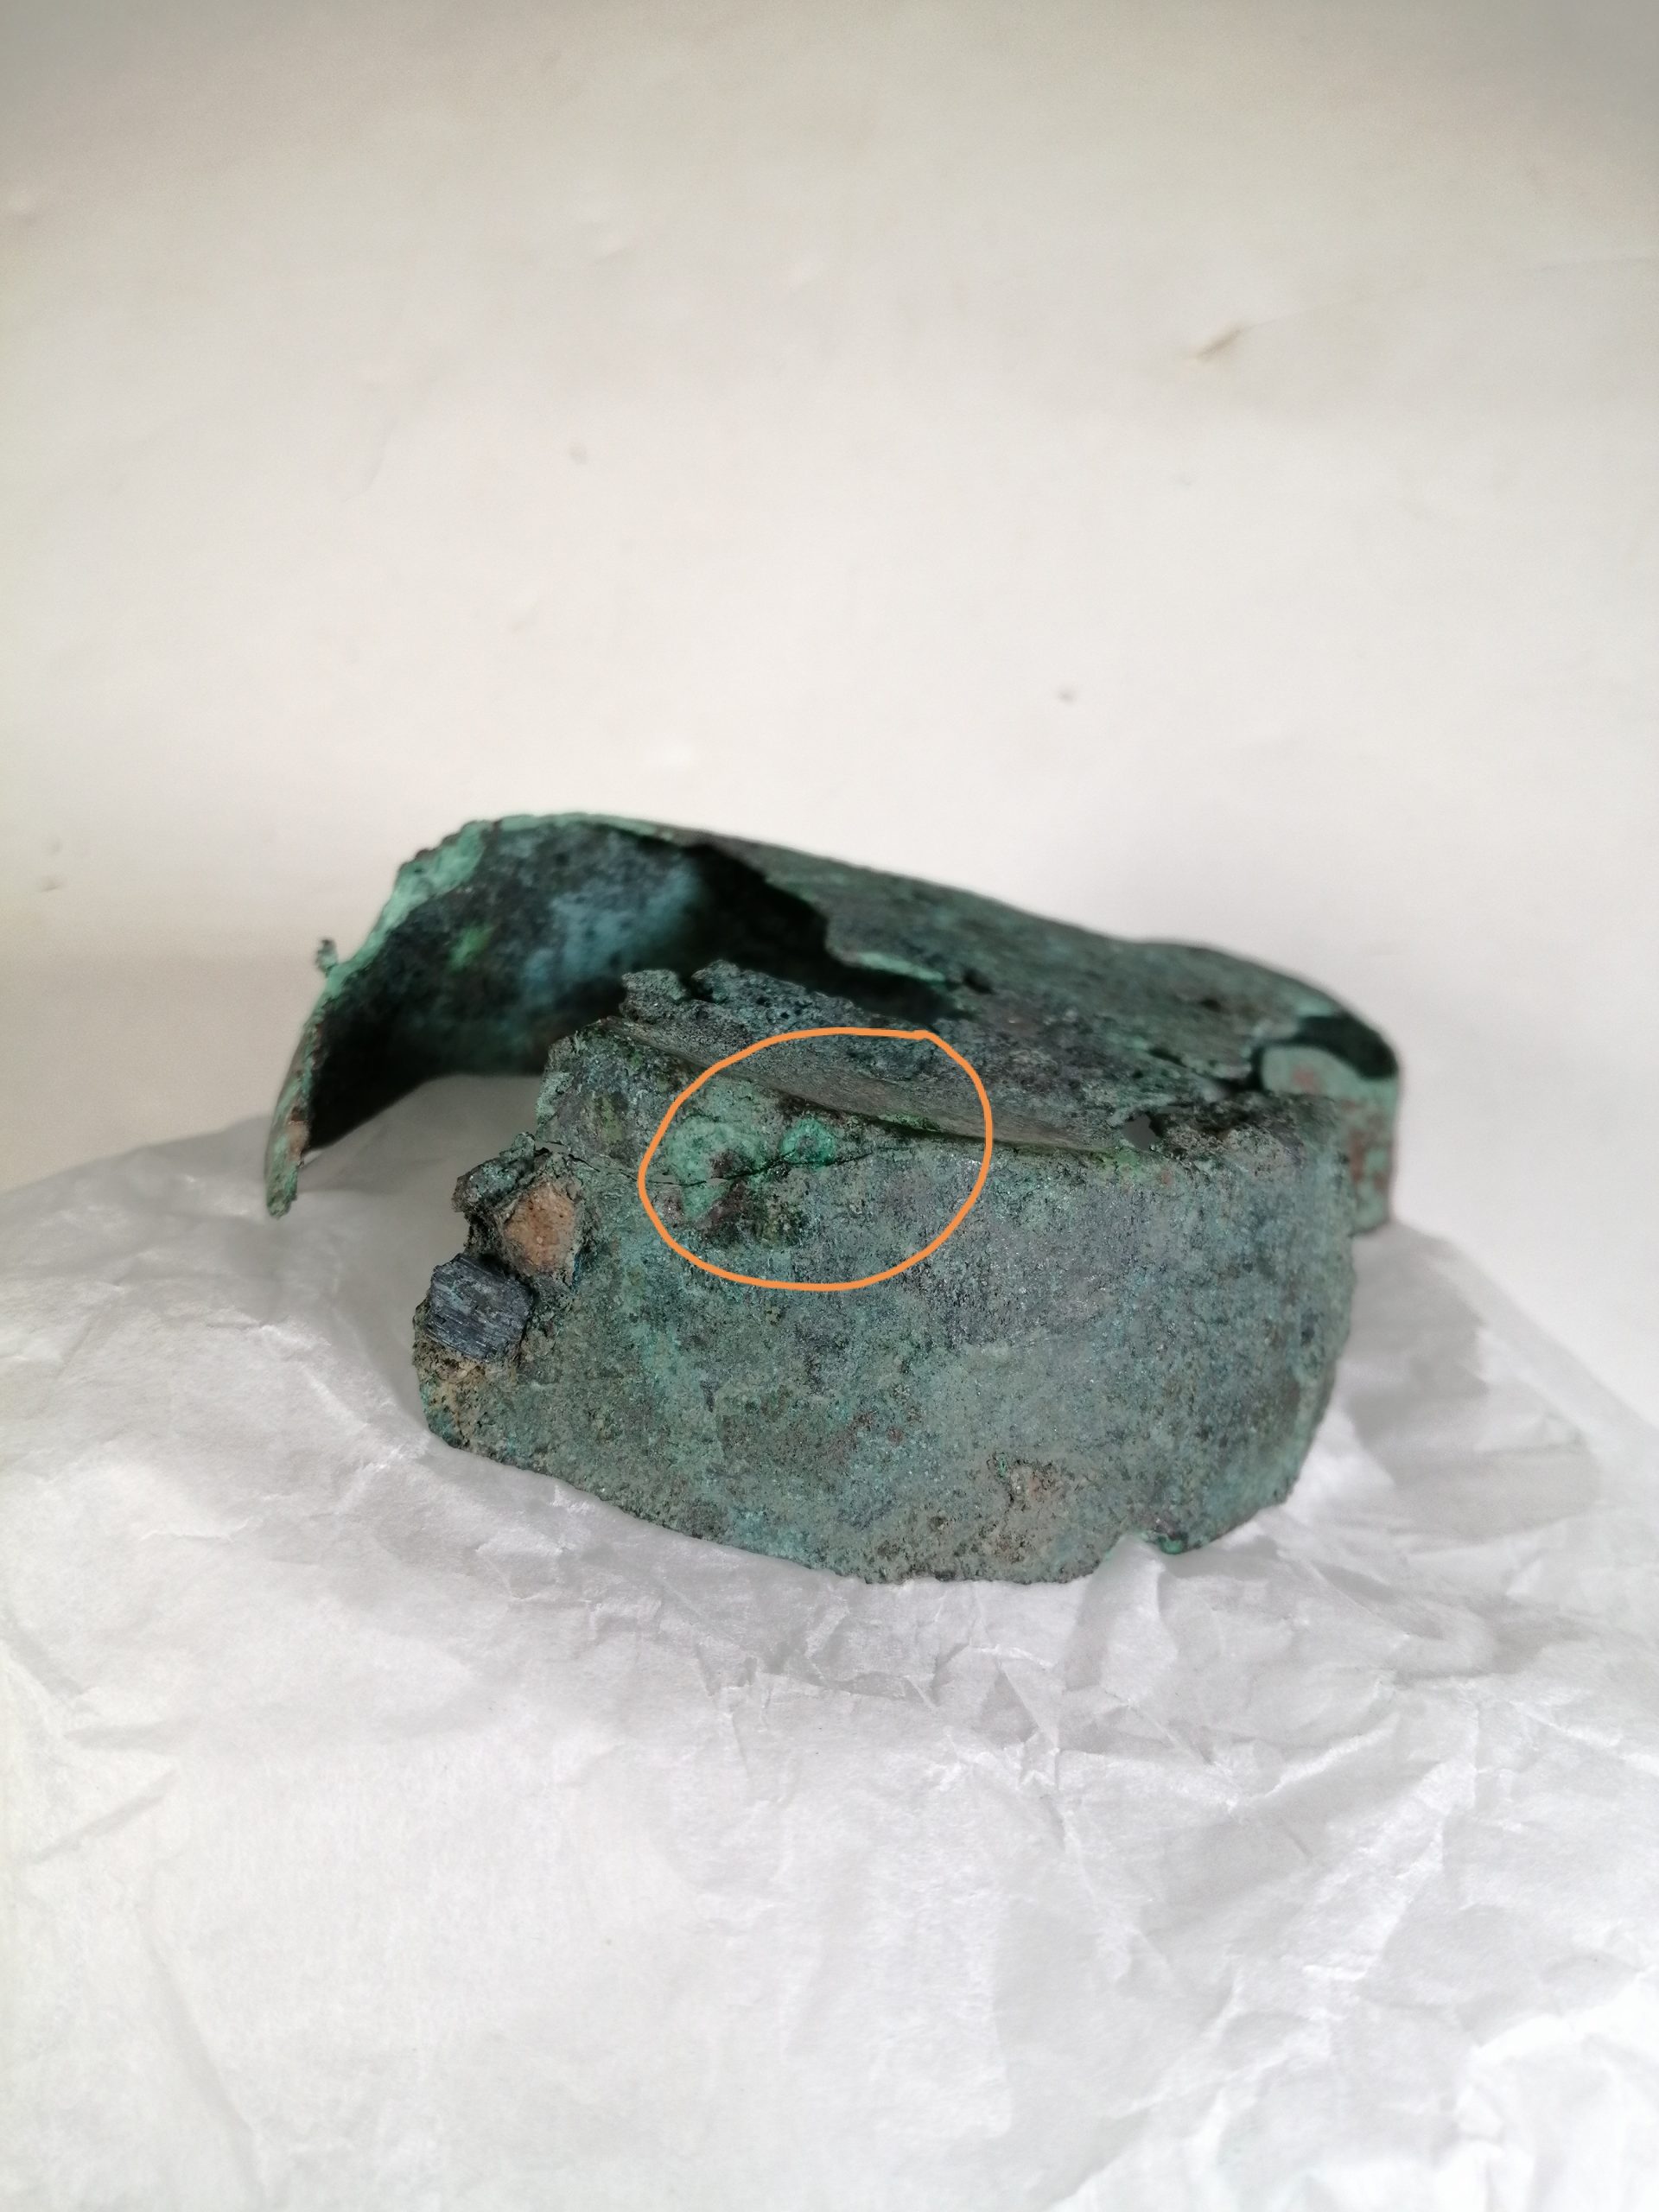
Possible bronze disease, wooden fragment and cleaning

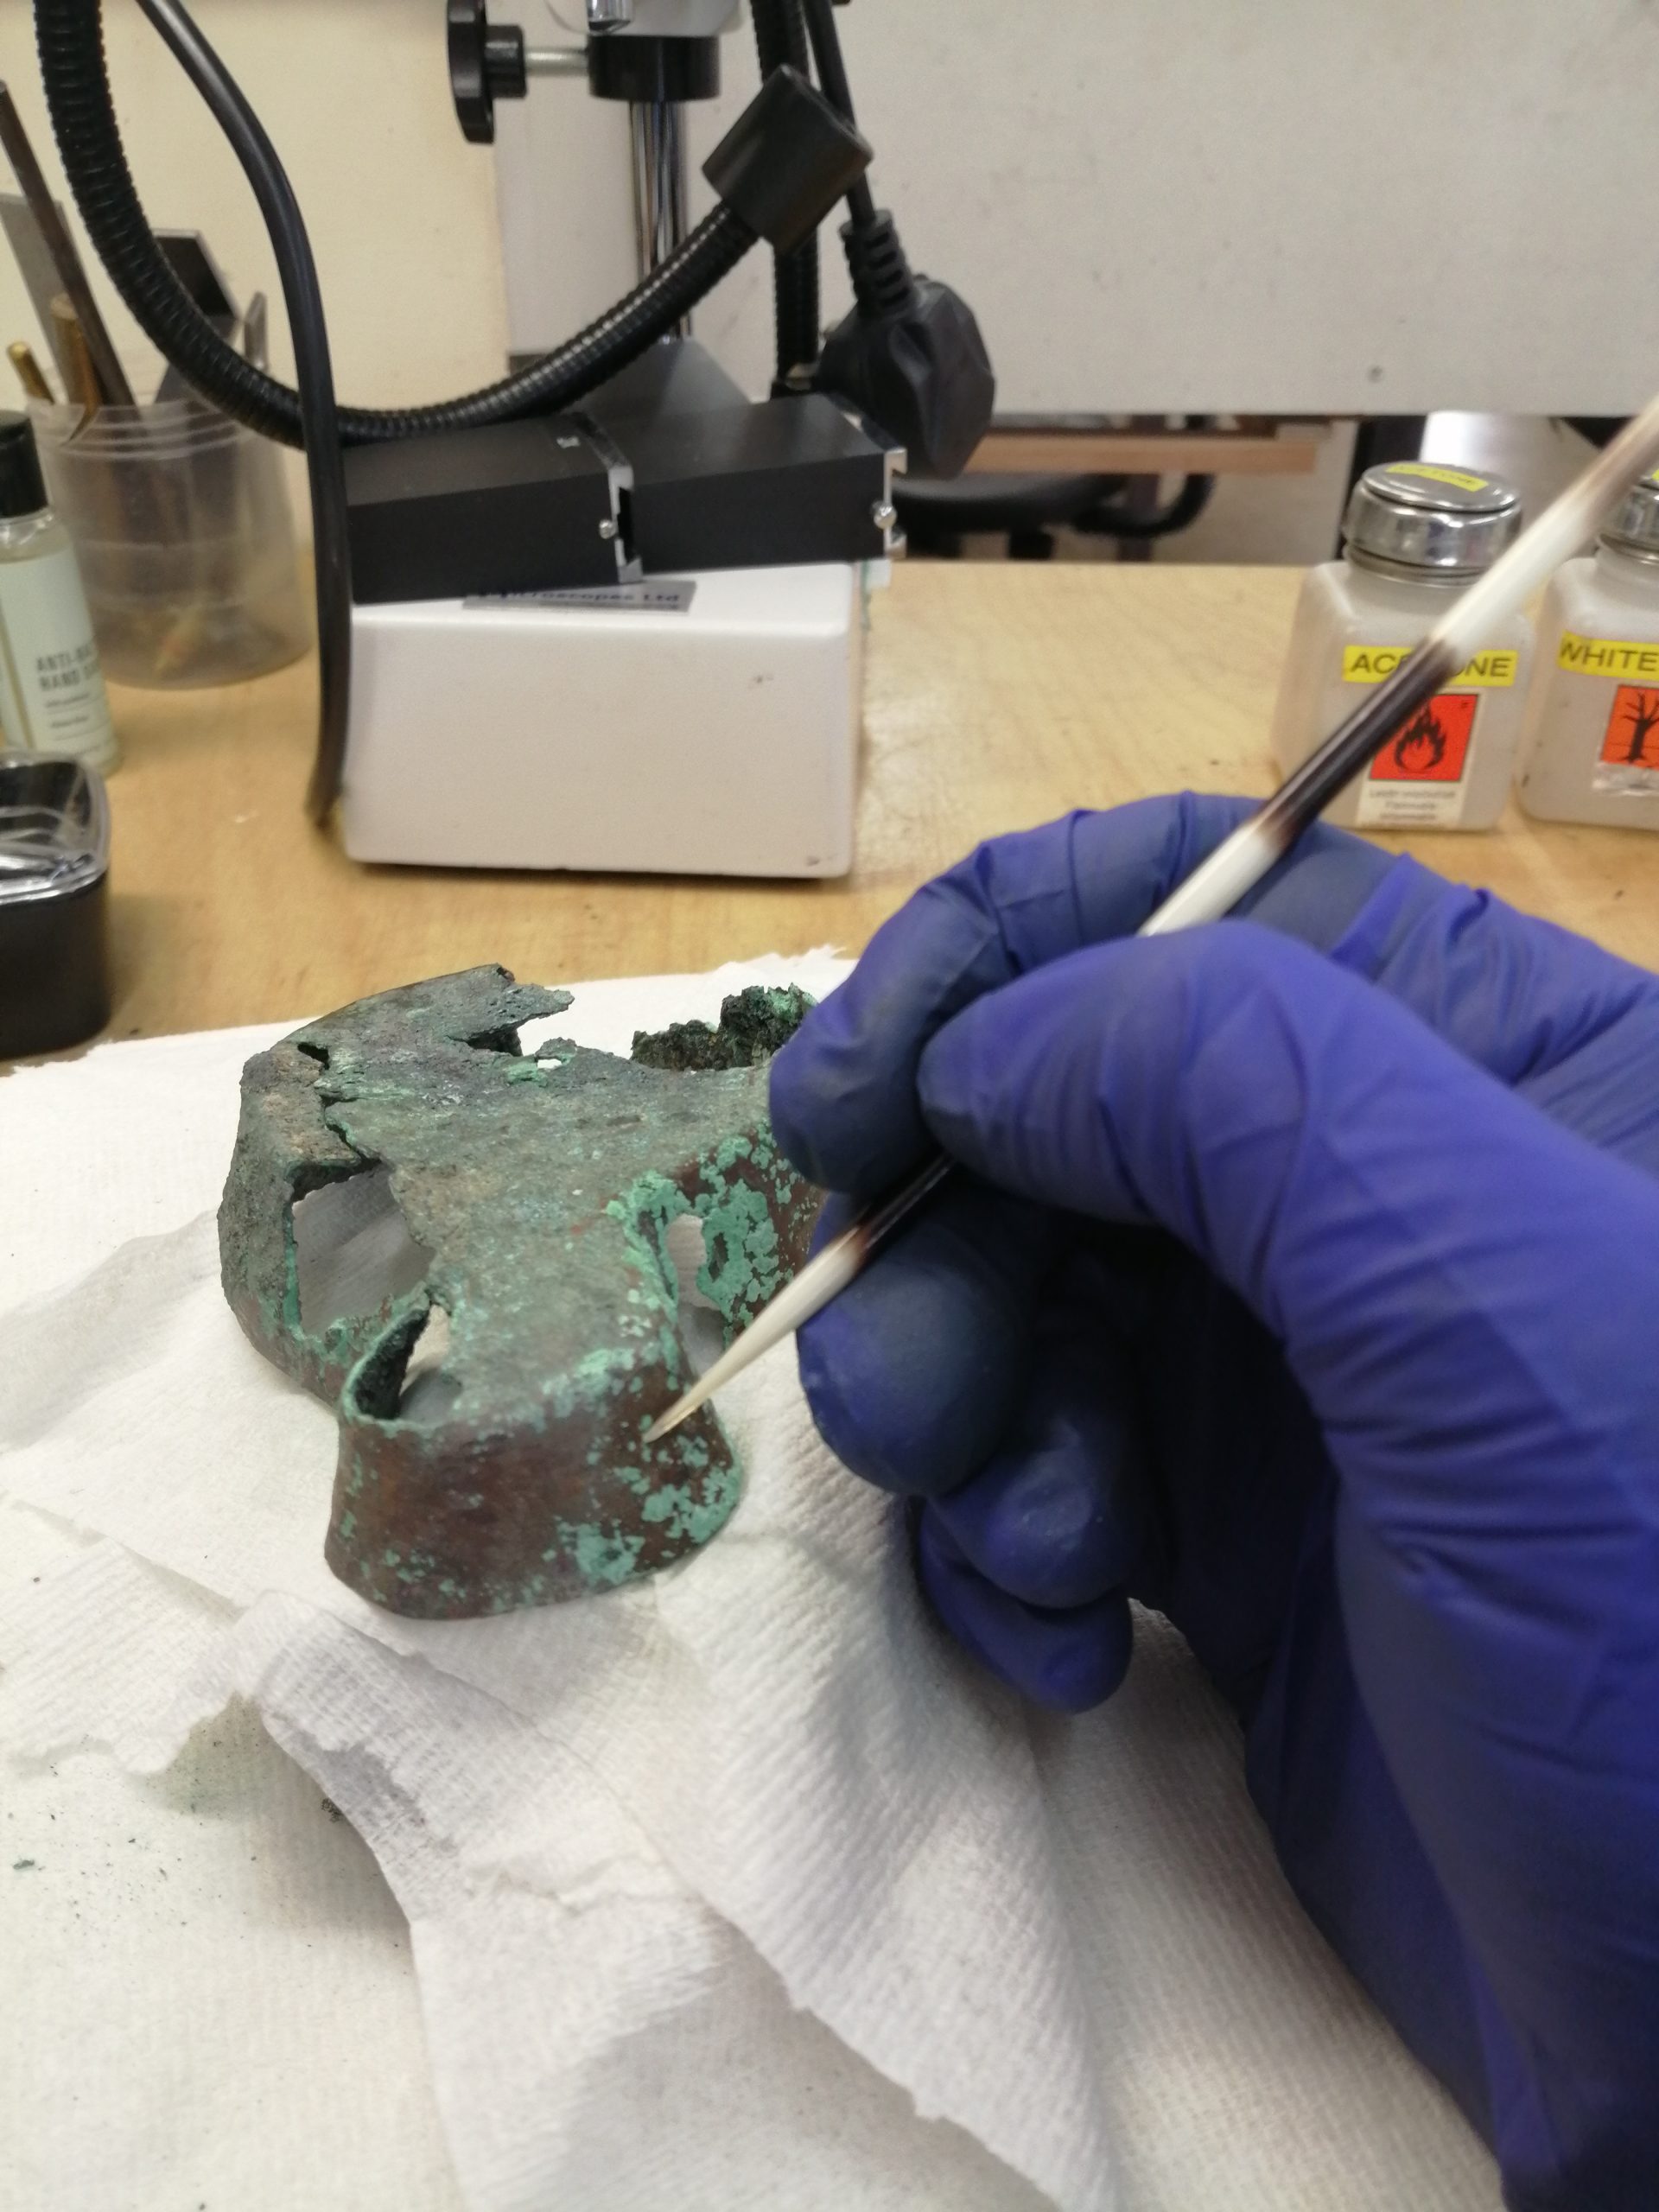
I began by removing the soil residues which were still attached to the lamp. Although it may have been helping to hold the fragile parts together, it was judged to be detrimental to the long term stability of the object and was concealing its shape and surface. After careful examination of the X-rays, I judged that the object would not disintegrate further after cleaning if handled correctly.
I removed the loose soil residues using a scalpel and bristle brush, taking care not to remove excessively in case of damaging the object, and further removal was achieved with a brush and IMS (industrial methylated spirits). I noticed that dry mechanical cleaning caused the green powder corrosion to spread over the surface, so to remove as much of this as possible I flushed the object with IMS using a syringe. There were 2 wooden fragments and a small amount of soil which were strongly attached to the surface and had been incorporated into the corrosion product. I decided to leave these in place as they appeared stable, and I did not want to risk damaging the object. Also, visually these elements are part of the story of the object, and in this case they give the viewer a suggestion of its ‘found condition’.
Once the object had dried, it was treated for the suspected bronze disease. As mentioned, in discussion with my tutor it was decided that treatment would not harm the object, and it was preferable to err on the safe side due to the possibility of further corrosion causing more damage to an already fragile object.
The lamp was immersed in a 2% w/v BTA/IMS solution for 1 hour then thoroughly rinsed with IMS to remove residues. BTA (benzotriazole) is a corrosion inhibitor used for copper and its’ alloys, which when applied, prevents further reactions and creates a passivating layer on the metal. The object was then left for 3 days to check whether the bronze disease reaction would recur, and there was no recurrence of the reaction.
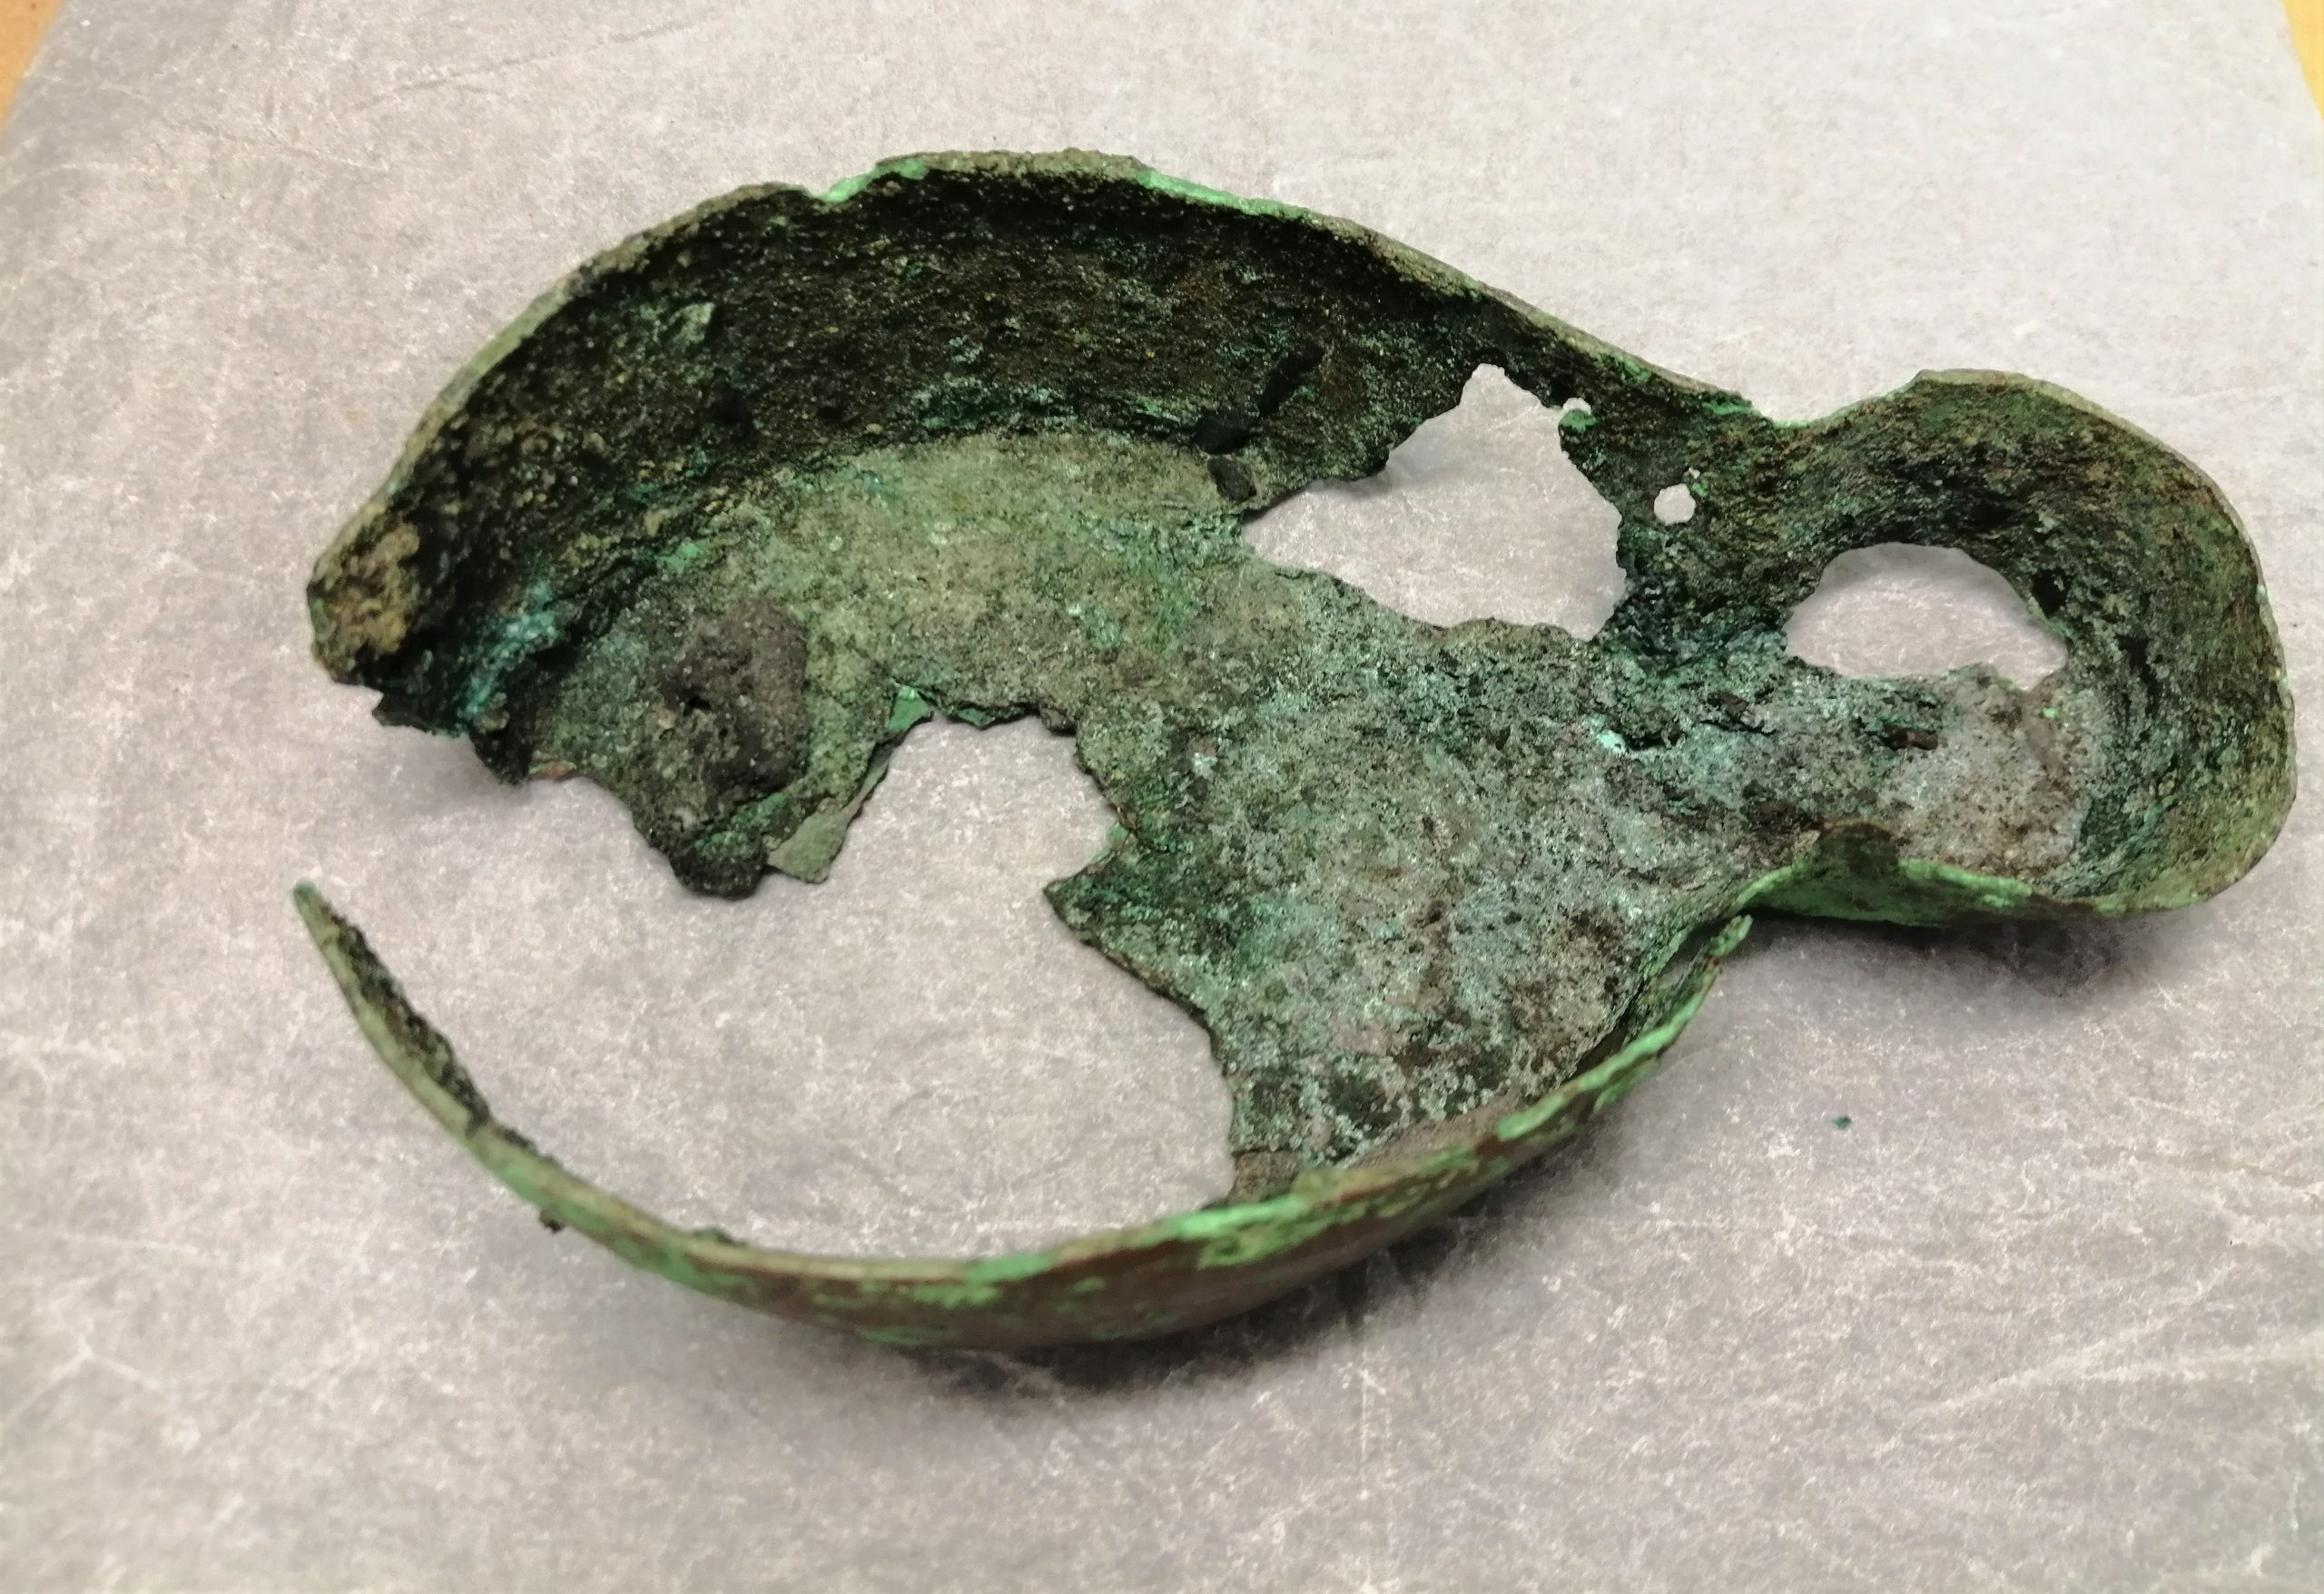
Consolidation and coating
Now it was time to treat the cracks in the body of the lamp which compromised its’ structural integrity, and the unstable edges. The consolidant should not be visible, and it was decided that a 10% solution of Paraloid B72 in acetone would be used. Paraloid is a clear acrylic resin used by conservators to glue, coat and consolidate, and can be thinned down to the desired consistency for the appropriate use.
Consolidation points


Before consolidation, the object was desiccated to remove any remaining moisture, and referring to the research conducted by Thunberg et al. Desiccated microclimates for heritage materials. the lamp was placed in a 1 litre airtight plastic container with 100g of silica gel, and a humidity indicator card. It was stored for 3 days and reduced to 20% Rh. The consolidant was then applied to the cracks using a fine brush, and any excess was gently swabbed away using acetone.
The object was now a little more stable, and after further consideration I decided that there should be some strategically placed infills for the following reasons:
- Infills would make it more resilient in the long term.
- Some losses had created gaps and could not be consolidated using Paraloid, but if not strengthened these gaps would inhibit handling.
- There was no information to suggest how the object would be stored, if it would be handled, and how it would be used in future, so discreet and fully documented infills would enable careful handling.
- The X-ray showed hidden fractures. Stress through handling could cause these fractures to break further, however infills could help to reduce this possibility.
- A full regeneration was not desirable, as this would be ‘restoration’ rather than conservation, could be misleading and would suggest that the object was more complete that it was.
- The small infills suggested would still retain the ‘found condition’ of the object, and represent a more authentic story to the viewer.
Before these steps could be carried out, the object needed a protective coating, so tests were carried out on patinated bronze tokens. The initial tests were done using 2 x coats of 8% Paraloid B44 in Frigilene ReducerTM (xylene and butyl acetate). The results were slightly glossy which was not acceptable, so I added fumed silica as a matting agent which worked perfectly and achieved the desired result – the protective coating was not visible and it looked the same as before the application.
Infill treatment
This is the part I enjoyed the most! During my career as a theatrical prop maker my job was to trick the audience into believing that objects or scenery were aged, or made of marble, stone or wood, or to achieve any kind of effect. I made everything from ‘rusty’ signs to fake food! However, applying conservation ethics to this object, the aim is not to ‘trick’ the viewer, or to completely hide the additions. Any infill should be documented, visible to an experienced heritage professional, and exist for the reasons detailed above, or to suggest how the item may originally have looked.
Infill process


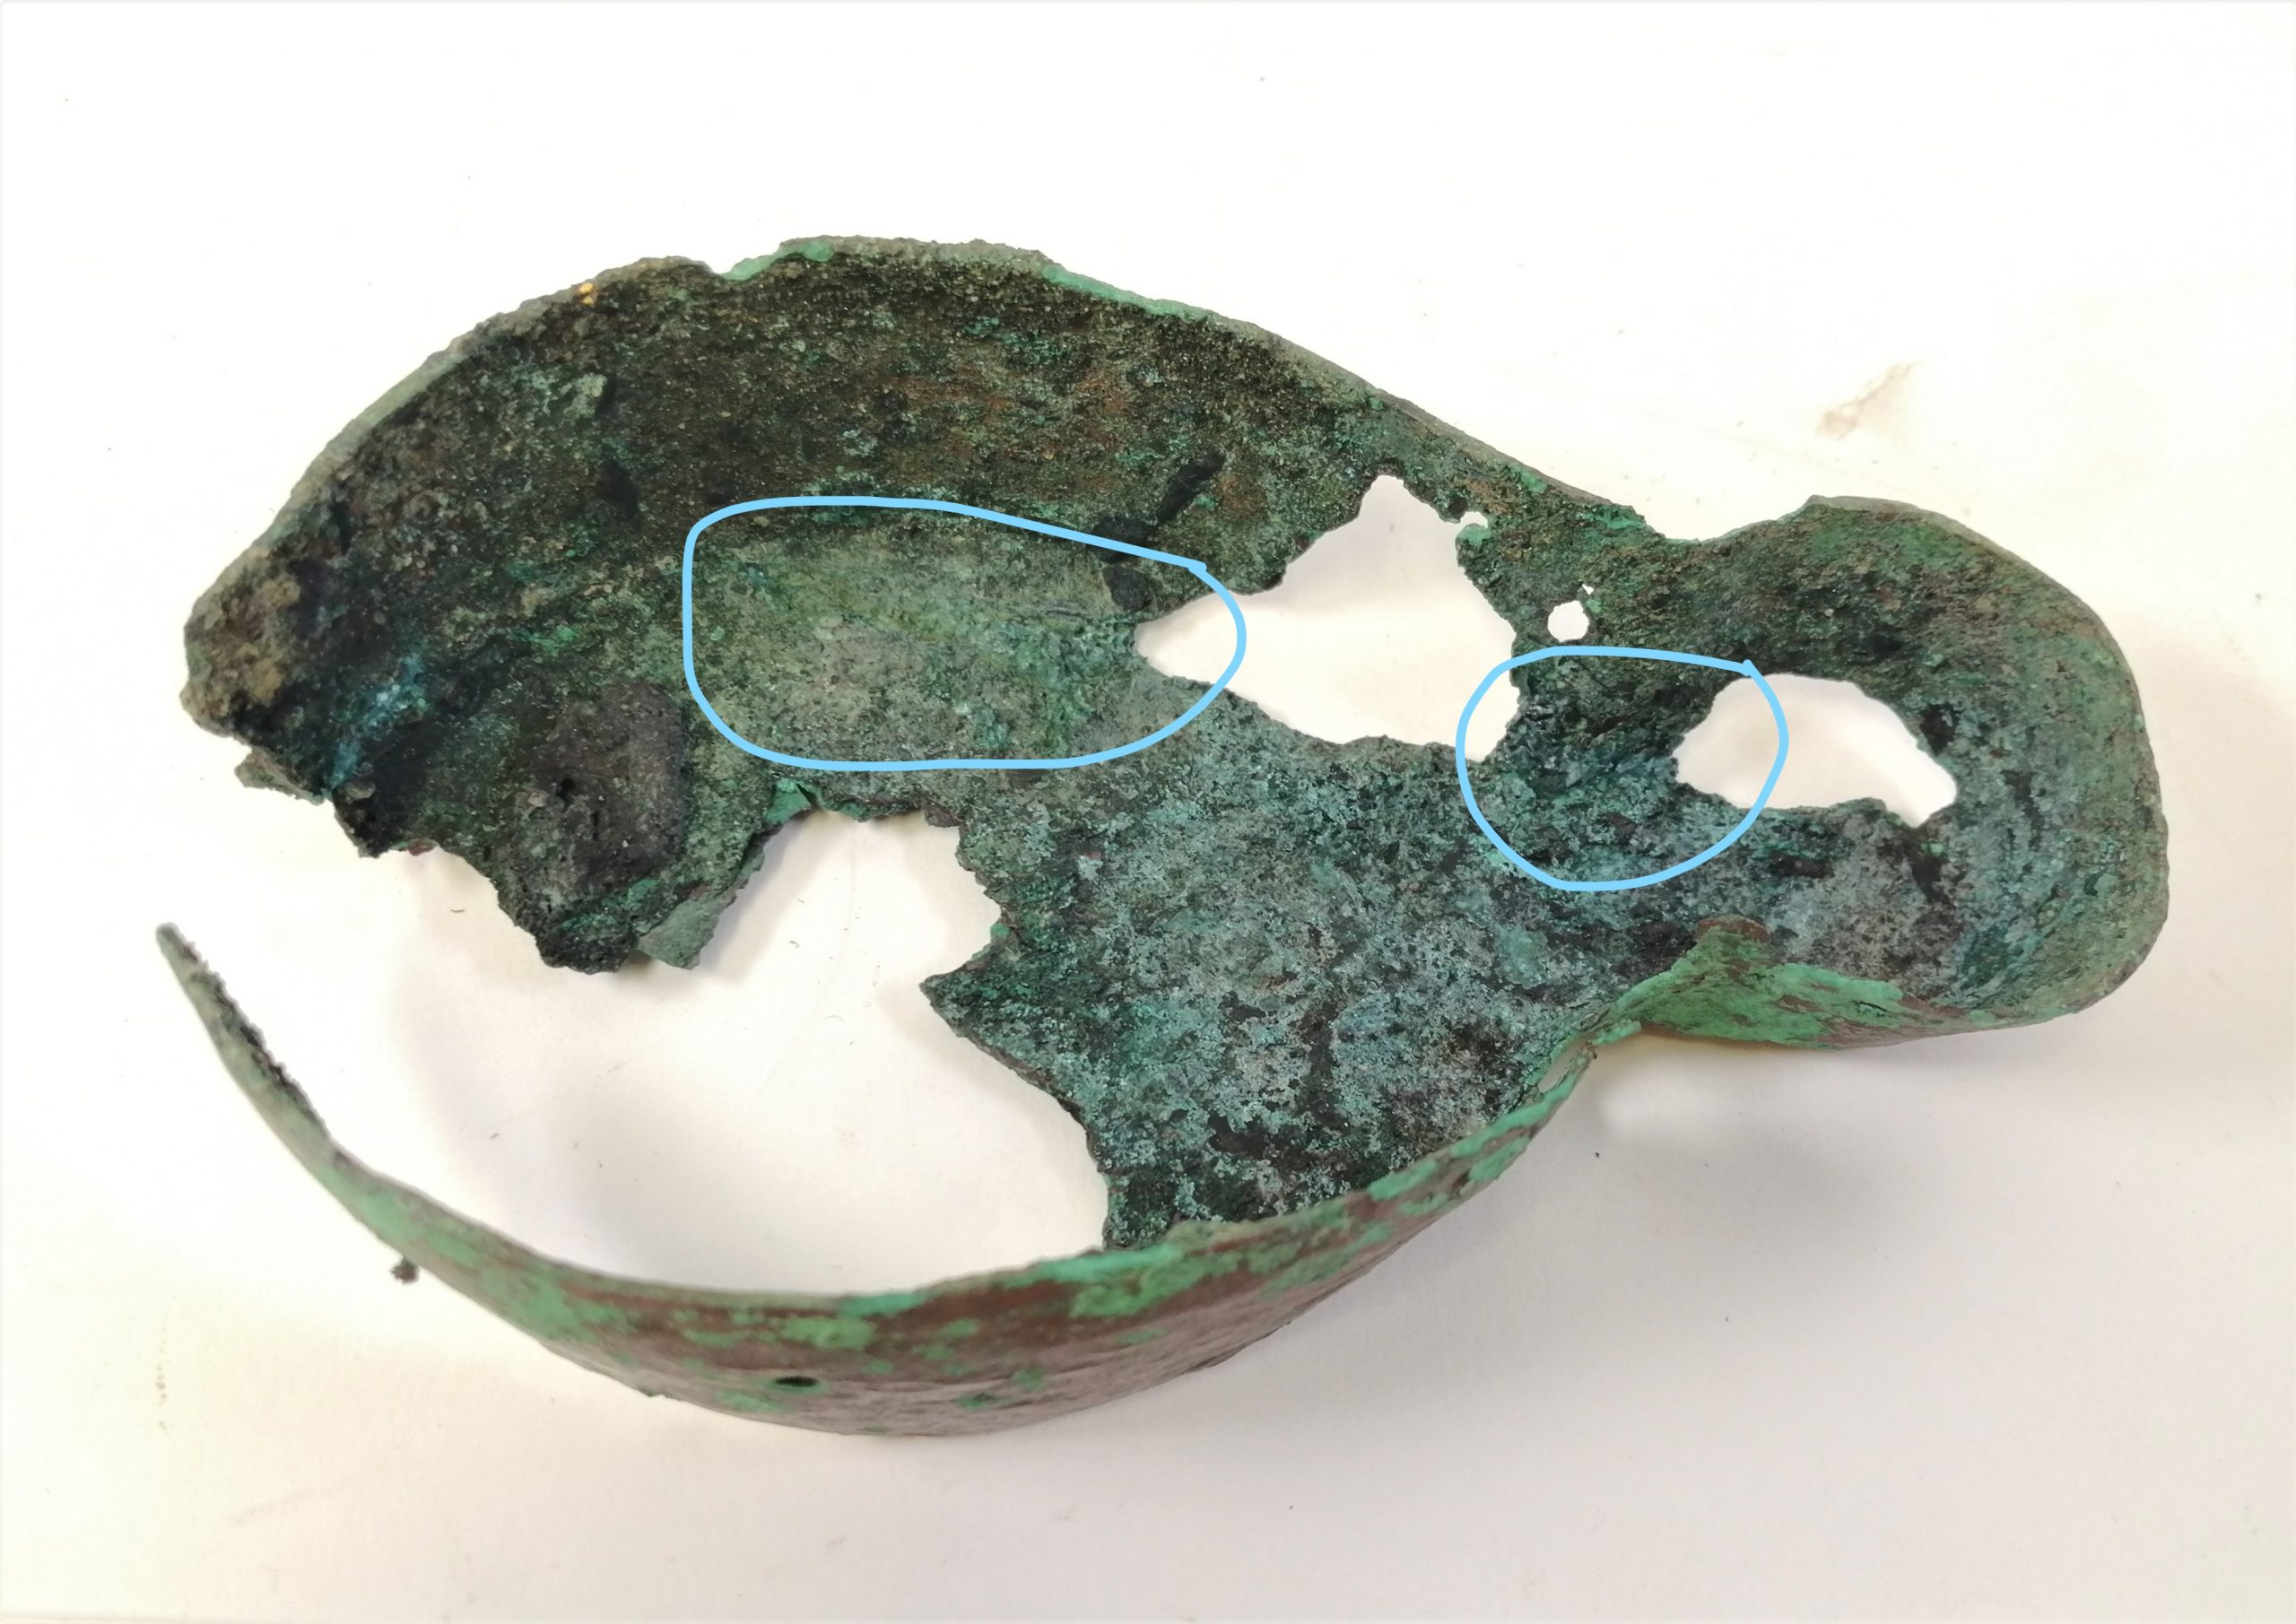
After deciding that there should be infills in 3 places, I used 2 layers of Japanese tissue paper torn to shape (to make feathered edges) and laid over the holes, on the outside of the object. The outside was decided upon as it is less visible if the object is displayed. A solution of 20% Paraloid B48 in acetone was applied on the paper and around the edges to smooth and adhere it onto the surface. I waited for the solution to cure and applied another thin layer to make sure it had fully adhered.
I then used a combination of 20% Paraloid B48 in acetone with glass powder balloons to make a paste, mixed with Windsor and Newton pigments to give a base colour similar to that of the object.
Once the tissue paper had cured, the paste was added to fill the gaps using dental tools. I used the tools to imitate the surface texture of the object while the paste was soft, and when it had hardened, I used a pin vice to enhance it.
When adding the colour, my instinct was to copy the surrounding area exactly, however as mentioned above, I needed to make it just discernible enough to a conservator, that this was an infill. Dry pigments were mixed sparingly with a matt water based medium and built up in translucent layers on both sides of the infill until I was satisfied. I used Windsor green, yellow ochre, burnt umber and titanium white. When the infills were finished, the object was more structurally stable and was ready for me to create a storage box, which I will describe in a subsequent post.
Conclusion
This project allowed me to practice several processes which I had not previously experienced, including assessment and treatment of bronze disease and of an archaeological object. It also posed interesting thoughts regarding the extent of cleaning in places where there was no original material remaining. This was also the first time I had used fumed silica, which I found very effective as a matting agent in the coating. I was challenged by the idea of reversibility with regards to the coating though, as the corroded surface was pitted and textured, however I was assured that even so, this is a standard treatment. All in all, I enjoyed the challenge, and the research I undertook to complete this assignment.
Roman lamp Condition and Treatment report. Shown with full permission of the owner.
Bibliography
Lang J, Middleton A. Radiography of Cultural Material. Pub: Taylor & Francis, Ltd. 2006
Selwyn, L. Metals and Corrosion: A Handbook for the Professional. Pub: Canadian Conservation Institute, Ottawa, 2004
Cronyn, J.M. The Elements of Archaeological Conservation. Pub: Routledge, London. 1990.
Scott, D.A. Copper and Bronze in Art: Corrosion, Colorants, Conservation. Pub: Getty Publications. Los Angeles, 2002
Read the online blog post about bronze disease and treatment by Aliza Taft from Cardiff University (2017)
http://www.getty.edu/publications/artistryinbronze/conservation-and-analysis/35-casaletto/ Artistry in Bronze, Maria Pia Casaletto. Excellent paper discussing research conducted on a variety of treatments for copper alloys.